Discover the art of Makeup Brush Cleaning: A Guide for Flawless Application & Healthy Skin. Dive into the secrets!
In the vibrant and ever-evolving world of beauty, makeup brushes are indispensable tools
for achieving that perfect look. From flawlessly blended foundation to precisely applied eyeshadow, these brushes are the unsung heroes of our makeup routines.

However, their constant contact with makeup products, skin oils, and environmental pollutants makes them breeding grounds for bacteria.
Cleaning your makeup brushes regularly is not just about maintaining their performance; it's also crucial for preventing skin problems and ensuring a hygienic beauty routine. So, let's dive into the best practices for keeping your brushes clean, fresh, and ready for action.
Dirty makeup brushes affect makeup application and skin health
Dirty makeup brushes are a silent menace. They accumulate layers of old makeup, skin cells, oils, and dust. This build-up hardens the bristles, making them less effective at picking up and blending products.

Imagine trying to paint a masterpiece with a brush clogged with dried paint – the result would be far from ideal. Similarly, dirty brushes can lead to streaky foundation, patchy eyeshadow, and an overall uneven makeup application.
Beyond the aesthetic aspect, unclean brushes pose a significant risk to your skin's health.
Dirty makeup brushes can cause acne and infections, prioritize cleaning for healthy skin
The bacteria that thrive in dirty brushes can cause acne breakouts, skin irritation, and even infections. When you swipe a dirty brush across your face, you're essentially transferring these harmful microorganisms onto your skin, clogging pores and disrupting the skin's natural balance.

For those with sensitive skin or pre-existing skin conditions, the consequences can be even more severe, leading to redness, inflammation, and prolonged healing times.
Therefore, making brush cleaning a regular part of your beauty routine isn't just about achieving a flawless look; it's about safeguarding your skin's health and maintaining a clear, radiant complexion.
Gather supplies for efficient brush cleaning
Before you begin the cleaning process, gather all the necessary supplies. This will save you time and ensure a smooth and efficient cleaning experience.

Here's a list of what you'll need: mild shampoo or brush cleanser, warm water, a silicone brush cleaning mat or your palm, a clean towel, and a drying rack (optional). You can use baby shampoo or a gentle liquid soap as a cost-effective alternative to specialized brush cleansers.
The silicone cleaning mat provides a textured surface that helps to dislodge makeup residue from the bristles.
Essential tips for effective brush cleaning
A clean towel is essential for blotting excess water from the brushes after washing, and a drying rack allows the brushes to air dry properly without damaging their shape. Having all these items readily available will streamline the cleaning process and make it a less daunting task.

Preparing your supplies beforehand sets the stage for a thorough and effective brush cleaning session, ensuring that your brushes are not only clean but also well-maintained for long-lasting performance.
Clean makeup brushes carefully to prolong their lifespan
Hold the brush upside down under a stream of lukewarm water, making sure that the water doesn't come into contact with the ferrule (the metal part that connects the bristles to the handle). Getting the ferrule wet can loosen the glue and cause the bristles to shed.
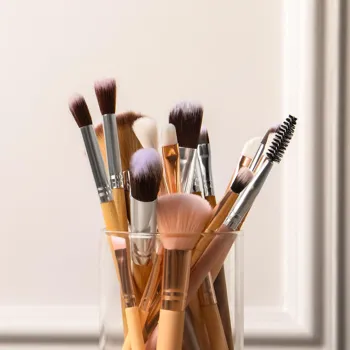
Gently swirl the brush bristles under the water to remove any loose makeup residue. Continue rinsing until the water runs clear, indicating that most of the surface dirt has been washed away. Avoid using hot water, as it can damage the bristles and shorten the lifespan of your brushes.
Initial rinse prepares brushes for deep cleaning
The gentle rinsing motion helps to dislodge the initial layer of makeup buildup without causing any damage to the delicate bristles. This step is crucial for preparing the brushes for a deeper cleaning with shampoo or brush cleanser.

By removing the excess makeup residue beforehand, you can ensure that the cleaning agent penetrates the bristles effectively, leading to a more thorough and efficient cleaning process.
This initial rinse also helps to prevent the cleaning solution from becoming overly saturated with makeup, which can make it less effective.
Clean makeup brushes with gentle swirling on silicone mat
Place a small amount of mild shampoo or brush cleanser onto your palm or a silicone cleaning mat. Gently swirl the brush bristles in the cleanser, using circular motions to create a lather. The silicone cleaning mat provides a textured surface that helps to dislodge makeup residue from the bristles.

Continue swirling until the lather turns the color of the makeup you're removing. This indicates that the cleanser is effectively breaking down and lifting away the dirt and grime from the bristles. Be careful not to apply too much pressure, as this can damage the delicate bristles.
Clean makeup brushes thoroughly to remove residue effectively
Focus on working the cleanser into the center of the brush, where most of the makeup tends to accumulate. Pay special attention to brushes used for applying foundation or concealer, as these tend to be more heavily soiled.

As you swirl the brush, you'll notice the makeup residue being released from the bristles, transforming the color of the lather. This is a clear indication that the cleaning process is working effectively.
Avoid using harsh soaps or detergents, as these can strip the bristles of their natural oils and cause them to become dry and brittle.
Rinse brush bristles until water runs clear, avoiding ferrule
Once you've thoroughly swirled the brush in the cleanser and the lather is visibly dirty, it's time to rinse the bristles again. Hold the brush upside down under a stream of lukewarm water, making sure that no water gets into the ferrule.

Gently squeeze the bristles to remove any remaining cleanser and makeup residue. Continue rinsing until the water runs completely clear, indicating that all traces of cleanser and dirt have been removed.
Ensure that you rinse the brush thoroughly to prevent any residue from being left behind, as this can irritate skin and affect the performance of the brush.
Thoroughly rinse brushes to remove cleanser residue
Take your time during the rinsing process, paying close attention to ensure that all traces of cleanser are removed. Squeeze the bristles gently to help release any trapped residue. If you're using a dense brush, you may need to rinse it several times to ensure that it's completely clean.

Once the water runs clear, give the brush a final shake to remove any excess water. This thorough rinsing process is crucial for ensuring that your brushes are not only clean but also free from any potentially irritating residue.
Properly dry makeup brushes to maintain quality
After rinsing, gently squeeze out any excess water from the bristles with a clean towel. Reshape the brush head to its original form, ensuring that the bristles are aligned properly. Lay the brushes flat on a clean towel or hang them upside down in a brush drying rack.

Drying the brushes upside down prevents water from seeping into the ferrule and loosening the glue. Avoid using a hairdryer or placing the brushes in direct sunlight, as this can damage the bristles. Allow the brushes to air dry completely before using them again.
Be gentle reshaping brushes to maintain shape and longevity
It's important to be gentle when reshaping the brushes to avoid damaging the delicate bristles. Use your fingers to carefully mold the brush head back into its original shape.

Laying the brushes flat on a towel or hanging them upside down allows them to dry evenly and prevents the bristles from becoming misshapen. The drying process may take several hours, depending on the size and density of the brushes.
Be patient and allow the brushes to dry completely before using them to ensure optimal performance and longevity.
Proper storage and regular cleaning extend makeup brush lifespan
To keep your makeup brushes in top condition, store them in a clean and dry place, away from direct sunlight and moisture. Consider using a brush holder or organizer to keep them separated and prevent them from getting damaged.

Clean your brushes regularly, ideally once a week for brushes used daily and once a month for brushes used less frequently. Proper maintenance and storage will extend the lifespan of your brushes and ensure that they continue to perform at their best.
Regular cleaning not only keeps your brushes hygienic but also maintains the integrity of the bristles, allowing them to pick up and blend makeup products effectively.
Invest in quality makeup brushes, care for them diligently for lasting beauty benefits
Investing in high-quality makeup brushes is a worthwhile investment, so taking good care of them is essential. By following these simple steps for cleaning, storing, and maintaining your brushes, you can ensure that they remain a valuable part of your beauty routine for years to come.

In conclusion, cleaning your makeup brushes is not a chore; it's an act of self-care. It's an investment in your skin's health, the longevity of your brushes, and the flawless application of your favorite makeup products.
So, make it a habit, and enjoy the benefits of clean, fresh brushes for a radiant and healthy complexion.
AI Generated Content. Glance/InMobi shall have no liability for the content