
Discover the secrets to a flawless makeup base! Master the art of perfect foundation with these 7 essential steps. Get ready to achieve a radiant complexion that will boost your confidence and elevate
your makeup game. Dive into the world of flawless foundation glory and become a base-makeup pro!
Achieving a truly flawless makeup base is like mastering the art of the perfect chai – it takes a bit of practice, precise steps, and the right ingredients. A good base is essential; it's the canvas upon which all other makeup artistry is displayed.

We're talking about that smooth, even, and radiant complexion that makes you feel like you can conquer the world (or at least nail that important Zoom meeting). Forget those cakey, uneven foundation days!
This guide will break down the process into 7 easy-to-follow steps, helping you achieve a base so perfect, it'll look like your skin, but better. So, grab your brushes and sponges, and let's get started on the path to flawless foundation glory! Get ready to become a base-makeup pro!
Good makeup begins with skincare - cleanse, tone, serum, moisturize for flawless foundation
Before you even think about touching that foundation bottle, remember this golden rule: good makeup starts with good skincare. Think of your skin as the foundation for your foundation! A well-hydrated and prepped face will allow your makeup to glide on smoothly and last longer.
Start with a gentle cleanser to remove any dirt, oil, and leftover makeup from the previous day. Follow up with a hydrating toner to balance your skin's pH levels. Then, apply a serum that targets your specific skin concerns, whether it's hydration, brightness, or anti-aging.
Most importantly – never skip moisturizer! Even if you have oily skin, a lightweight, oil-free moisturizer is crucial for preventing your skin from overproducing oil and causing your foundation to break down. Finally, let all these layers sink in for a few minutes before moving on to the next step.
This ensures that your makeup doesn't mix with your skincare and become patchy. Remember, patience is a virtue! And in this case, it's the key to a perfect base.
Hydrated face enhances makeup with cleansing and moisturizing
A well-hydrated face matters for great makeup results. Cleansing removes impurities, setting the stage. Moisturizer is key, even for oily skin.
Primer is key for flawless foundation, catering to various skin needs
Primer is your secret weapon for extending the wear of your foundation and creating a smooth surface. It’s like the "glue" that holds everything together. Primers come in various forms, each designed to target specific skin concerns.
If you have oily skin, opt for a mattifying primer to control shine and minimize the appearance of pores. If you have dry skin, choose a hydrating primer to add moisture and prevent your foundation from clinging to dry patches.
For those with enlarged pores, a pore-filling primer can create a smooth, even canvas. Apply a pea-sized amount of primer to your fingertips and gently massage it onto your face, focusing on areas where you tend to get oily or have visible pores.
Let the primer set for a minute or two before applying your foundation. This allows it to properly grip the skin and create a barrier between your skincare and makeup.
Don't underestimate the power of a good primer – it can make a world of difference in the longevity and appearance of your foundation. It can also blur acne and reduce the large pores.
Primer enhances foundation and preps skin for makeup application
Primer extends foundation wear and smooths skin. Select primer based on skin type. Apply a pea-sized amount, let it set.

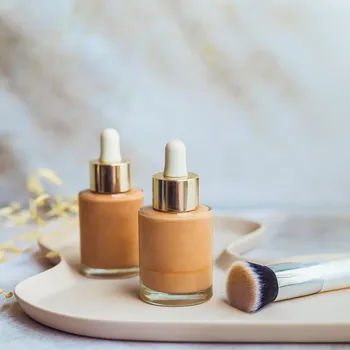
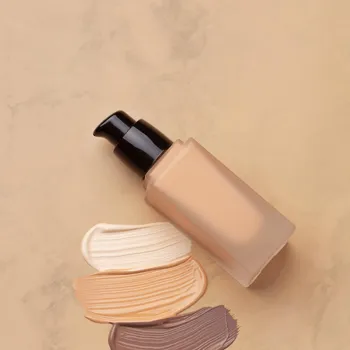
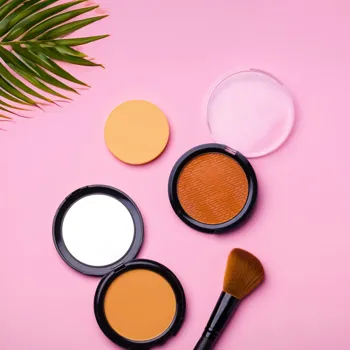
Choose foundation based on skin type & coverage needs for flawless look
With so many foundation options available, finding the right one can feel overwhelming. But don't worry, we're here to help! The key is to understand your skin type and desired coverage. For oily skin, opt for an oil-free, matte foundation. For dry skin, choose a hydrating, dewy foundation.
If you have combination skin, look for a foundation that's designed for all skin types. In terms of coverage, sheer foundations provide a natural, barely-there look, while medium foundations offer buildable coverage for everyday wear.
Full-coverage foundations are best for special occasions or when you want to conceal significant blemishes. When choosing your shade, it's always best to test it on your jawline in natural light. The shade should disappear seamlessly into your skin. And don't forget to consider your undertones!
If you have warm undertones, look for foundations with yellow or golden hues. If you have cool undertones, opt for foundations with pink or blue hues.
Foundation choice based on skin type, undertones, test shades in natural light
Foundation choice depends on skin type and coverage. Test shades on jawline in natural light. Consider undertones.
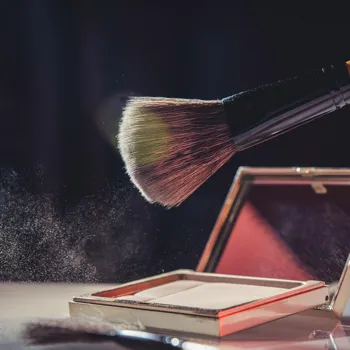
Apply foundation with sponge for natural finish or brush for more coverage, blend well
Now for the fun part – applying your foundation! There are several ways to apply foundation, each with its own set of pros and cons. A makeup sponge, like a Beautyblender, provides a natural, airbrushed finish.
Dampen the sponge before use and bounce it across your face to blend the foundation seamlessly. A foundation brush offers more coverage and control. Use a stippling brush for a light, natural finish or a flat foundation brush for more full coverage.
Apply the foundation in thin layers, starting from the center of your face and blending outwards. Remember, less is more! You can always add more foundation to areas that need extra coverage. Avoid dragging or pulling on your skin, as this can cause irritation and streaking. Blend, blend, blend!
This is the key to a flawless, seamless finish.
Sponges vs. brushes for makeup application: thin layers, blend well, be gentle
Sponges offer natural, brushes offer more coverage. Apply thin layers, blend from center outwards. Avoid dragging skin.

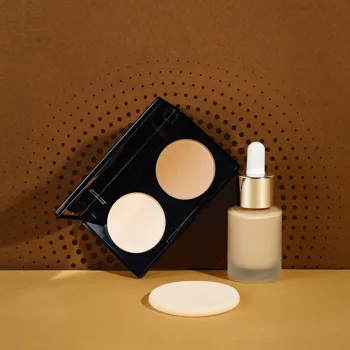
Concealer tips: Brighten under eyes, match blemishes, set with powder, use color corrector
Concealer is your best friend for hiding dark circles, blemishes, and any other imperfections that your foundation didn't quite cover. Choose a concealer that's one shade lighter than your foundation for brightening the under-eye area.
For blemishes, select a concealer that matches your skin tone exactly. Apply the concealer in small dots to the areas you want to cover and gently blend it in using your fingertips, a brush, or a sponge. Set your concealer with a light dusting of powder to prevent creasing.
Pro tip: use a color corrector before applying concealer to neutralize discoloration. For example, a peach corrector can cancel out dark circles, while a green corrector can neutralize redness.
Concealer conceals imperfections, brightens under eyes, use powder to set
Concealer hides imperfections and brightens under eyes. Blend gently, set with powder. Use color correctors if needed.
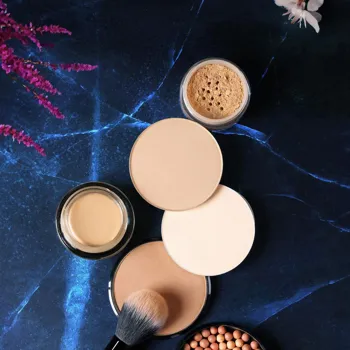
Setting powder is crucial for long-lasting makeup; choose based on skin type, apply strategically
Setting your foundation with powder is essential for preventing it from creasing, transferring, and breaking down throughout the day. Choose a setting powder that's appropriate for your skin type. If you have oily skin, opt for a translucent powder to control shine.
If you have dry skin, choose a hydrating powder to prevent your skin from looking cakey. Apply the powder with a large, fluffy brush, focusing on areas where you tend to get oily, such as your T-zone. For extra-long wear, try baking!
Apply a generous amount of powder to your under-eye area and let it sit for 5-10 minutes before dusting it off. This allows the powder to absorb any excess oil and create a smooth, crease-free finish.
Powder selection for long-lasting makeup
Powder prevents creasing and controls shine. Match powder to skin type. Bake for extra long wear.
Achieve flawless makeup base with proper blending technique
Congratulations, you've almost reached flawless base nirvana! But before you pat yourself on the back, there's one final step: blending. Grab a large, fluffy brush and lightly dust it over your entire face to blend all the layers of makeup together.
This will help to create a seamless, natural finish. If you've applied too much powder, spritz your face with a hydrating setting spray to melt the makeup into your skin. And there you have it! A flawless, long-lasting foundation base that will make you feel confident and radiant all day long.
Now go out there and conquer the world – or at least take some amazing selfies!
Blend layers, set with spray for flawless base
Blend all layers with a fluffy brush. Use setting spray to melt makeup. Enjoy your flawless base!