Unlock the secrets to a flawless smoky eye with our step-by-step tutorial. Dive in to master this classic look effortlessly!
The smoky eye. It’s a classic. A timeless look that can take you from a regular
day at work to a dazzling evening party. But let’s be honest, attempting a smoky eye can sometimes feel more like a makeup mishap than a masterpiece. Fear not, fellow makeup enthusiasts!
This isn't about complicated techniques or needing a professional's touch. We’re breaking down the smoky eye into easy-to-follow steps, perfect for everyone, no matter your skill level. We'll guide you through the whole process, from picking out the right shades to mastering the art of blending.
This will make it so easy for you to create an exquisite smoky eye look.
Guide to creating a smoky eye look with proper tools and color choices
Our guide starts with the basics. A good smoky eye isn't just about smudging dark eyeshadow. It's about layering, blending, and understanding the colours you are using. First step, grab your eyeshadow palette! Think about the occasion. Attending a wedding function?
Choose shades of gold, bronze or copper with a hint of shimmer. Going for a casual hangout with friends? Grey, brown or black shades might be the better choice. We’ll be using a palette with a range of neutral shades for this exercise.
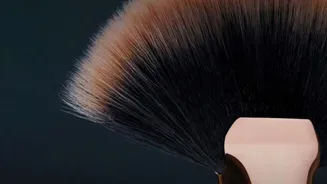
You’ll also need an eyeshadow primer, a fluffy blending brush, a smaller shader brush, a dark eyeliner (pencil or gel, your preference!), mascara, and cotton swabs (for easy clean up of any mistake). Setting brush should also be on your tray for face set up.
Prep eyelids with primer, apply base shade for smooth, crease-free eyeshadow
Now, Prep your eyelids. This step is super important! An eyeshadow primer creates a smooth base, prevents creasing, and helps your eyeshadow stay put for longer, especially in humid weather. Apply a thin layer of primer all over your eyelid, from lash line to brow bone. Give it a minute to dry.
Next, choose your base shade. Pick a medium-toned brown or taupe shade from your palette. Using your fluffy blending brush, apply this shade to your crease, which is the area where your eyelid folds when you open your eye.
Blend back and forth in a windshield-wiper motion, making sure there are no harsh lines. This base shade will help create dimension and make blending the darker shades easier. When blending, keep in mind not to apply a lot of pressure with the brush on the eye, or else, it might cause wrinkles.
Be as swift as possible for even blending.
Apply black eyeshadow for a smoky eye look using blending techniques
Time for our shadow. Grab any black eyeshadow from your eyeshadow kit. Using your smaller shader brush, gently apply the darkest shade of eyeshadow to your upper lash line, as close to your lashes as possible. Don't worry about being perfect at this stage. You can use it to smudge it out later.
Use the same brush to smudge a little bit of the dark eyeshadow on your lower lash line. Keep it thin and close to your lashes. The key to a good smoky eye is blending. Using your fluffy blending brush again, start blending the dark eyeshadow upwards into your crease. Use small, circular motions.
If you feel like there aren’t enough tones on the eyelid, you can pick up the medium tone shade and use it for blending the edges of the darker shade. The blending process is important, as this is the point which helps achieve that smoky look we are aiming for.
Apply eyeliner, curl lashes, mascara for defined eyes
Add eyeliner to your eyelid. Use your liner brush and use a dark shade of eyeliner on your upper lash line, as close to your lashes as possible. If you’re using a pencil liner, gently smudge it with your finger or a cotton swab for a softer, smokier effect.
You can also line your lower lash line, connecting it to the upper liner at the outer corner of your eye. Again, smudge the lower liner for a softer look. Curl those lashes. Use an lash curler properly so that all your lashes gets the same curl.
Apply two to three coats of your favourite mascara to your upper and lower lashes. Mascara will help define your lashes and make your eyes pop. A lot of people tend to use fake eyelashes for a more exquisite look, but that is optional.
Once you're done with the mascara, you will see a visible difference.
Clean up smoky eye mess with these tips
Now, let's Clean up all the mess. Smoky eyes can sometimes get messy. If any eyeshadow has fallen onto your cheeks, use a large, fluffy brush to dust it away. You can also use a makeup wipe or cotton swab dipped in makeup remover to clean any smudges or mistakes.
If you’ve accidentally blended the eyeshadow too high up, use a cotton swab to clean up the edges and sharpen the shape of your eye. Adding Brightness is optional.
To add a little brightness to your smoky eye, apply a small amount of highlighter to the inner corner of your eye and under your brow bone. This will help open up your eyes and make them look more radiant.
Blend a gorgeous smoky eye with confidence
Lastly, set your Base and you are done! If you haven't already, apply your foundation, concealer, and powder. For a smoky eye, it's best to keep the rest of your makeup simple and natural. Focus on highlighting your cheekbones and using a neutral lip colour. And there you have it!
A perfectly blended, gorgeous smoky eye. With practice, you'll be able to create this look in just a few minutes. Remember, makeup is all about experimenting and having fun. So don't be afraid to try new things and find what works best for you. Enjoy your beautiful, smoky eyes!
Practice this a few times, and you'll be a smoky eye pro in no time. And remember ladies, confidence is the best makeup of all! So rock that smoky eye and own your unique beauty!
AI Generated Content. Glance/InMobi shall have no liability for the content


