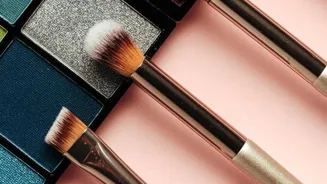
Master the art of the smoky eye with our step-by-step tutorial! Create a captivating look with ease. Read on for expert tips!
For all you lovely ladies out there yearning to master the art of the smoky
eye, worry not! Achieving that glamorous, sultry look is easier than you might think. Forget those complicated tutorials; we've got a simple, step-by-step guide that will have you rocking a flawless smoky eye in no time.
Whether you're heading to a Diwali party, a wedding reception, or just want to add a little drama to your everyday look, this tutorial is your ultimate resource. So, grab your makeup brushes, gather your favorite eyeshadows, and let's get started on creating that captivating smoky eye!
It's all about blending, ladies, blending is the key to success! With a little practice, soon you'll be a total smoky eye pro, turning heads and making a statement wherever you go.
Remember, makeup is all about having fun and expressing your personality, so don't be afraid to experiment with different shades and styles to find what works best for you.
Proper prepping key for flawless smoky eye makeup
First things first, proper prepping is absolutely crucial for a long-lasting and smooth smoky eye. Start by applying a good quality eye primer to your eyelids. This creates a smooth canvas, ensuring that your eyeshadows blend seamlessly and stay put throughout the day or night.
Let the primer set for a minute or two before moving on to the next step. Next, apply a neutral eyeshadow base all over your lid, from your lash line to your brow bone. This helps to even out your skin tone and creates a consistent base for the darker smoky shades.
A matte beige or light brown shade works perfectly for this. With a fluffy blending brush, gently blend the base shade upwards, ensuring there are no harsh lines. This step is essential for a flawless, professional-looking finish.
Remember, a well-prepped eye is the foundation for a stunning smoky eye, so don't skip this important step! Taking the time to properly prep your lids will make a world of difference in the final result, ensuring your smoky creation looks polished and stays put.
Choose eyeshadows wisely for a flawless smoky eye look
Now comes the fun part: choosing your eyeshadows! The classic smoky eye usually involves shades of grey, black, and dark brown, but don't feel limited to these colors. You can easily adapt the smoky eye technique to suit your personal preferences and skin tone.
For instance, you could use deep purples, emerald greens, or even warm bronzes for a unique and captivating twist. Once you've chosen your colors, start with the lightest shade and apply this all over your eyelid.
This acts as your transition shade, helping to seamlessly blend the darker colors later on. Next, take a medium-toned shade and apply it to your crease, blending it outwards in a windshield wiper motion. This is where the magic happens, so take your time and blend, blend, blend!
Remember, blending is the key to a flawless smoky eye. Finally, using a small, dense brush, apply the darkest shade to your outer corner and along your lash line, creating depth and definition.
Blend carefully for a flawless smoky eye look
Now, let’s talk about the magic of blending! This is where the real artistry of the smoky eye comes into play. Grab a clean, fluffy blending brush – the same one you used for your base shade will do just fine.
Starting at the crease, gently blend the edges of the dark eyeshadow outwards and upwards, diffusing any harsh lines. The goal is to create a seamless transition between the different shades, giving your smoky eye that soft, diffused look.
Use small, circular motions to blend the colors together, ensuring there are no visible lines or patches. This may take a little practice, but don't worry, you'll get the hang of it.
If you find that you've applied too much dark eyeshadow, simply go back in with your base shade and blend it over the harsh lines to soften them. Blending is all about patience and finesse; the more time you spend blending, the smoother and more professional your smoky eye will look.
With practice, you'll develop a feel for how much pressure to apply and how many layers of eyeshadow you need to achieve the perfect, diffused effect.
Highlight eyes with shimmer for a wide-awake look
To really make your eyes pop, don't forget to highlight! Use a shimmery eyeshadow or a highlighter with a subtle sheen and apply it to your brow bone and the inner corner of your eyes. This will brighten up your eyes and create a beautiful, wide-awake look.
A touch of shimmer in the inner corners really opens up the eyes and adds a touch of glamour. You can also use a white or nude eyeliner on your lower waterline to make your eyes appear even bigger and brighter.
This simple trick can make a huge difference, especially if you have small or hooded eyes. Remember to use a light hand when applying the highlighter to avoid looking too glittery or overdone. The goal is to enhance your natural features, not to create a disco ball effect.
A subtle sheen is all you need to achieve that gorgeous, luminous look! Plus, applying it to your brow bone will further enhance the shape of your eyes.
Finish smoky eye with eyeliner, mascara for dramatic look
Finally, finish off your smoky eye with eyeliner and mascara. Line your upper lash line with a black or dark brown eyeliner, creating a thin line that gradually thickens towards the outer corner. You can use a pencil, gel, or liquid eyeliner, depending on your preference and skill level.
If you want a more dramatic look, you can extend the eyeliner slightly beyond the outer corner to create a subtle wing. Curling your lashes before applying mascara. This opens up your eyes and makes your lashes appear longer and fuller.
Apply several coats of your favorite mascara to your upper and lower lashes, being sure to coat each lash from root to tip. If you want even more drama, you can add a pair of false eyelashes. With these final steps, you've successfully completed your makeup!
AI Generated Content. Glance/InMobi shall have no liability for the content


