Unlock the mystery of the smoky eye! From preparation to blending, master the sultry look effortlessly. Ready to dive in?
The smoky eye. It's that classic makeup look that’s been making appearances on Bollywood
stars and everyday girls alike for ages. It can seem a bit intimidating, eh? All that blending, the dark colours… it can feel like you need to be a makeup artist to pull it off. But fear not, my friend!
Creating a gorgeous smoky eye is totally achievable, even if you're just starting out. This guide will break down the whole process, step-by-step, so you can confidently rock that sultry, smoldering look for your next shaadi, party, or even just a fun night out with the girls.
We’ll keep things simple and practical, avoiding the fancy techniques until you've got the basics down pat. Ready to become a smoky eye pro? Let's get started!
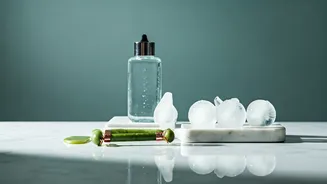
Properly prep eyelids with primer for long-lasting eyeshadow
First things first, preparation is key! Before you even think about picking up an eyeshadow brush, make sure your eyelids are prepped and ready to go. Start with a clean, moisturized face. Then, apply an eyeshadow primer to your eyelids.
This is super important because it creates a smooth base for your eyeshadow, prevents creasing, and helps the colours stay vibrant for longer. Don’t skimp on this step – it's the secret weapon for a long-lasting, flawless smoky eye.
If you don't have a primer, a little bit of concealer or foundation will do in a pinch. Just make sure to set it with a translucent powder to prevent it from getting too oily. Proper preparation is the base and it will save your look for longer duration.
Gather essential tools and products for a smoky eye look
Next, gathering your ingredients is very vital. To create a smoky eye, you really only need a few key tools and products. First, you'll need an eyeshadow palette with a range of light, medium, and dark shades – think neutrals like browns, greys, and blacks.

A matte black eyeshadow is a must-have for creating that signature smoky effect. You will need, a set of good quality makeup brushes, including a flat shader brush for applying colour to the lid, a blending brush for softening the edges, and a small detail brush for precise application.
Don't forget essentials like mascara, eyeliner (pencil or liquid, your choice!) and cotton swabs for cleaning up any mistakes along the way.
Apply eyeshadow in light, medium, and dark shades for depth and dimension
Now its time to start applying the eyeshadow! Start with a light shade all over your eyelid, from your lash line to your brow bone. This helps to create a smooth, even base for the other colours you will be applying later.
Next, take a medium shade, such as a taupe or a medium brown, and apply it to your crease. Use a windshield-wiper motion to blend the colour back and forth, ensuring there are no harsh lines. This will add depth and dimension to your eyes. Then, it’s time for the dark shade.
Start by patting a small amount of the dark eyeshadow onto your outer corner. Use the other darker shade to get it completely in to your lids. Build up the intensity gradually, blending it into the crease to create a seamless transition.
Remember, it's always easier to add more colour than to take it away.
Blending is crucial for a perfect smoky eye; patience and technique are key
Then comes Blending, like a pro is the most important step. Blending is absolutely crucial for a perfect smoky eye. Harsh lines are a big no-no! Use a clean blending brush to soften the edges of the dark eyeshadow, blending it seamlessly into the medium shade in your crease.
Keep blending until there are no visible lines and everything looks smooth and diffused. The key to blending is patience – take your time and don't rush the process. Small circular motions work best for blending out the edges.
If you feel like you've applied too much colour, simply go back over the area with your blending brush to soften it up. Blending brushes come in variable quality standards available in the online and offline markets.
Apply dark eyeshadow on lower lash line for a balanced look
Let’s bring in the lower lash line. Don't forget about your lower lash line! Use a small detail brush to apply a touch of the dark eyeshadow along your lower lash line. This will help to create a more balanced and dramatic look.
Be careful not to apply too much colour, as this can make your eyes look smaller. Blend the eyeshadow gently with a cotton swab to soften the edges. You can also use a slightly lighter shade on your lower lash line for a softer, everyday look.
This step adds definition and completes the smoky eye, tying the whole look together, it is very relevant.
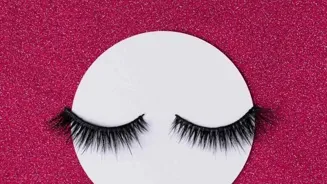
Final touches for perfect smoky eyes: eyeliner, mascara, clean up, admire your look
Here comes the final touches and clean up of your look. Once you're happy with your eyeshadow, it's time to add eyeliner and mascara. Apply eyeliner along your upper lash line, as close to your lashes as possible.
You can use a pencil liner for a softer look, or a liquid liner for a more dramatic effect. Then, apply several coats of mascara to your top and bottom lashes. This will help to make your eyes look bigger and more awake.
Use a cotton swab dipped in makeup remover to clean up any mistakes or smudges. You can also use a bit of concealer to highlight your brow bone and the inner corners of your eyes for a more polished look. Now, take a step back and admire your handiwork – you've just created a gorgeous smoky eye!
Also don’t forget to remove all of the make up with a good make remover, before you doze off after the party. Now step out with confidence.
AI Generated Content. Glance/InMobi shall have no liability for the content