


I’m back again to tell you all the tale of how my Buffalo Bills-themed Mandalorian armor is going. It all started with a gifted Black Series helmet and my insistence that things become very complicated. I know some of it has dragged out thanks to a variety of reasons (me screwing up, weather, schedule).
To get you hooked again, this edition has a finalized accessory that might also end up inspiring some of the final paint on the breastplate.
Previous installments for this project: Buffalo Beskar Part
1 Buffalo Beskar Part 2 Buffalo Beskar Part 3 Buffalo Beskar Part 4 Buffalo Beskar Part 5
Blaster time!
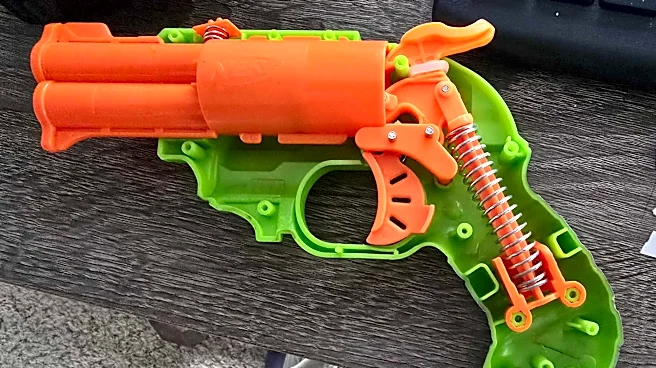
I was kicking around the shed and stumbled across the Nerf guns my youngest and I occasionally break out, which led to a very obvious idea: Paint one to match the Mandalorian armor. But which one?

We had three types to choose from, but with cropping the third is hard to see (orange one on the bottom right). Being candid, that one was never really in play as I don’t believe it matches my style at all. After asking for some opinions, I decided to go with…

The other style looked like something a Storm Trooper might use and would have fit the Star Wars vibe, but this one has a little Wild West flair to it, which fits much of the Star Wars universe too. One of the most profound things I’ve ever seen was someone pointing out that all Han Solo needs is a hat to be full-on cowboy. This was also the one I purchased specifically for myself to duel my daughter, and was the favorite of the group as far as function went.
With the blaster selected…
Whenever possible, disassemble and photograph

This is what I tried to do with the helmet, but couldn’t due to a couple stubborn clips that might have led to me breaking something. With the components separated, painting becomes a breeze and the end result is better than taping. There’s one pro tip I have for you though when disassembling anything with mechanical parts…
Photograph the way it came apart to make reassembly considerably less stressful. On that second picture, that tiny little spring has a very significant portion of the trigger function attached to it and looks haphazard all things considered. I was very glad to be able to confirm where it went.
Design and paint!
This was a good side quest for the project because it was overall low stakes. Nerf guns can be found cheap and it let me do two very important things.
- Test out some paint tricks, like an attempt at ombré
- Muck about in crap weather
That second one was a big reason this got done. I wasn’t about to risk the helmet in cold and damp weather as my painting has to be done either outside or in the shed, which isn’t much better aside from blocking wind. I used a different paint than what you’ve seen so far for the barrel. The age of the paint, the weather, and what may have been some oil residue on the barrel made this a bit challenging to pull off. At one point I was scrubbing the spots the paint wouldn’t take with alcohol prep pads and trying again. Luckily, I did finally get it to work.

The main body was a breeze overall. It reaffirmed that my metallic blue paint will hold onto anything and the ombré effect went very well in my opinion. This part was about as stress-free as possible. The barrel as noted was not, but in the end…

It came out pretty great I think. I had copper laying around, which I thought would look cool for the barrel(s) and some other components like the hammer and trigger. In this view you can also see I taped off both ends. I was very worried about making sure it still functioned when I was done.
The final product!
I wanted it to still be able to shoot so here you go! Proof I didn’t **** it up. Talk about feeling grateful for photographing the disassembly!
There was one thing more I wanted to do, though. You might have noticed that on the original the plastic was intended to look like it was cloth wrapped. This gun is part of their Zombie Strike set and I guess cloth wrapping is post-apocalyptic. In case you forgot, here’s a better look at the handle. You might also notice I taped off the black sections above and below the “cloth” wrap to keep the look of an actual grip.

I purchased some white cloth that looks like burlap, but isn’t technically burlap, for my third Skarekrow mask. The smallest amount I could buy was “way too much for a mask” so I thought it would look good on this and be a nod to my true Skarekrow self all in one go.

I love the look, and a huge bonus in that it fits my hand even better now. I have one last thing to share about this, and that’s my decision to leave the Nerf logo on it. Well, maybe you remember this line…

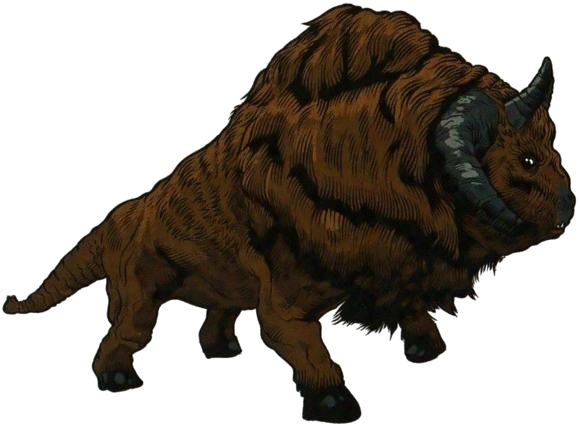
That’s right. In Star Wars, a nerf is a type of cattle originally from Alderaan. After digging a little into it, they’re known as nasty, ill-tempered creatures that have the best meat and make it worth the incredible difficulty in raising them.
Or in other words, a nerf is a lot like a space bison, perfect for this build. It’s not too farfetched to see a blaster manufacturer naming themselves after such a beast All good cosplay builds should incorporate some lore/story into them, and this was an easy addition.


