


Last time I showed off my friend’s work and gave some teasers of what we still have in store. This stage represents a major milestone for the project as it was the most significant mechanical build.
Between shaping and assembly, this was by far the most “smithing” part of the journey. It’s not that other things didn’t require work, it’s that…
Well, you’ll see.
“Forging” ahead
The last time you saw the overall armor, it was nothing more than the four base plates from this picture.

It looks cool stacked, but it’s not
together. I also mentioned that the plan isn’t actually four pieces, it’s six. I added two extra layers to the top piece to add more depth and allow for something you’ll see in just a moment. The next step on the journey before assembly was trimming. It’s easier to see from the backside, but originally the edges didn’t form very straight lines. A good set of kitchen shears helped get them back in line, and some sanding helped things out even more.

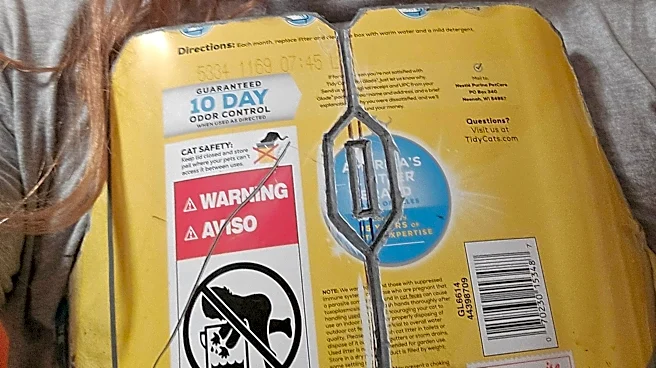
Kitchen shears and sanding were good for the single sheets of plastic, but for the triple layer top piece, I wanted them to match up pretty well and kitchen shears ain’t going through three layers of polypropylene (PP) from a cat litter bucket.
Before taking more drastic measures, I joined the three layers of the top plate using a specialized glue made for PP. The glue, while strong, really isn’t made for joining pieces of this size. So what I did was glue the center stripe between each layer to hold it together for the next steps. This is sort of like pinning while sewing. It prevents things from shifting, but isn’t the final method of joining.
Once they were “pinned” with glue, it was time to get the edges even. For that, we had our first foray into power tools.

Now that I had even edges for the triple layers of the top plate, I needed to find a way to permanently join them. Not-so-spoiler alert, but I used rivets as promised for a primary mechanical method. With that in mind, this might be a very weird following sentence: While I wanted the top of the breastplate to be three layers thick, I didn’t want it to look like it was three layers. That meant I needed to join the edges.

If for whatever reason you wanted to try this (and you shouldn’t), make sure you have a mask and a ventilated area for this. PP can be welded together, but you’ll need patience. A lot of patience. In the picture above you can see on the left the area that was welded together, and my clamping to the right for areas that still need it. You can see that the saw chewed up the edges, but that’s okay because it left smaller bits that helped with the welding step. You can also see that the welded area developed a crack and needed to be re-welded. This was not an uncommon situation.
Using the grips to clamp the layers tight and hold the three plates away from your hand, you can weld the plastic together with a plumbing-style torch. Be careful to raise the temperature to melting but not “ignited.” That means getting the flame close but not blasting the plastic directly with the flame. You can also use a heat gun, but careful torch use is a bit faster.
Once the three layers melted enough to combine, there are some tricks like pushing the edges together with the side of a knife to help them join. You need to be careful of rapidly cooling the plastic, as that can make it brittle and have the welds pop back open. Ask me how I know that? Anyway, that means on a cold day, the knife blade will cool and create issues. Ask me how I know that?
Yes, that does also mean you need to wait for the molten plastic to cool naturally. I was able to do a couple inches every five minutes or so. Put differently, have something else to work on at the ready while you clamp, weld, wait… clamp, weld, wait… clamp, weld, wait. The edges I’m showing here are still uneven, but part of the reason you take your time with the welding is to make sure it’s deeper than the surface. I was able to sand down the edges quite well without having the three layers pop back open.

It’s not DIY if you’re not slightly injured. This is a minor wound, but one of many reasons I think it’s ill-advised to try things I’m doing. This is the result of me pinching my fingers in the rivet gun. I have had superficial burns, quite a few other cuts, and the trauma of trying to work PP to shape might haunt me forever.

Once assembled, it’s time to start with some fancier work. Using a rotary tool, I was able to roughly carve out a center line and the iconic “rectangle in a diamond” embellishment that most of the Mandalorian breastplates have some variation of. As you can see in the picture, it was very rough and meant filing and sanding to even things out. I may have also broken out some X-acto knives to shave off some bumps.

I wanted to test out some ways to simulate battle damage so you can see where I used a small chisel to scar part of the breastplate. I introduced a chip or two to some edges on purpose, and while I cleaned up the edges of all the plates, I didn’t smooth things out anywhere near as meticulously as I did the oval for my car logo. Here’s a quick reminder of what sandpaper can do to clean up an edge, but which I elected not to do for the armor.

And that wasn’t even the final smoothing on the edges. I won’t claim my oval was perfect, but it was pretty darn good. By “was” I actually mean “still is.” My bat logo has been on the car since April 22 and as of the time I’m writing this it’s been on for over two months and still looking good. The plastic and paint combine beautifully and are very durable.

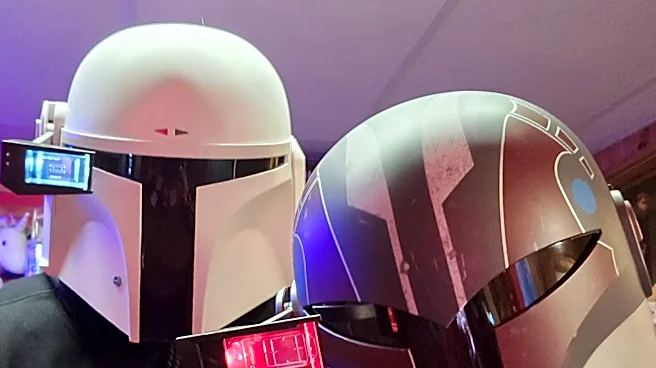
This isn’t the most flattering picture of me, but… well actually it might very well be the most flattering picture of me. At the very least it shows you shouldn’t let your children play in cat litter buckets. It also shows near-final smoothing of the chest plate and that it is sized up to be worn by yours truly.
What’s in store next? Tune in next time to find out!
Previous installments in this adventure:
Buffalo Beskar Part 1
Buffalo Beskar Part 2
Buffalo Beskar Part 3
Buffalo Beskar Part 4
Buffalo Beskar Part 5
Buffalo Beskar Part 6
Buffalo Beskar Part 7