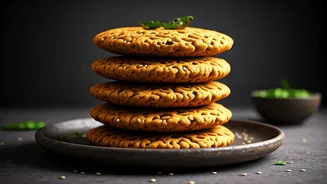


The Crispy Vada Secret
The distinction between a homemade medu vada and its professional counterpart often hinges on more than just technique; it's rooted in the precise balance
of ingredients. While numerous recipes abound, a culinary insider highlights that the true magic lies in the proportions. Achieving that signature crispiness and airy interior, akin to what you'd experience in a high-end eatery, is surprisingly accessible with the right approach. This isn't about complex maneuvers but rather understanding how each component contributes to the final taste and texture, ensuring your home-cooked versions stand out.
Essential Medu Vada Ingredients
Crafting superior medu vadas requires a specific set of components, each playing a vital role. The foundation is 1 kg of urad dal, which needs to be thoroughly rinsed and then soaked for at least 4 hours, or even overnight, to achieve a soft texture. For flavour and aroma, incorporate 100 grams of finely chopped onion, a handful of 10 grams of curry leaves, and 5 grams each of pepper and cumin seeds. The subtle heat comes from 2 grams of grated ginger and 2 grams of chopped green chili. Seasoning is crucial, with 20 grams of salt, and for that characteristic depth, 2 grams of hing (asafoetida) is essential. Water is used sparingly to achieve a thick, smooth batter consistency.
Batter Preparation & Shaping
Once the urad dal has been soaked, it's time to grind it into a smooth batter, using just enough water to achieve a thick, flowing consistency. If the batter appears too thin, a common trick is to add a bit of semolina, urad dal flour, or rice flour to absorb excess moisture. Once the batter is the right consistency, all the prepared ingredients – chopped onion, curry leaves, pepper, cumin seeds, ginger, green chili, salt, and hing – are mixed in thoroughly. For shaping, a simple method involves wetting your palms, taking a portion of batter, and forming it into a round shape. Then, using your thumb, create a distinct hole in the center, mimicking the classic donut shape. Alternatively, you can use banana leaves or zip-lock bags as aids for shaping.
Frying for Perfect Crispiness
The art of frying is paramount to achieving that coveted extra-crisp texture. Heat oil in a kadai or deep pan over medium heat. It's crucial that the oil isn't excessively hot, as this can lead to uneven browning and an undercooked interior. Once the oil reaches the right temperature, carefully slide the shaped vadas into the hot oil, ensuring not to overcrowd the pan, as this lowers the oil temperature and can result in greasy vadas. Fry them until they achieve a light golden hue, then gently flip them using a slotted spoon. Continue frying until they are uniformly golden brown and wonderfully crisp. Once fried, drain them on kitchen tissue to remove any excess oil. Leftover batter can be stored in the refrigerator for up to a day, but allow it to return to room temperature before frying.
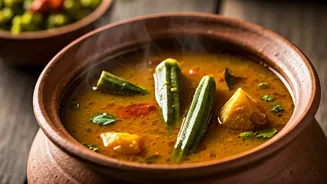
Serving Suggestions & Variations
Piping hot medu vadas are traditionally served alongside a flavourful tiffin sambhar and a refreshing coconut chutney, creating a delightful South Indian breakfast or snack experience. However, their versatility extends beyond these pairings. They pair wonderfully with a wide array of condiments, including zesty mint chutney, herbaceous coriander chutney, or even a simple tomato or onion chutney. For a truly complete meal, a rich cup of filter coffee makes for an ideal accompaniment. It's worth noting that while this recipe focuses on medu vadas, other popular vadas across India include the Maharashtrian Batata Vada, the tapioca-based Sabudana Vada, and the yogurt-soaked Dahi Vada, each offering distinct regional flavors and ingredients.