






Choose the Right Scarf
The secret to a great hatband is the scarf itself. Look for long, narrow scarves, often called 'skinny scarves' or 'twillies'. These are designed for accessorizing and won't create too much bulk. Silky or satin materials work beautifully as they have
a bit of shine and are easy to tie. If you're using a traditional square scarf, choose one that's about 35 inches square and made of a lightweight material like silk or polyester satin. A lighter fabric is easier to fold into a neat, crisp band. You can find scarves specifically designed to be used as hatbands, but raiding your own closet for a vintage pattern is part of the fun.
Method 1: The Classic Flat Wrap
This is the simplest and most common method, creating a clean, timeless look. If you're using a square scarf, start by laying it flat. Fold it in half diagonally to form a triangle. Then, starting from the long, folded edge, begin making horizontal folds about two to three inches wide, rolling it up toward the point until you have a long, flat band. Find the center of the scarf and place it at the front of your hat's crown. Wrap the two ends snugly around the sides to the back. Tie a simple, tight square knot to secure it. You can let the tails hang down for a relaxed look or tuck them in for a cleaner finish.
Method 2: The Polished Side Knot
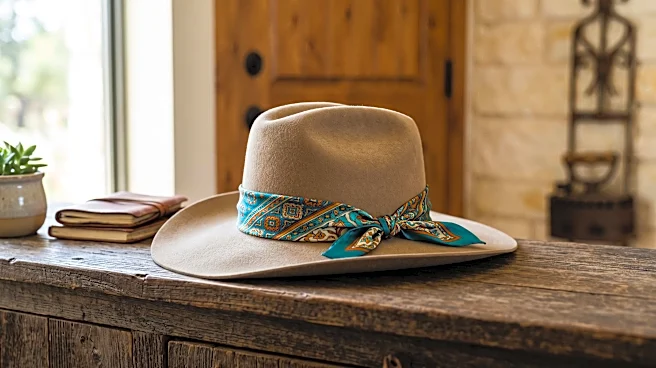
For a touch more flair, a side knot or bow adds a deliberate, stylish accent. Prepare your scarf using the same folding method as the classic wrap. This time, instead of starting at the front, place the center of the scarf at the back of the hat's crown. Bring the ends around to the front and pull them to one side. Tie a simple knot first to hold everything in place. Then, tie the remaining length into a neat bow, much like you'd tie a shoelace. You can fluff the loops and adjust the tails to hang artfully over the brim. This style works especially well with felt fedoras and cowboy hats, adding a pop of personality right where people can see it.
Method 3: The Braided Band
If you're feeling more ambitious, a braided band offers a unique, textured look. This technique works best with three separate skinny scarves in complementary colors or patterns. Tie the three scarves together at one end with a small, tight knot. You can temporarily tape this end to a table to hold it steady. Gently braid the three scarves together until you have a single braided strand long enough to wrap around your hat's crown. Once you reach the desired length, tie another knot to secure the end of the braid. Wrap your new braided band around the hat and tie the two knotted ends together at the back.
Keep It Secure All Night Long
A removable band is great, but you don't want it slipping off mid-song. To ensure your creation stays put, a few hidden safety pins are your best friend. After you've tied your scarf, discreetly pin the underside of the band to the hat in a few spots—one on each side and one at the back usually does the trick. Be sure to pin from underneath so the hardware isn't visible. For delicate fabrics like silk, you can also use a small piece of clear hair elastic instead of a knot to secure the ends, which is gentler on the material. Some tutorials even suggest using a large bead or a scarf slide to cinch the ends together for a decorative and secure finish.