


Prep Is the First Line of Defense
Any makeup artist will tell you that a long-lasting, shine-free finish begins long before the first drop of foundation is applied. The secret isn't to dry out the skin, but to control oil production from the start. This begins with skincare. After cleansing,
artists often use a lightweight, oil-free moisturizer to hydrate the skin without adding extra grease. This prevents the skin from overcompensating later by producing more oil. Following that, a targeted primer is key. Rather than slathering a mattifying primer all over, pros apply it strategically to the T-zone (forehead, nose, and chin) and any other areas prone to shine. This creates a velvety base that grips makeup while forming a barrier against excess oil.
Choose Your Weapon: Paper, Puffs, or Sponges
Not all blotting tools are created equal. While classic blotting papers are effective, many top-tier artists have evolved their kits. The main goal is to lift oil without lifting the meticulously applied makeup. * **Blotting Papers:** The standard for a reason. They are thin, absorbent, and portable. Look for ones made from natural fibers like rice paper or hemp, which are excellent at soaking up oil. * **The Powder Puff Trick:** A game-changer. Many artists, like the legendary Pat McGrath, use a clean, empty powder puff. The soft, velour-like texture is perfect for pressing against the skin to absorb oil without disturbing foundation. * **Dry Beauty Sponges:** A dry makeup sponge (like a Beautyblender) can also be used in a pinch. Its porous texture works similarly to a puff, absorbing shine when gently pressed or stippled onto the skin.
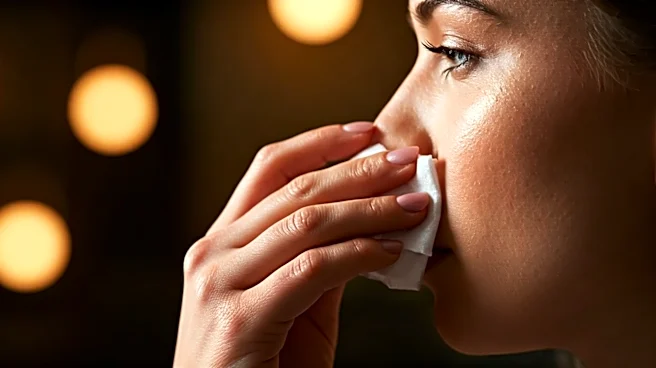
The All-Important 'Press and Roll' Technique
The most common mistake people make is rubbing or swiping at their face. This not only smears makeup but can also stimulate oil glands to produce even more sebum. The professional method is far more delicate. Whether you’re using a blotting paper or a powder puff, the technique is the same: press, hold for a few seconds, and then gently roll or lift away. Don’t drag it across your skin. By pressing firmly but gently, you’re allowing the tool to make contact with the oil and absorb it. The rolling motion lifts the tool off the skin cleanly, taking the shine with it but leaving your foundation, blush, and bronzer perfectly intact. Work in sections, starting with the shiniest areas first.
The Strategic Powder Touch-Up
After blotting, your skin is now mattified but might need a slight touch-up to lock in the finish. This is where people often go wrong, caking on heavy pressed powder that can look chalky and settle into fine lines. Instead, professionals use a very small amount of finely milled translucent setting powder. The key is in the application. Instead of a big fluffy brush, use a small, precise brush or even the tip of your powder puff. Dip it into the powder, tap off any excess—seriously, tap off almost all of it—and then gently press it only onto the areas you just blotted. This sets the area without adding texture or weight, ensuring your makeup looks fresh, not layered.
Don't Forget the Details
While the T-zone gets the most attention, it's not the only culprit. Makeup artists know that oil can creep up in unexpected places during a long event under hot lights. Pay attention to the smile lines around your mouth, the creases on the sides of your nose, and even your eyelids, where oil can cause eyeshadow to crease. Use the same gentle press-and-roll technique with the corner of a blotting sheet or a small brush for these hard-to-reach spots. A quick, targeted blot in these areas can be the difference between looking put-together and looking like your makeup is melting away.