
Gather Your Game Day Gear
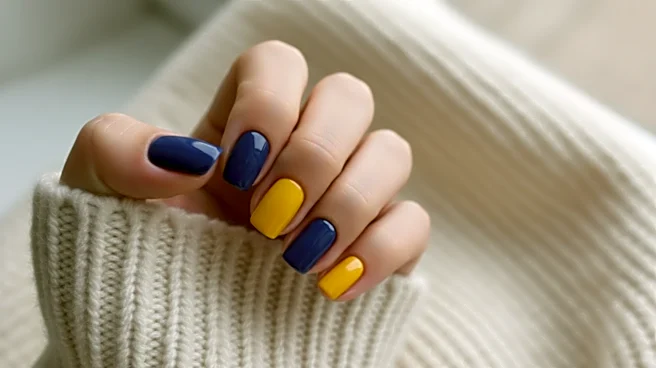
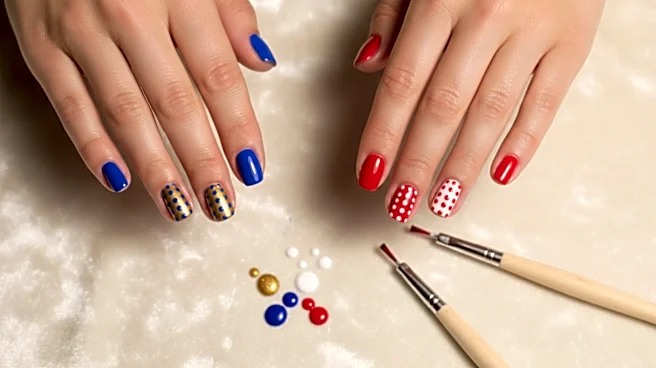
The beauty of this design is its simplicity. You don't need a professional kit to get started. First, grab your team's colors. You'll want at least two contrasting nail polishes that pop. Next, find your 'dotting tool.' You likely have several options
hiding in plain sight. The rounded end of a bobby pin is perfect for creating uniform dots. A simple toothpick works well for smaller, more delicate dots. You can also use the tip of an unbent paperclip, a blunt pencil, or even a dried-out ballpoint pen. Finally, make sure you have a clear base coat and a quick-drying top coat. These are non-negotiable for protecting your nails and making your design last through every cheer and high-five. A bit of nail polish remover and some cotton swabs will also be handy for quick cleanups.
The Pre-Game Prep
A great manicure starts with a clean canvas. Rushing this step is a recipe for chips and smudges. Start by making sure your nails are clean and free of any old polish. File them to your desired shape and gently push back your cuticles. Proper nail prep is one of the most important steps for achieving a long-lasting manicure. Once your nails are shaped, apply a single, thin layer of your clear base coat. This does more than just protect your natural nails from staining; it gives the color polish something to grip onto, extending the life of your design. Let the base coat dry completely for at least two minutes before moving on to the color. This prevents bubbling and ensures a smooth foundation for your artwork.
Applying Your Base Color
With your prep work done, it's time to lay down your team's primary color. Apply one thin, even coat of your chosen base polish. Don't worry if it looks a little sheer; two thin coats are always better than one thick, goopy one. Let the first coat set for a couple of minutes, then apply the second for full, vibrant coverage. Patience is key here. Make sure your base color is completely dry before you even think about starting your dot design. A good rule of thumb is to wait at least 10 minutes. If the polish is tacky at all, your dots will smudge and drag, ruining the clean look you're going for.
Mastering the Dotting Technique
This is where the fun begins. To avoid making a mess, pour a small puddle of your contrasting polish (the color for your dots) onto a disposable surface like a piece of foil or a paper plate. This gives you better control than dipping your tool directly into the bottle. Take your chosen tool—let's say a bobby pin—and dip the rounded tip straight into the polish puddle. Before taking it to your nail, do a practice dot on paper to get a feel for the pressure needed. When you're ready, hold the bobby pin perpendicular to your nail and gently press the tip onto the surface, then lift straight up. Voila! A perfect dot. Reload your tool with polish every one or two dots to keep them consistent in size.
Simple Plays for Your Polka Dots
You don't need complex art skills to make a statement. The easiest design is often the most effective. Consider a simple row of dots along the base of your nail, near the cuticle, for a minimalist look. Another classic is creating a polka dot 'French tip' by concentrating the dots at the top edge of your nail. For a bolder statement, create an accent nail by covering your entire ring finger in dots while keeping the others a solid color. This is a forgiving look for beginners because the pattern is intentionally scattered. You can also create a gradient effect by placing dots close together at the tip of your nail and spacing them out as you move down toward the cuticle.
Sealing the Win with a Top Coat
Once you're happy with your design and the dots are completely dry (give them another 10-15 minutes to be safe), it's time to seal your work. Applying a top coat is the single most important step for making your manicure last. It adds a professional-looking gloss and protects your design from chipping. Apply one smooth layer over the entire nail, making sure to 'cap' the free edge by swiping the brush along the very tip of your nail. This prevents peeling and helps your manicure withstand the excitement of game day. If you notice any smudges around your nail, simply dip a cotton swab in polish remover and carefully clean up the edges for a crisp finish.