






The Myth of a Single Shadow
The biggest misconception about a monochromatic eye is that it uses only one eyeshadow. While beginners often take this literally, swiping a single matte or shimmer shade across the lid, professionals understand that “monochromatic” refers to a single color
family. A pro look is built with multiple tones of the same hue—think a light peach, a medium terracotta, and a deep brown. They use these varying tones to create a gradient effect, adding depth and dimension that a single, flat color can't achieve. A beginner can replicate this by using a palette with several shades of the same color or simply by choosing a light, medium, and dark version of their chosen hue.
It’s All About the Texture Play
A beginner might stick to one finish, typically a matte, which can make the eye look one-dimensional. In contrast, professionals are masters of mixing textures to create interest. They might lay down a matte shade as a base, press a satin or shimmer finish onto the center of the lid to catch the light, and even add a touch of metallic or glitter to the inner corner for a bright, eye-opening pop. This layering of different finishes within the same color family prevents the look from appearing flat and gives it a sophisticated, polished quality. Even if you're new to this, try using a matte in the crease and adding a corresponding shimmer on the lid—the difference is immediate.
Strategic Placement Defines the Shape
Where you place the color is just as important as what color you use. Beginners often apply shadow evenly across the entire mobile lid, which can fail to flatter the natural eye shape. Professionals use strategic placement to sculpt and define. A core technique involves applying a mid-tone shade as a transition in the crease, a deeper shade on the outer corner of the eye to create depth, and the lightest shade on the inner corner and center of the lid to bring light and focus forward. This purposeful application enhances the eye's natural contours, making them appear larger and more defined, a subtle trick that elevates the entire look from amateur to expert.
The Art of the Seamless Blend
Perhaps the most significant difference between a pro and a beginner is the blend. A beginner’s application might have harsh, visible edges where the color stops and starts. A professional spends significant time blending every layer. Using a clean, fluffy brush, they diffuse the edges of the shadow in soft, circular or windshield-wiper motions until there are no harsh lines. The goal is a seamless gradient that melts into the skin. A pro tip is to blend more than you think you need to. This patient process is what creates that soft-focus, airbrushed effect that looks effortlessly chic.
Balancing the Lower Lash Line
A step frequently skipped by beginners is addressing the lower lash line. Leaving it bare while the upper lid is full of color can make the look feel top-heavy and incomplete. Professionals almost always bring a touch of the eyeshadow down to the lower lash line. Using a small, precise brush, they smudge a bit of the mid-tone or darker shade used in the crease along the outer two-thirds of the lower lashes. This technique balances the eye makeup, creates a cohesive look, and adds a subtle smokiness that makes the eyes appear bigger and more defined.
Framing the Final Look
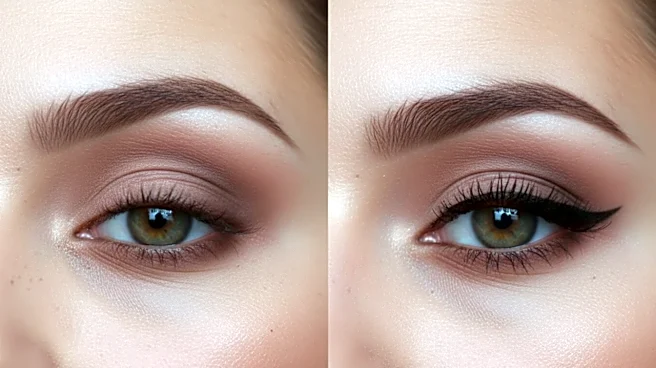
Finally, a professional knows that the eyeshadow is just one part of the puzzle. The most beautiful monochromatic eye can fall flat if it isn't properly framed. This means paying attention to the eyebrows and eyelashes. Pros ensure brows are groomed and filled in to provide a clean frame for the artistry below. They also finish with a deliberate application of eyeliner to define the lash line and several coats of mascara to add volume and lift, which helps the eye color pop. These finishing touches, while seemingly minor, are crucial for pulling the entire look together and giving it that polished, intentional finish.