


The Goal: Dimension, Not Just Color
For many beginners, the primary goal is to fill in the blank space, treating the brow like a coloring book outline that needs to be shaded in. This often results in a flat, one-dimensional block of color that looks heavy and unnatural. A professional
makeup artist, however, thinks differently. Their goal isn’t to fill, but to build. They focus on creating the illusion of depth, texture, and individual hairs. This means some areas will be softer, others more defined, and there might even be tiny gaps left strategically to mimic the look of real brow hair.
The Tools: A Wardrobe vs. A Single Weapon
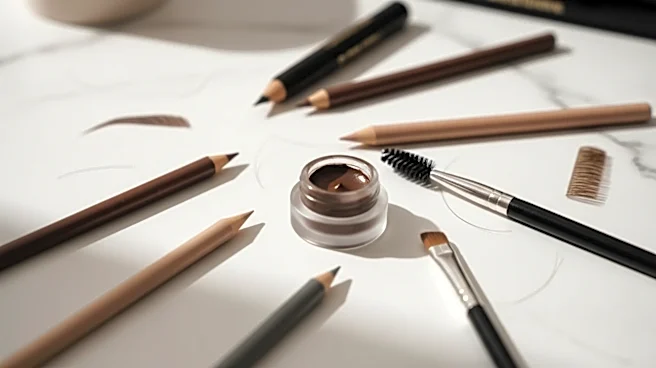
A beginner often relies on a single, all-purpose product—typically a soft, waxy pencil. While convenient, one product can rarely do it all. Pros, on the other hand, build a “brow wardrobe.” This might involve starting with a fine-tipped pencil or a brow pen to create hair-like strokes in the sparsest areas. They then might use a powder to add soft volume and dimension throughout the brow, focusing a lighter shade at the front and a slightly deeper shade from the arch to the tail. Finally, they lock everything in place with a clear or tinted brow gel to add texture and hold. This layering of different formulas and textures is what creates a believable, three-dimensional effect.
The Application: Soft Strokes, Not Harsh Outlines
One of the most telling signs of a beginner's brow is a harsh, geometric outline, especially at the front. Many people start by drawing a sharp boxy shape at the inner corner, which instantly screams “unnatural.” A pro starts much more gently. They often begin applying product in the middle of the brow or at the arch, where the brows are naturally densest. They use the majority of the product here and then work towards the tail. Only with the small amount of product left on the brush or pencil do they flick light, upward strokes at the very front of the brow. This creates a soft, gradient effect where the brow looks fainter and more diffused at the start, gradually getting bolder towards the arch.
The Technique: Mimicking Hair, Not Drawing a Line
When filling in sparse areas, the instinct is to scribble back and forth to deposit color. Professionals use a much more deliberate technique. They use tiny, short, upward flicks that mimic the natural growth direction of the hair. They don't draw long, solid lines. This is especially important for creating a believable shape. Instead of drawing one continuous arch, they build the arch with dozens of tiny individual strokes. A fine-tipped pencil or a specialized brow pen with a forked tip is perfect for this, allowing for the creation of strokes that are almost indistinguishable from real hair.
The Color: A Thoughtful Match, Not Just 'Brown'
Choosing a color that's too dark is one of the most frequent mistakes. It can make brows look severe and overpowering. The common advice is to choose a shade that is one step lighter than your natural brow hair for a soft look, or a perfect match for more definition. Pros also pay close attention to undertones. Most natural brow hairs have a cool, ashy undertone. Many beginner-friendly brow products can lean warm or reddish, which can clash with natural hair color and look obviously like makeup. Testing shades and opting for cool-toned browns, taupes, and soft grays often yields a more realistic result.
The Finish: Setting and Blending
A beginner might fill in their brows and call it a day. A pro knows the final steps are what pull everything together. After applying pencil or powder, a makeup artist will always take a clean spoolie brush and comb through the brows. This does two crucial things: it blends the product for a softer, more seamless finish, and it helps lift and separate the hairs for a fluffier look. The final, non-negotiable step is often a brow gel. A clear or tinted gel not only sets the pencil and powder, preventing smudging, but it also gives the existing brow hairs texture and hold, making them look fuller and more defined.