





1. Check for Symmetry
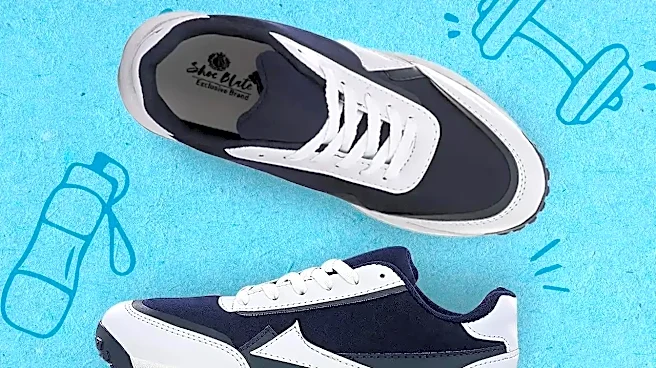
Place the shoes side-by-side on a flat surface. They should be a mirror image of each other. Pay close attention to the height of the heel counters, the shape of the toe boxes, and the placement of every panel. Asymmetry is a common sign of poor quality
control.
2. Inspect the Overall Stance
A well-made shoe should stand perfectly upright without leaning to one side. A tilted stance can indicate issues with the sole's attachment or a poorly constructed last (the mold the shoe is built on), which can affect comfort and durability.
3. Examine the Toe Box Shape
The toe box should have a clean, defined shape that isn't collapsing or overly puffy. On classic court shoes, this shape is iconic. A crushed or misshapen toe box suggests low-quality internal structuring and can ruin the shoe's silhouette.
4. Assess the Leather Quality
High-quality leather feels supple and has a natural grain. Cheap or synthetic leather often feels stiff, plasticky, and may have a chemical smell. Gently bend the shoe; good leather will crease naturally, while poor materials might show signs of cracking.
5. Look at Panel Alignment
Retro sneakers are made of multiple panels of material. On a quality pair, these panels will be cut precisely and aligned perfectly where they meet. Misaligned panels or uneven overlaps suggest rushed production and a lack of craftsmanship.
6. Verify Perforation and Venting Holes
Many court sneakers feature perforation holes on the toe box or side panels for breathability. These holes should be cleanly punched, evenly spaced, and fully open. Messy, clogged, or unevenly spaced holes are a red flag.
7. Check the Tongue's Padding and Position
The tongue should be well-padded and sit centered. A flimsy, under-padded, or crooked tongue is not only a sign of cost-cutting but will also be uncomfortable, sliding to the side during wear.
8. Feel the Heel Counter
The heel counter is the rigid piece inside the back of the shoe that cups your heel. It should feel firm and supportive. A weak or flimsy heel counter won't provide adequate stability and is a clear indicator of a poorly constructed shoe.
9. Inspect the Inner Lining
Run your hand inside the shoe. A quality sneaker will have a smooth lining made from soft, breathable material with no rough seams or bumps. A coarse or poorly finished interior will be uncomfortable and can cause blisters.
10. Scrutinize the Midsole Paint Job
If the midsole has painted details, check for precision. The lines should be crisp and clean. Sloppy paint that bleeds onto the upper or other parts of the sole is a common flaw in low-quality pairs.
11. Examine the Midsole-to-Upper Bond
The seam where the upper connects to the sole unit should be clean and tight with no gaps. This is often a glued seam, and while minor, clean glue lines are acceptable, excessive or messy glue stains are a major defect.
12. Analyze the Outsole Traction
Turn the shoe over. The traction pattern on the outsole should be sharp, deep, and well-defined. On fakes or low-quality shoes, these patterns can appear shallow, soft, or blurry, offering poor grip and faster wear.
13. Count the Stars (On Applicable Models)
For certain iconic models like the Air Force 1, the tiny stars on the outsole's toe and heel are a key detail. On an authentic, well-made pair, these stars are crisp and distinct. On fakes, they often blend together into a blurry texture.
14. Perform a Flex Test
A good shoe should flex with your foot. When you bend the shoe, the primary flex point should be at the ball of the foot. If it bends in the middle of the arch or feels overly stiff, the construction is incorrect and will be uncomfortable to walk in.
15. Look for Stitching Uniformity
Stitching is a clear giveaway of quality. The stitches throughout the upper should be straight, evenly spaced, and tight. Any wavering lines, inconsistent spacing, or loose-looking stitches point to poor craftsmanship.
16. Hunt for Loose Threads
Inspect the beginning and end of every stitch line. A well-made shoe will have no loose or stray threads hanging off. While one tiny thread might be a minor factory flaw, multiple instances suggest a systemic quality issue.
17. Spot Over-Gluing
Examine all the seams for visible glue stains. Quality manufacturing uses adhesive precisely. Smudges of glue on the leather panels or around the sole are a sign of sloppy assembly and are often found on counterfeit or B-grade products.
18. Check Brand Logos and Text
Logos on the heel, tongue, and side should be crisp, properly spelled, and perfectly placed. Look closely at the font and spacing. On fakes, branding is often slightly blurry, misshapen, or misaligned, which is a detail counterfeiters frequently get wrong.
19. Inspect the Eyelets
The eyelets (holes for the laces) should be perfectly aligned and evenly spaced. Whether they are simple punch holes or reinforced with metal, they should be clean and free of rough edges that could fray the laces over time.
20. Assess the Insole (Sockliner)
Remove the insole if possible. A quality insole will have some degree of cushioning and an anatomical shape. A flimsy, flat piece of foam is a sign of cost-cutting. The branding printed on it should also be sharp and clear.
21. Feel the Laces
Even the laces can indicate quality. They should feel substantial and durable, not thin or cheap. The aglets (the plastic tips) should be firmly attached. It's a small detail, but premium brands rarely overlook it.