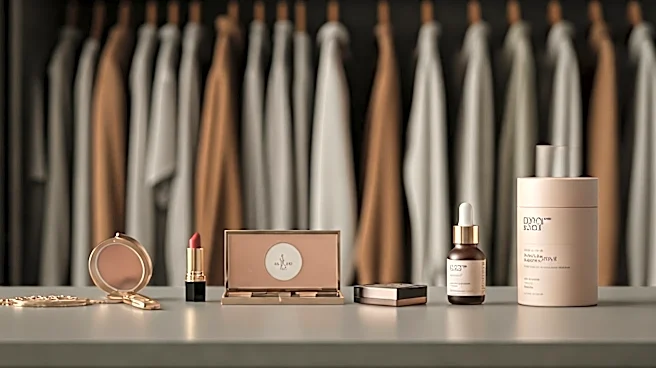


The Pro Philosophy: Sculpt, Don't Paint
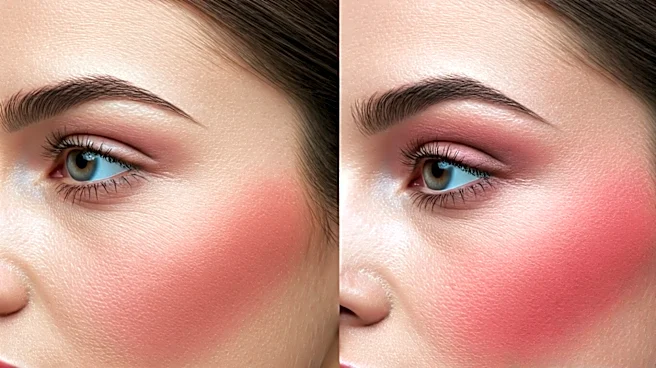
Here's the fundamental difference: A beginner sees blush as a way to add a pop of rosy color. They often default to smiling and swirling a brush on the apples of their cheeks, a one-size-fits-all technique taught decades ago. A professional makeup artist,
however, sees blush as a strategic tool for shaping and defining the face. For them, color is secondary to structure. They use blush placement to create illusions—to lift cheekbones, soften jawlines, or add width where it’s needed. They aren't just adding color; they're manipulating light and shadow to enhance the unique bone structure of their client. This mindset is the game-changer that separates a muddy, misplaced patch of color from an integrated, natural-looking flush.
For Round Faces: Create Angles
A round face is characterized by similar width and length with soft, curved lines. * **The Beginner Mistake:** Placing blush directly on the apples. When you smile, the apples of your cheeks are prominent, but when your face is at rest, that color can drop and drag the face down, emphasizing its roundness. * **The Pro Technique:** Ignore the apples. Instead, find the high point of your cheekbone (closer to your eye) and apply the blush there, blending up and out towards your temple. Imagine drawing a soft checkmark or a 'C' shape from your cheekbone to your brow bone. This upward motion creates a lifting effect, giving the illusion of more defined cheekbones and adding a subtle, angular dimension to the face.
For Square Faces: Soften and Center
A square face features a strong, defined jawline and a forehead and jaw of similar width. * **The Beginner Mistake:** Applying blush in a harsh line under the cheekbone, as if contouring. This only accentuates the angularity and can make the face appear severe or overly sharp. * **The Pro Technique:** The goal is softness. A pro will apply blush directly to the apples of the cheeks, but the key is the blending motion. They use soft, circular motions to diffuse the color, ensuring there are no hard edges. By concentrating the color on the fullest part of the cheek, they draw attention to the center of the face and away from the strong jawline, creating an overall softer, more balanced look.
For Heart-Shaped Faces: Add Balance
A heart-shaped face is wider at the forehead and tapers down to a narrower chin. * **The Beginner Mistake:** Applying blush too high on the cheekbones. This can make the widest part of the face—the forehead and cheeks—appear even wider, exaggerating the V-shape and making the chin look smaller in comparison. * **The Pro Technique:** Pros aim for balance. They apply blush slightly lower than the highest point of the cheekbone, often on the outer part of the apple. Then, they blend outward toward the ear. This technique adds a touch of fullness to the lower part of the cheek, creating harmony between the wider top half and narrower bottom half of the face.
For Oval & Long Faces: Build Width
An oval face is considered balanced, but a long face can benefit from techniques that create the illusion of width. * **The Beginner Mistake:** Blending upward toward the temple. While this is great for lifting, on a long or oval face it can sometimes accentuate the length even more. * **The Pro Technique:** To create width, pros apply blush to the center of the apples and blend it almost horizontally, straight back toward the middle of the ear. This horizontal line breaks up the vertical length of the face, making it appear slightly wider and fuller. It's a subtle trick that maintains balance while preventing the face from looking further elongated.
The Final Touch: An Impeccable Blend
Beyond placement, the ultimate pro secret is the blend. Beginners often use a dense brush, apply too much product at once, and stop blending too soon, leaving obvious stripes or circles. A pro builds color in sheer layers, using a fluffy, less-dense brush. They tap off the excess product before the brush ever touches the skin. Then, they blend, and when they think they're done, they blend some more. They might even use a clean powder brush or a beauty sponge to go over the edges, ensuring the blush melts seamlessly into the skin with no discernible start or end point. That's the real magic: making it look like the flush is coming from within, not sitting on top.