


The Secret Is in the Blueprint
The one step that separates a professional brow shaping from a DIY disaster isn't a fancy wax or a thousand-dollar tool. It's the blueprint. Professionals call it “brow mapping,” and it’s the crucial planning phase that happens before a single hair is touched.
Brow mapping is the technique of using your own unique facial features—your nose, your eyes—to determine the exact points where your eyebrows should start, arch, and end. Instead of just ‘cleaning up’ stray hairs and hoping for the best, mapping creates a customized, symmetrical guide that is perfectly proportioned to your face. It’s the architectural rendering that ensures the final structure is sound, balanced, and beautiful.
Why Mapping Changes Everything
Guesswork is the enemy of great brows. When you tweeze, thread, or wax without a clear guide, you’re making tiny, irreversible decisions in a vacuum. This often leads to the most common brow woes: tadpole shapes, arches that are too high or too far in, and one brow sitting higher than the other. Mapping eliminates this risk. By establishing your three key points—start, arch, and end—you create a ‘safe zone.’ Any hair removal is then done with a clear purpose: to remove what falls *outside* of your ideal shape. It’s a strategic approach that guarantees you won't accidentally take too much off. This method ensures symmetry not just between the two brows, but in how they frame your eyes and harmonize with your entire face.
Your Simple At-Home Mapping Guide
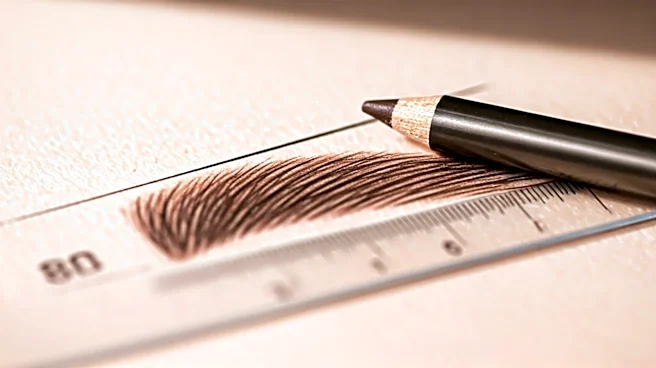
You don't need a pro's toolkit to do this. A straight object like a brow pencil, a makeup brush handle, or even a piece of uncooked spaghetti will work. 1. Find Your Starting Point: Hold your tool vertically against the side of your nose, right at the dimple of your nostril. Where the tool meets your brow line is where your eyebrow should begin. Make a small, faint mark with a brow pencil. 2. Locate Your Arch: Keeping the bottom of the tool anchored at your nostril, pivot it diagonally so it lines up with the outer edge of your iris (the colored part of your eye). Where the tool intersects your brow is the natural high point of your arch. Make another mark here. 3. Determine Your End Point: Pivot the tool again from the same nostril spot, this time lining it up with the outer corner of your eye. Where the tool extends past your eye to your brow bone is where your eyebrow tail should end. Mark this final spot. Once you have your three marks, you can lightly connect them with a brow pencil to outline your ideal shape before you begin grooming.
Tools and Common Pitfalls
The most important tool for shaping after you’ve mapped is a good pair of tweezers. Once your outline is drawn, you can confidently tweeze any hairs that fall outside the lines. If you prefer waxing or threading, the map provides an essential guideline for precise application. The most common pitfall is ignoring the map. People will draw the lines and then get carried away, plucking a hair from *inside* the shape because it looks out of place on its own. Trust the map. It sees the big picture that your up-close-and-personal mirror view can’t. Another mistake is drawing the map with a dark, heavy hand. Use a light-colored or nude pencil and gentle pressure; this is a guide, not the final look.