


Selecting Your Tiles
The foundation of a successful project lies in choosing the right clay roof tiles. Prioritize tiles that are largely intact, free from significant cracks
or damage that could compromise their structure once modified. The dimensions of the tiles you select should correspond with the size of the plants you intend to cultivate; larger tiles lend themselves to more substantial planters, while smaller ones are perfectly suited for housing delicate herbs or resilient succulents. Before you begin any work, it's crucial to ensure the tiles are thoroughly cleaned, free from any residual dirt, dust, or potentially harmful substances that might affect plant life or your crafting process. A careful selection guarantees a sturdier and more visually pleasing final product, ready for its second life.
Tile Preparation Essentials
Once you've gathered your chosen clay roof tiles, the next critical step involves meticulous preparation. Begin by giving each tile a thorough cleaning to banish all traces of accumulated dirt, moss, or debris. A solution of warm water mixed with a gentle, non-toxic detergent is usually sufficient for this task. After washing, allow the tiles to air dry completely; this is vital before any further manipulation or assembly takes place. For an improved finish and enhanced safety, consider lightly sanding any rough edges or sharp corners. This not only creates a smoother surface but also contributes to the overall aesthetic appeal and makes handling the tiles more pleasant during the assembly phase.
Assembling Your Planters
The creative assembly phase allows you to shape your repurposed tiles into functional plant pots. Position a tile into a desired form, such as a 'U' shape or any other configuration that appeals to your design vision, and place it on a stable, flat surface. Employ a robust, waterproof adhesive or a suitable mortar to firmly join the edges, ensuring a secure bond that will withstand the elements. Crucially, you must incorporate drainage. This can be achieved by drilling small holes at the base of the assembled structure or by strategically leaving slight gaps between tile pieces if you're constructing a multi-part planter. Adequate drainage is paramount for the health of your plants.
Drainage and Soil
Effective drainage is absolutely non-negotiable for fostering healthy root development and preventing common plant issues like root rot. Before adding soil, ensure your newly fashioned tile pots feature sufficient drainage outlets at their base. To further enhance this crucial function and provide structural support within the pot, place a layer of small stones or gravel at the bottom. This aggregate layer facilitates water runoff and helps to maintain the integrity of the soil mixture above. Following this, select an appropriate soil mix that is specifically formulated for the type of plants you intend to grow in these unique containers.
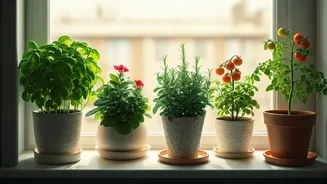
Planting Your Greenery
With your charming repurposed tile pots assembled and their drainage systems perfected, the final step is to introduce your plants. Fill each pot with the carefully selected soil mixture, ensuring it's the right composition for your chosen flora. Gently transplant your seedlings or young plants into their new, rustic homes, making sure to water them thoroughly immediately after planting. Consistent care and regular maintenance, tailored to the specific needs of each plant species, will ensure they thrive in their unique, recycled planters, adding a touch of sustainable charm to your garden.