
Cultural Significance Unveiled
Dot art is far more than just placing dots on a surface; it carries deep cultural roots. Understanding its significance enriches the artistic experience.
Many cultures around the globe have embraced dot art, with unique styles and meanings woven into each piece. Indigenous Australian art, for instance, uses dots to represent landscape features, ancestral stories, and spiritual connections. The meticulous placement of dots creates intricate patterns, each holding symbolic value. These artworks are not merely decorative; they are a visual language communicating history, belief systems, and cultural identity. Appreciating this cultural context elevates the creation process from a mere craft to a meaningful expression of heritage and tradition, and promotes a deeper understanding and respect for the art form.
Color Harmony Explorations
Selecting color combinations is key to creating visually appealing dot art. Consider the mood and message you want to convey when choosing colors. Complementary colors, like blue and orange, provide high contrast and energy, making the artwork stand out. Analogous colors, like blues and greens, create a harmonious and calming effect. When mixing colors, experiment with hues, saturation, and values. Different hues can drastically alter the overall impact of your art; a bright red can evoke passion, while a deep burgundy suggests sophistication. Varying saturation and value adds depth and dimension. Highly saturated colors pop, while muted tones create a softer look. Understanding the interplay of these elements allows you to manipulate the viewer's perception and emotion. Proper color selection can completely transform a piece of artwork, and can convey specific emotional responses based on how the colors are combined.
Materials for Success
Choosing the right materials is essential for success in dot art. Start with a sturdy base, like canvas, paper, or wood panels. These surfaces should be prepared with a primer to provide a smooth base for your dots. For the dotting tools, consider using paint pens, dotting tools, or even the end of a paintbrush. Experiment with different sizes and styles to achieve different effects. Acrylic paints are a popular choice due to their versatility and vibrant colors. They dry quickly and are water-resistant once dry. Avoid using paints that are too watery or thick, as they can lead to uneven dots. Different mediums can also be used with the acrylic paints to alter the effects: a gloss medium can enhance the shine, while a matte medium can soften the color. Consider the surface you are working on and ensure your medium choice is compatible.
Mastering Dot Placement
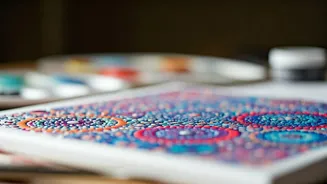
The placement of dots is the heart of dot art. Varying the size, spacing, and arrangement of dots is key to generating texture and visual interest. Start with a grid system to ensure the dots are regularly spaced, especially during the early stages. Use small, uniform dots for detailed, crisp designs. For larger areas, opt for a more freehand approach. Consider the density of the dots; denser areas add depth and shadow, while sparse dots create openness and airiness. Practice creating gradients by gradually changing the dot size or spacing. Use different dotting tools to vary the size of your dots. Experimenting with these techniques allows you to control the visual flow and enhance the three-dimensional effects of your artwork. Remember, practice is crucial. The more you practice, the more skilled you become in dot placement.