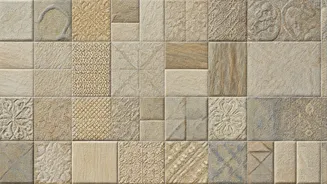


Mosaic Home Transformation
Seed mosaics present an innovative method for injecting character and charm into home decor, offering an alternative to conventional wall treatments. The
use of seeds provides a distinct textural element, setting it apart from other decorative options. Unlike paint or wallpaper, seed mosaics introduce an organic feel, establishing a connection with nature inside your living space. This DIY approach not only elevates aesthetics but also offers an engaging project for those seeking a creative outlet. The tactile quality of arranging and adhering tiny seeds to a surface can prove a therapeutic and fulfilling pastime, resulting in a unique piece of art. Moreover, a seed mosaic project can prove cost-effective, using easily sourced and affordable materials, making it accessible to a wide array of individuals looking to personalize their interiors. Through seed mosaics, you can give your walls a story, and a stunning conversation piece.
Seed Selection Essentials
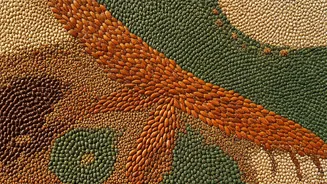
The foundation of a captivating seed mosaic lies in the judicious selection of materials. The choice of seeds directly impacts the aesthetic outcome, influencing color, texture, and overall design. Consider a diverse palette of seeds, which gives you a wider variety of hues, sizes, and forms to work with. Think about various types of seeds, such as small poppy seeds for fine details, lentils for filling larger areas, and pumpkin seeds for a bolder effect. The durability of the seeds is another vital factor to take into account. Seeds must withstand the adhesive and the environment they are placed in, making it crucial to select seeds that are naturally resilient or that can be treated to extend their longevity. Moreover, the sourcing of seeds must be prioritized. Explore local stores, online retailers, and even your own pantry to gather a variety of options. Prioritize the sustainability of your materials, which aligns with the values of eco-conscious home decor and promotes a mindful approach to your art. A well-considered selection process ensures that your seed mosaic reflects your artistic vision and stands the test of time, adding character to your home.
Pattern Design Ideas
Designing the layout for a seed mosaic calls for creativity, meticulous planning, and an understanding of visual composition. Begin by sketching your design on paper, carefully mapping out the arrangement of seeds and color schemes. Consider geometric shapes, abstract patterns, or even representational images. Inspiration can come from nature, art, or personal experiences; the key is to develop a concept that resonates with your style and complements your interior decor. A fundamental step in the design process is to establish a color palette. Think about combining contrasting hues to draw the eye or use monochromatic variations for a more subtle look. Next, transfer your sketch onto the chosen surface, whether it is a board, wall, or any other suitable material, which will act as your canvas. Before you begin assembling, visualize your design by arranging the seeds on the surface, which gives a sense of the final outcome and allows for adjustments. The design should take into account the size of the seeds. For instance, tiny seeds are ideal for fine lines, while large seeds can make striking focal points. Consider the spacing between the seeds; this affects the texture and visual density of your mosaic. By applying a well-planned design, you not only ensure aesthetic appeal but also facilitate a streamlined assembly process.
Mosaic Assembly Process
The assembly phase demands patience, care, and a systematic approach to turn your design into reality. Before you begin, gather the essential tools and materials: the selected seeds, a surface to adhere to, adhesive, tweezers for precision, and a protective sealant. Consider suitable adhesive. The adhesive must be strong enough to bond the seeds and surface; it should also be compatible with the materials used. The application of the adhesive is a crucial step. Apply a thin, consistent layer to a small portion of your design area and carefully begin placing the seeds. Tweezers are helpful for maneuvering individual seeds. You may vary the amount of adhesive, and the time you wait to apply seeds, depending on the type of adhesive, the seed, and the surface. Begin with the outline of your design and then fill in the inner areas, working section by section to avoid the adhesive from drying. Once the assembly is complete and the adhesive is dry, apply a protective sealant to safeguard your mosaic from moisture and wear. This sealant should be clear and non-toxic, and it will prevent seeds from loosening. By meticulously following these steps, you will be able to transform simple materials into a unique mosaic.