
Choosing the Pebbles
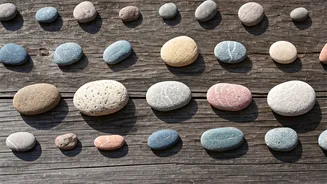
The foundation of successful pebble art lies in the selection of the right materials. This process starts with identifying the most suitable pebbles. Consider
factors such as size, shape, and color. Smooth, rounded pebbles work best for wall art, as they are easier to handle and adhere. Explore different types of pebbles, from river rocks to beach stones. River rocks, with their smooth surfaces, provide an excellent canvas for various designs. Beach stones, on the other hand, offer unique textures and colors, adding depth and character to your artwork. The size of the pebbles must align with the size of your artwork; larger pebbles might be better suited for larger pieces and vice versa. Inspect the pebbles carefully, selecting those that are clean and free from cracks or damage. Gathering your pebbles can be a creative activity. You can source them from beaches, riverbeds, or even purchase them from craft stores. Consider the natural colors and patterns of the pebbles, as these elements can become integral parts of your designs. Remember that the pebbles' size and shape will influence your creative options, impacting the overall appearance of the finished product. To begin, thoroughly wash and dry all of your chosen pebbles before starting any project. This will remove any dirt or debris that could interfere with adhesion and the final look of your artwork. Careful selection ensures not only aesthetic appeal, but also improves the ease of the entire artistic process, which includes design and mounting.
Design Your Masterpiece
Once you have your pebbles, the design phase kicks off. First, choose the size and shape for your pebble art. Think about the wall space where it will hang. Consider whether you want to craft a small, focused piece or a larger, all-encompassing design. Next, sketch your design on paper. This initial step lets you plan the arrangement of the pebbles, experimenting with shapes, patterns, and color combinations without actually gluing anything. Some artists use software to visualize their designs. Alternatively, use graph paper, dividing the area into a grid to help visualize pebble placement. Think about themes that appeal to you. Nature-themed art, depicting landscapes or animals, is a popular choice. Another option is abstract art, where shapes and colors take center stage. Decide on the layout of your pebble art. This means determining the arrangement of the pebbles. Experiment with various layouts, such as linear arrangements, geometric patterns, or free-form compositions. Consider the negative space, which is the area around the pebbles. This empty space can contribute to the overall balance and visual interest of your artwork. Select the colors and textures of your pebbles to complement your design. Think about the mood you want to create. Soft, muted colors can evoke a sense of calm, while bright, vibrant colors can bring energy. Create a test layout of your design before applying the adhesive. Lay your pebbles on the surface you will be using and make final adjustments to the design. This step helps to identify potential issues or areas for improvement, and ensures you're satisfied with the overall arrangement before adhering the pebbles.
Mounting for Durability
The method you use to mount your pebble art is crucial for its longevity. Start by selecting the right adhesive. Choose an adhesive that is waterproof and strong enough to secure the pebbles. Options include epoxy resin, construction adhesive, or a strong craft glue. Consider the base material for your artwork. A sturdy backing, such as plywood, MDF board, or a canvas, is recommended. Prepare the base by cleaning it to remove any dust or debris. Then, apply the adhesive to the back of each pebble, following the design you have prepared. Place the pebbles onto the backing, pressing them firmly to ensure they adhere well. Work slowly, allowing the adhesive to set according to the manufacturer's instructions. Keep in mind that epoxy resins often take several hours or even days to fully cure. Make sure the artwork is kept flat during the curing process. Once the adhesive has cured, consider adding a protective sealant. Sealants can shield the art from moisture, UV rays, and general wear and tear, and may also enhance the colors of the pebbles. There are various sealants available, including clear acrylic sealants or epoxy resins. After the sealant has fully dried, your pebble art is ready to be hung. Use appropriate hanging hardware, such as picture hanging hooks or D-rings. Make sure the hardware is securely attached to the back of the artwork, and that it can support the weight of the artwork. Finally, choose the right location for your pebble art. Avoid direct sunlight and areas prone to excessive moisture to preserve your artwork. This will contribute to the long-term beauty and endurance of your piece.
Maintenance and Longevity
Taking care of your pebble art ensures its continued beauty and durability over time. Clean your pebble art regularly to prevent dust and grime from accumulating. Use a soft, dry cloth or a gentle brush to remove dirt. If the artwork is exposed to moisture, wipe it with a damp cloth and then dry it thoroughly. Avoid harsh chemicals or abrasive cleaners, as these can damage the pebbles or the adhesive. Check the artwork periodically for any loose pebbles. If you find any, you can re-glue them with a suitable adhesive. If the artwork is exposed to direct sunlight, its colors might fade over time. Consider placing your artwork in a location that is shaded from direct sunlight. To protect your artwork from the elements, you might consider adding a protective sealant. This sealant can guard against moisture, UV rays, and other environmental factors. If your artwork is displayed outdoors, make sure to use a weather-resistant sealant. Inspect the hanging hardware regularly to ensure it is secure. Over time, the hardware can loosen or fail, so check it often and replace any hardware that shows signs of wear or damage. Proper care and maintenance are simple, but will extend the life of your pebble art. By following these suggestions, you'll be able to preserve the visual appeal of your artwork and enjoy it for many years to come. Remember to address any issues promptly, so you can maintain its integrity.