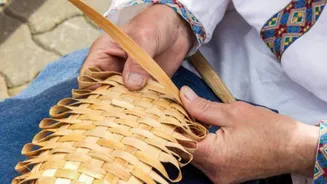


Gather Your Supplies
Embarking on the journey of creating your own Maasai sandals begins with assembling the right materials. You'll primarily need durable leather strips or
a flexible rubber material to fashion the sandal's sole, ensuring a comfortable foundation. For the characteristic Maasai aesthetic, procure an assortment of colorful beads and sturdy threads that can withstand wear and tear. Essential for binding the components together are a strong adhesive specifically designed for footwear or robust stitching tools. It's advisable to select leather that is supple and pliable, allowing it to conform gracefully to the contours of your feet for optimal comfort. These crafting essentials are readily available at most local craft supply stores or can be conveniently ordered online, making the acquisition process straightforward for any aspiring sandal maker.
Precise Foot Measurements
Achieving a perfect fit is paramount when crafting any footwear, and Maasai sandals are no exception. Begin by meticulously measuring both the length and the width of your foot. These precise dimensions will dictate the exact size and shape of the sole you need to cut from your chosen material, whether it's leather or rubber. Equally important is determining the appropriate length for the straps. These should be substantial enough to wrap securely around your foot, providing stability and support during movement, without being so constrictive that they cause discomfort. Careful attention to detail during this measurement and cutting phase ensures that all the individual components will integrate seamlessly, resulting in a well-fitting and functional sandal.
Assembling the Base
With your materials prepared and measurements finalized, the next crucial step involves the foundational assembly of your sandal. This typically starts with affixing the cut sole to the main body of the sandal. You can achieve a strong bond using a high-quality adhesive formulated for flexible materials or by employing traditional stitching methods, ensuring durability. Following this, attention shifts to securing the straps. These can be adhered directly to the sole or meticulously sewn into place, depending on your chosen method and the desired aesthetic. It's vital to position each strap strategically, ensuring it offers adequate support for your foot and contributes to the overall stability of the sandal when you walk, laying the groundwork for both comfort and longevity.
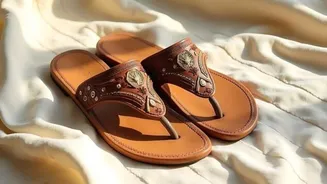
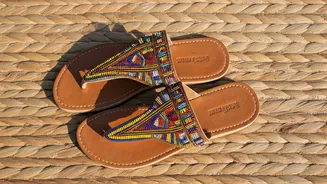
Adding Maasai Flair
To imbue your homemade sandals with the authentic and vibrant spirit of Maasai artistry, the decorative embellishment stage is where your creativity truly shines. This is your opportunity to infuse the sandals with unique character and visual appeal. You can skillfully thread colorful beads along the length of each strap, adding intricate patterns and a touch of sparkle that catches the eye. Alternatively, consider wrapping vibrant threads around specific sections of the sandal, introducing fascinating textural contrasts and bold splashes of color. This personalized touch not only enhances the aesthetic but also allows you to tailor the final design to perfectly match your individual style preferences, transforming a simple sandal into a wearable piece of art.
Final Fitting and Refinements
The penultimate stage of your DIY sandal-making process involves a critical trial fitting. Once your sandals are fully assembled and decorated, slip them on to assess their comfort and overall fit. This is the moment to identify any areas that might require adjustment. You might need to carefully trim away any excess material from the straps to ensure a snug yet comfortable fit, or perhaps reposition decorative beads if they interfere with comfort or aesthetics. Thoroughly testing your creation allows you to fine-tune the design, guaranteeing that the finished product is not only visually appealing but also highly functional and comfortable for everyday wear, ensuring you achieve the perfect balance of form and utility.