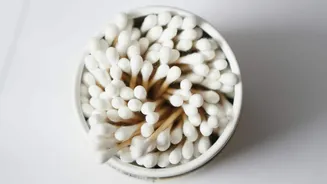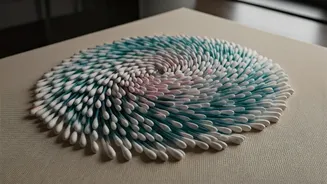


Gather Your Supplies
Embark on your artistic journey by assembling the necessary materials for your cotton swab masterpiece. The foundation of this craft relies on readily
available and budget-friendly items. You'll need a generous quantity of cotton swabs, as these will form the texture and design elements of your artwork. Select a suitable base for your creation; this could be a stretched canvas for a more traditional feel or a piece of sturdy cardstock for a lighter option. Adhesive is crucial for securing your swabs; a strong craft glue will ensure your design stays intact. Lastly, consider paint. While cotton swabs can be used in their natural white state, adding color with acrylics, watercolors, or spray paint can elevate your piece dramatically, offering a vast spectrum of visual possibilities. Having an assortment of brushes and perhaps some stencils on hand can also be beneficial for the painting stage. This simple collection of items forms the toolkit for an imaginative and impactful art project, proving that beautiful decor doesn't require expensive supplies.
Design Your Vision
Before you begin affixing cotton swabs, dedicating time to conceptualizing your design is paramount for a cohesive and visually appealing outcome. The possibilities for patterns are virtually limitless, ranging from intricate geometric arrangements and delicate floral formations to bold abstract expressions. To ensure your vision translates effectively onto the canvas or paper, it's highly recommended to sketch your intended design first. This preparatory step allows you to visualize the final composition, experiment with different layouts, and make any necessary adjustments to the scale or placement of elements before committing them with glue. Think about the overall aesthetic you wish to achieve – do you want a minimalist piece, or something with abundant texture and detail? Considering how the light will interact with the raised surfaces of the swabs can also inform your design choices, leading to a more dynamic final artwork. A well-thought-out plan prevents potential frustrations and ensures a more satisfying creative process.
Applying the Swabs
Once your design is finalized and sketched, the hands-on process of applying the cotton swabs to your chosen base can commence. It's advisable to start your application from one corner of your canvas or paper and gradually work your way across the surface. This methodical approach helps maintain the integrity of your design and prevents accidental dislodging or misplacement of already glued swabs. For added textural depth and visual interest, don't hesitate to experiment with cotton swabs of varying lengths or by trimming them to create different effects. Patience is an indispensable virtue during this stage; take your time to ensure each swab is securely adhered and positioned precisely according to your plan. Consider the spacing between swabs – tighter arrangements can create a more solid appearance, while wider spacing might lend a lighter, airier feel. This careful application forms the tactile foundation of your wall art, transforming individual cotton buds into a unified and engaging surface.
Adding Color and Finish
With all the cotton swabs firmly in place and dried, the transformative stage of adding color and completing your artwork begins. This is where your piece truly comes to life and gains its unique personality. You have the flexibility to paint directly onto the cotton swabs, allowing for a seamless blend of color across the entire surface, or you can opt for a more striking contrast by painting only specific swabs or sections. Alternatively, consider using pre-colored cotton swabs for a more immediate and varied chromatic effect throughout your creation. Once the paint is completely dry, take a step back and critically assess your work. Are there any areas that could benefit from additional detail, such as subtle outlines to define shapes or small accent colors to highlight certain elements? Carefully adding these final touches can enhance the overall impact and polish of your DIY wall art, preparing it to be proudly displayed as a testament to your creativity and resourcefulness.