


Initial Planning Phase
Before diving into wallet creation, a well-defined plan sets the foundation. It begins with 'What's the Story?' - the overall design and functionality
of the wallet. Next comes the 'Planning Stage', where you decide on dimensions, compartments, and the wallet's purpose. This stage ensures you select appropriate materials and estimate required quantities. It's also where you consider personal touches like pockets for cards or coins, aiming for an elegant and functional accessory. Consider the desired style: minimalist, classic bifold, or something more unique, guiding material choices and construction techniques.
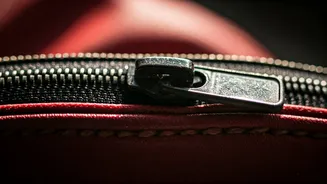
Material Selection Matters
The materials determine the wallet's look, feel, and durability. Material collection is crucial, starting with the primary wallet body. Leather is a popular choice for its longevity and aesthetic appeal. Fabric, canvas, or even repurposed materials such as bicycle inner tubes can be used, with each imparting a distinct character. Sourcing bicycle inner tubes is a creative option, offering a unique texture and sustainability aspect. Along with the main material, you will need lining materials, thread, and possibly reinforcement components. Carefully consider material thickness, flexibility, and resistance to wear and tear to build a long-lasting wallet.
Designing Your Wallet
Wallet design goes beyond simply choosing materials; it's about crafting a practical and aesthetically pleasing accessory. Start by visualizing the wallet's layout: how many card slots, compartments for cash, and any additional features. 'Designing your wallet' is a process of sketching, measuring, and refining. Consider the dimensions that suit your needs and style. A well-designed wallet balances functionality and form, optimizing space without compromising comfort or aesthetics. Explore different design concepts, experimenting with shapes, folds, and closures. Creating a template helps in precise cutting and assembling of materials, ensuring a professional finish.
Cutting and Assembly
Once the design is finalized and the materials are sourced, it's time to start the physical construction. 'Cutting and assembling materials' is where your design comes to life. Begin by transferring your template to the chosen material, marking the precise dimensions for each component. Using sharp tools, carefully cut out the wallet pieces. Precise cutting is crucial for a well-fitting and professional-looking wallet. After cutting, the assembly begins. This involves techniques like gluing, sewing, or both, depending on the material and design. Attention to detail ensures seams are straight, edges are aligned, and the wallet components fit together seamlessly, creating a durable and attractive end product.
Finishing and Personalization
The finishing touches elevate your wallet from a simple item to a personalized statement. 'Finishing touches and personalization' includes refining edges, smoothing surfaces, and adding design elements. Leather edges might be burnished or painted for a polished look. You can apply protective coatings to the materials. Consider adding custom features such as a monogram, stitching patterns, or unique hardware. Personalization adds a unique character to the finished product, making the wallet reflect its creator's style and intention. These final steps involve techniques that can enhance durability and enhance the wallet's aesthetics.
Final Steps & Review
The final steps ensure your wallet is functional, stylish, and durable. Reviewing your work for any imperfections ensures a high-quality product. Carefully examine all seams and edges to prevent any fraying. The 'final steps' involve double-checking all compartments, ensuring cards and cash fit comfortably. If sewing, inspect the stitches for neatness and strength. Consider adding a protective sealant to the wallet’s surface. Once the final checks are complete, your handcrafted wallet is ready. This detailed review ensures the finished product aligns with your vision, showcasing your craftsmanship.