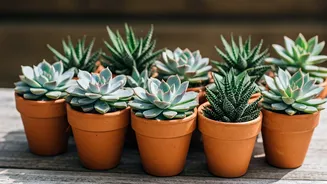


Choose the Rhizomes
Begin your ginger-growing adventure by selecting the right rhizomes. Head to your local market and look for fresh ginger roots. Look for plump, firm rhizomes that
are free from wrinkles or mould. Ensure they have visible “eyes” or buds, which are the growth points. Aim for pieces that are thumb-sized, as one root can yield around 4-6 plants. It's a great idea to purchase the rhizomes in winter and plant them in spring when the weather is warmer. This will help provide the perfect conditions for your ginger to thrive. Careful selection of the rhizomes is a vital step in making sure you will have a good harvest. Taking the time to pick out the best ones will give your plants the best chance of survival. With the right selection, you will be well on your way to a successful ginger harvest, so choose wisely and be patient.
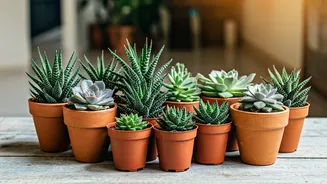
Prep for Planting
Before planting, give your ginger roots a little prep. Cut the rhizomes into sections, ensuring each piece has 2-3 eyes. Use a clean knife to prevent any potential rot. Place the cut pieces in a shady spot for a day or two to let the cuts callus over, which reduces the risk of infection. Afterward, soak the pieces in lukewarm water for about 12 hours to awaken the buds. You can also dust the cuts with cinnamon powder, which acts as a natural antifungal agent. This step gets your ginger primed and ready for planting, so you can increase your chances of a successful harvest. By ensuring that your ginger is prepared, you're setting the foundation for a flourishing plant. You can prevent any issues before they even begin. So, take your time with these preparations, and get ready to plant your ginger.
Create the Mix
Ginger thrives in a well-draining environment, so make sure your soil is perfect. Get a deep pot, about 12-15 inches wide and tall. This could even be an old bucket with holes drilled into it. For the soil mix, combine 50% compost, such as vermicompost or cow dung manure, with cocopeat, garden soil, and sand. This mixture should be loamy and well-draining, and the pH should ideally be between 5.5 and 6.5. Fill the pot halfway, leaving room for growth. If you don't have a garden, don't worry! Windowsill pots work great indoors too. Proper soil preparation is essential for healthy ginger growth. By following this guide, you will be well on your way to success in your ginger-growing journey. Creating the perfect potting mix is a crucial step towards your first harvest. Following these steps and tips can give your ginger the best start and ensure that you get a healthy harvest.
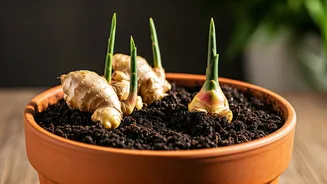
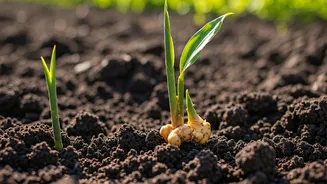
Plant the Rhizomes
Now, it's time to plant your ginger. Bury the rhizomes 2-4 inches deep, ensuring the eyes face upwards or sideways. Space them 6-8 inches apart. After planting, gently firm the soil around them, but avoid compacting it. Water thoroughly until water drains out from the bottom, and then keep the soil moist but not waterlogged. Place your pots in a location with partial shade or morning sun, ideally getting about 4-6 hours of sunlight. If you're growing indoors and the nights get below 20°C, you might want to use a heat mat to keep the soil warm. Following these planting instructions is key to helping your ginger plants grow properly. This will provide the roots with the best environment for a healthy start. With proper care, your ginger will have the best start, and your garden will flourish.
Nurturing Phase
Once planted, ginger needs some nurturing during the sprouting phase. Patience is key, as shoots usually start popping up within 2-4 weeks. The ideal temperature range for optimal growth is between 25-35°C. To maintain humidity, mist the leaves daily. Water when the top inch of soil dries out. After about a month, when the shoots reach 4-5 inches tall, it's time to transplant them to bigger pots if you started small, ideally one or two plants per 20-litre container. If your plants start to get leggy, you can snip off the excess for tea while you wait. With consistent care, your ginger will continue to grow and flourish. Providing the right environment will ensure your ginger sprouts into healthy plants. By giving your ginger these essential things, you'll be one step closer to your first ginger harvest.
Ongoing Care
Proper care is essential to keep your ginger plants happy and thriving. Mulch with dry leaves to help lock in moisture. Water consistently, providing deep watering twice a week during the summer months, and less during the monsoon season. You should feed the plants monthly with compost tea or a balanced NPK (10-10-10) fertilizer, diluted as instructed. Keep a watchful eye for spider mites or any signs of yellowing. It's a good idea to prune away any dead leaves to boost energy downwards. Ginger plants usually reach a height of 60-90cm in about 6-8 months, becoming lush and lovely. Following this care plan will ensure your ginger plants remain healthy and happy. With proper care, your ginger will grow beautifully and make your garden a sight to behold. A little extra care now will help ensure a successful and rewarding harvest.
Harvest the Bounty
After about 8-10 months, when the leaves start to turn yellow and die back, it's time to harvest. Gently unearth the ginger. If you're harvesting young ginger, it will be pink and tender after about 4 months. Mature ginger, on the other hand, will be golden, which takes around 9 months. You can leave some rhizomes in the soil to replant for an endless supply of ginger. Allow the harvested ginger to cure in the shade for a couple of days to toughen up the skins. Once cured, you can store it in the fridge or dry it for powder. Typically, you can get about 500g-1kg of ginger from one pot. Once your ginger is fully grown, it’s time to harvest and enjoy all of your hard work. You can then use your own fresh ginger in your cooking, and enjoy it. The rewarding journey of growing ginger will make you want to grow more in the future.