





Embrace the Rustic Galette
The secret to a bakery-style tart without a tart pan is to make a galette. A galette is a French, free-form tart where the pastry is simply rolled out flat on a regular baking sheet and the edges are folded up around the filling. This isn't a compromise; it's a style. The charm of a galette lies in its rustic, imperfect beauty. There's no need to fuss with fitting dough into a fluted pan. All you need is a standard baking sheet lined with parchment paper, which makes for easy cleanup and seamless transfer. This approach celebrates the handmade look and delivers all the flavor and texture of a traditional tart with a fraction of the stress.
An All-Butter Crust is Your Foundation
A truly memorable tart starts with a phenomenal crust. An all-butter pastry provides the richest flavor
and the most delicate, flaky layers. The key to a perfect crust is keeping your butter extremely cold. Dice one stick (1/2 cup) of very cold, unsalted butter and work it into about 1 1/2 cups of all-purpose flour, a tablespoon of sugar, and a pinch of salt. You can use a pastry cutter, two knives, or even your fingertips to rub the butter into the flour until it resembles coarse crumbs with some pea-sized pieces of butter still visible. Slowly add ice-cold water, just a tablespoon at a time, until the dough comes together. Form it into a disk, wrap it in plastic, and let it chill in the refrigerator for at least an hour. This resting period is crucial for a tender, flaky result that’s easy to roll.
Build a Flavorful, No-Fuss Filling
For the best flavor and texture, use a mix of apples. Combining a tart apple like Granny Smith with a sweeter, firm variety like Honeycrisp, Fuji, or Jonagold creates a more complex and balanced filling. For one tart, you'll need about three to four medium apples, peeled, cored, and sliced thinly. In a bowl, toss the apple slices with about 1/3 cup of sugar, a teaspoon of cinnamon, a pinch of nutmeg, and a squeeze of fresh lemon juice to prevent browning. Some bakers swear by pre-cooking the filling briefly in a pan with a little butter to soften the apples and release some of their moisture, which helps prevent a soggy bottom crust. Let the mixture cool before assembling the tart.
The Art of the Fold and Bake
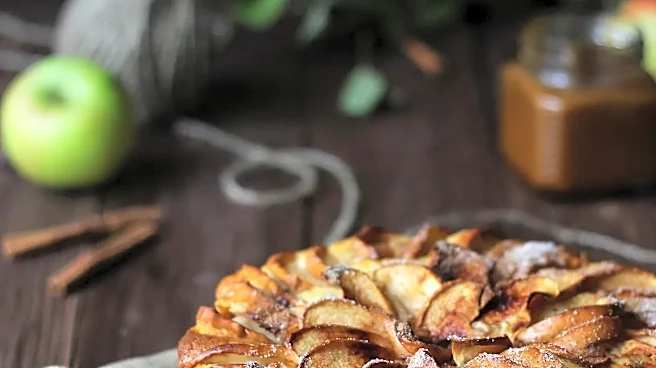
Once your dough is chilled, let it sit at room temperature for about 10 minutes to become pliable. On a lightly floured piece of parchment paper, roll the dough into a large circle, about 12 to 14 inches in diameter. Don't worry about perfect edges. Transfer the parchment with the dough onto your baking sheet. Arrange the cooled apple slices in the center, leaving a 2- to 3-inch border all the way around. Now, for the signature fold: gently lift the edges of the dough and fold them over the outer edge of the filling, pleating the dough as you go. This border will hold in all the juices. For an extra-professional finish, brush the crust with a beaten egg and sprinkle it with coarse sugar for a beautiful golden color and crunch. Bake in a preheated oven at around 375-400°F for 35 to 45 minutes, or until the crust is deeply golden and the apple juices are bubbling.
The Finishing Touch: A Simple Glaze
What separates a good tart from a great one is often the finish. To get that enticing, bakery-window shine, all you need is a simple glaze. A classic method is to warm a few tablespoons of apricot preserves with a teaspoon of water in a small saucepan until it becomes loose and brushable. Gently brush this warm glaze over the apples as soon as the tart comes out of the oven. This not only adds a beautiful sheen but also a subtle, fruity sweetness that complements the apples. If you don't have apricot preserves, a simple apple jelly will also work wonderfully. Let the tart cool on a wire rack for at least 20 minutes before slicing; this allows the filling to set.