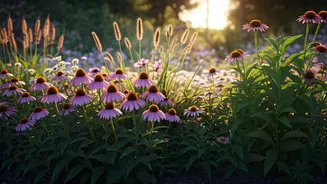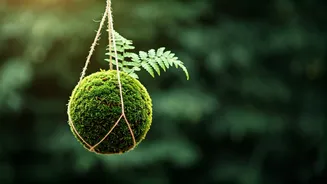


What Exactly Is Kokedama?
Kokedama translates literally to "moss ball" ("koke" meaning moss and "dama" meaning ball). It’s a centuries-old Japanese garden art form that is related to bonsai. The practice involves taking a plant, freeing its roots from a container, and encasing
them in a special soil mixture that’s then covered with moss and bound with string. The result is a self-contained, pot-less plant that can be displayed on a decorative dish or, more strikingly, hung from the ceiling. It’s a simple, meditative project that allows you to connect with nature while creating a unique piece of living decor.
Gather Your Supplies
Before you start, you’ll want to have everything ready. This project can get a little messy, so lay down some newspaper or work outside if you can. Here's your shopping list: * **A small plant:** Choose a resilient, easy-care plant (more on this next). * **Bonsai soil:** This has excellent drainage and structure. * **Peat moss:** This helps retain moisture. * **Sphagnum moss:** To wrap the inner soil ball and help with water retention. * **Sheet moss (optional but recommended):** For that classic, lush green exterior. * **Twine, fishing line, or decorative string:** To bind the moss ball together. * **A mixing bowl and water.**
Step 1: Choose the Right Plant
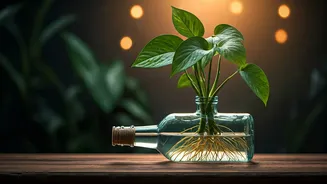
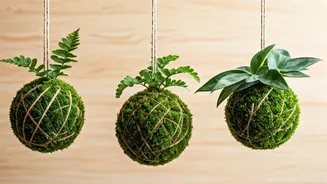
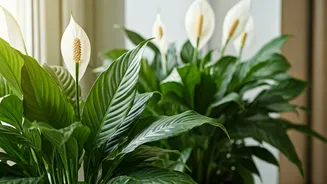
Success starts with selecting a plant that can thrive in a moss ball environment. You’re looking for plants that don't mind their roots being a bit snug and can handle the unique watering cycle. For beginners, humidity-loving, low-light tolerant plants are fantastic choices. Think about grabbing a small golden pothos, a spider plant, a philodendron, a bird's nest fern, or even an orchid. Avoid succulents or cacti, as they prefer dry conditions that are the opposite of what a moss ball provides. Gently remove the plant from its nursery pot and dust off any excess soil, being careful not to damage the root system.
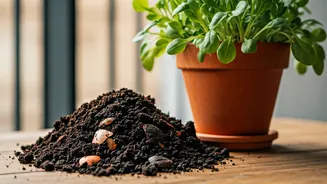
Step 2: Create Your Soil Ball
In your mixing bowl, combine roughly 7 parts bonsai soil with 3 parts peat moss. Slowly add water and mix with your hands until you have a consistency like thick clay or dough—it should hold its shape when you squeeze it. This is your 'mud pie' moment! Take a handful of the mixture and flatten it into a pancake in your palm. Place the bare roots of your plant in the center and gently fold the soil pancake around them, adding more soil as needed to form a firm, compact ball that completely encases the roots. Squeeze out any excess water until it’s no longer dripping.
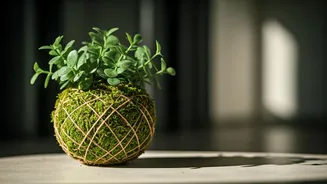
Step 3: Wrap It in Moss
Now it's time to wrap your soil ball. First, take your pre-soaked sphagnum moss and press thin layers of it around the entire soil ball, creating a fuzzy covering. This layer is crucial for moisture management. If you’re using sheet moss for the exterior, soak it and wring it out. Carefully press the green sheets of moss onto the sphagnum layer, patching them together to cover the entire sphere. Don't worry about it being perfect; the string will hold it all together.
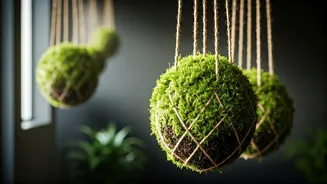
Step 4: Secure with String
This is where your Kokedama gets its signature look. Cut a very long piece of twine or string. Hold the end of the string against the moss ball and begin wrapping it firmly around the sphere in various directions—horizontally, vertically, and diagonally—as if you're wrapping a gift. The goal is to secure the moss tightly. Once you feel it’s secure, you can tie off the string and trim the excess. To create a hanger, simply leave a long piece of string at the end, form a loop, and tie a secure knot.
Caring for Your Creation
Watering your Kokedama is the most important part of its care. The best method is soaking. When the moss ball feels lightweight and dry to the touch, submerge it in a bowl of room-temperature water for about 10-20 minutes, or until it’s fully saturated and stops releasing air bubbles. Gently squeeze out the excess water and let it drip for a bit before re-hanging. The frequency will depend on your home's humidity and the plant's needs, but a good starting point is once a week. Hang your Kokedama in a spot with indirect light that suits your chosen plant, and enjoy your new piece of living art.