


First, What Is a 'Money Plant'?
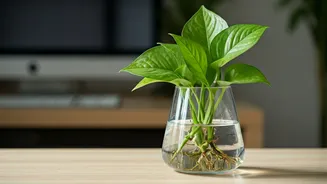
While several plants go by the name "money plant," the one we’re talking about is *Epipremnum aureum*, better known as Pothos. With its glossy, heart-shaped leaves and vining habit, Pothos is the go-to for beginners and a favorite for this project. Why?
It's incredibly forgiving and famously easy to propagate in water. It thrives in a variety of light conditions, tolerates occasional neglect, and is an expert at telling you what it needs. Its reputation for bringing good fortune and prosperity is a charming bonus, but its real value lies in its resilience and effortless beauty. You don't need a green thumb—Pothos has a will to live that does most of the work for you.
Gather Your Simple Supplies
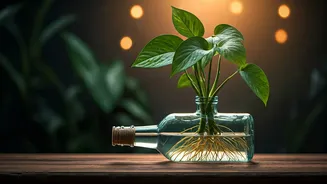
You don't need a high-tech lab to pull this off. The beauty of this "hydroponic" hack is its simplicity. In this context, hydroponics just means growing a plant in water without soil. Here’s your short shopping list: * **A Glass Bottle or Jar:** Choose something with a narrow-enough neck to support the plant cutting but wide enough to allow roots to grow. A clear bottle lets you watch the roots develop, which is part of the fun. An old olive oil bottle, a stylish kombucha bottle, or a small vase works perfectly. * **A Pothos Cutting:** If you have a friend with a Pothos, ask for a small cutting. If not, you can buy a small starter plant from any nursery or big-box store and take cuttings from it. * **Clean Water:** Tap water is usually fine, but letting it sit out for 24 hours allows chlorine to evaporate, which is healthier for the plant's new roots. * **Sharp Scissors or Pruners:** For making a clean cut on the mother plant.
Step 1: Take a Healthy Cutting
The success of your project starts with a good cutting. Look for a healthy, mature vine on the mother plant. Using your sharp scissors, snip off a 4- to 6-inch section of the vine. Your cut should be made about a quarter-inch below a "node." A node is a small brown bump on the vine where a leaf grows from. This is the critical spot where new roots will sprout. Your cutting should have at least two or three leaves on the upper part and one or two nodes on the lower part. Once you have your section, gently remove any leaves on the bottom half of the stem that would otherwise be submerged in water; they will rot and foul the water if left on.
Step 2: Prep Your Bottle and Plant
This step is simple but important. Make sure your chosen bottle is sparkling clean. Any lingering residue or bacteria can harm the delicate new roots. A quick wash with hot, soapy water and a thorough rinse is all it takes. Next, fill your clean bottle with the dechlorinated or filtered water, leaving about an inch of space at the top. Now you're ready for the main event. Take your prepared Pothos cutting and gently place the cut end into the bottle. Ensure that at least one or two of the bare nodes are fully submerged in the water, as this is where the magic happens. The remaining leaves should be well above the water line, resting comfortably on the bottle’s rim.
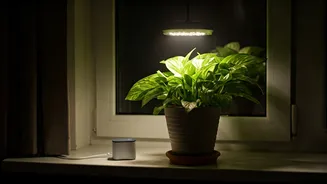
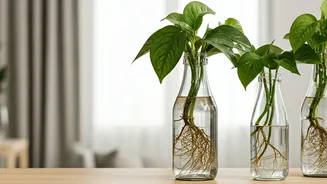
Step 3: Provide Light and Patience
Place your new creation in a spot that receives bright, indirect light. A desk a few feet from a window is perfect. Direct, scorching sunlight can burn the leaves, while a dark corner will slow down root growth. Now comes the hardest part: waiting. You should start to see little white roots emerge from the nodes within one to three weeks. It’s a fascinating process to watch through the clear glass. To keep your plant happy, change the water every one to two weeks to replenish oxygen and prevent algae growth. Just carefully remove the plant, rinse the bottle, and refill with fresh water. Once the roots are a few inches long, you can add a very diluted, water-soluble fertilizer once a month to provide nutrients, but Pothos will often grow for years in plain water without any fuss.