Why Rainwater Reigns Supreme
At first, it sounds a little extra. Your plants are doing just fine with tap water, right? Probably. But switching to rainwater is less about fixing a problem and more about upgrading to first class. Tap water is treated for human consumption, which means
it contains chlorine and sometimes chloramine to kill bacteria. It can also be “hard,” loaded with dissolved minerals like calcium and magnesium. Over time, these chemicals and minerals can build up in the soil, affecting its pH and potentially stressing sensitive plants like calatheas, ferns, and carnivorous plants. Rainwater, on the other hand, is nature’s default. It’s naturally soft, free of treated chemicals, and has a slightly acidic pH that most houseplants absolutely love. This acidity helps plants absorb nutrients more efficiently from the soil. Think of it as the difference between a highly processed meal and a fresh, organic one. Both provide calories, but one offers a lot more of the good stuff.
Your Simple Guide to Rain Harvesting
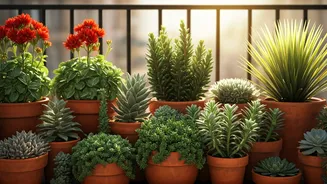
You don’t need a complicated cistern system to get started. The easiest method is simply placing a clean bucket, tub, or large bowl outside during a downpour. If you live in an apartment with a balcony, this is your go-to move. Let it fill up, bring it inside, and you’ve got a ready supply. For homeowners who want to level up, a rain barrel is the classic solution. These connect directly to your home’s downspout and can collect 50 gallons or more from a single storm. You can find them at most hardware and garden supply stores. Before you buy, a quick search on your state and local rules is a good idea, but rest assured, small-scale collection for gardening is legal and encouraged in almost all of the U.S. The key is to start simple. Collect a small amount on your patio first. Once you see how your plants respond, you can decide if a bigger setup is right for you.
A Few Words of Caution
While rainwater is fantastic, it’s not entirely without risk if collected improperly. The main concern is contaminants from your roof. Runoff from an old asphalt shingle roof can sometimes contain tars or other chemicals you don’t want in your pothos. To be safe, it’s best to avoid the “first flush”—the first 10-15 minutes of rain that washes debris and pollutants off your roof. Some rain barrels even have first-flush diverters built-in. Another tip is to keep your collection container covered. An open bucket of standing water is a prime breeding ground for mosquitos. Use a lid or a fine mesh screen to keep pests out. Finally, use the water you collect within a week or two to prevent algae or bacteria from growing. Collected rainwater is for your plants, not for drinking, so always keep it separate and clearly labeled.
No Rain? No Problem.
What if you live in a high-rise with no balcony, or you’re in the middle of a long dry spell? Don’t worry, you haven’t failed as a plant parent. You can still give your plants a better drink than straight-from-the-tap. The simplest trick is to fill your watering can and let it sit out, uncovered, for at least 24 hours. This allows most of the chlorine to evaporate. (Note: this method is less effective for chloramine, which many water districts now use). For a more advanced option, you can use a basic faucet filter, like a Brita pitcher, to remove chlorine and some minerals. If you have particularly fussy plants or just want to offer the best, using store-bought distilled or reverse osmosis water is a great (though more expensive) alternative, as it’s also free of minerals and additives. The goal is to be an attentive caregiver, not a perfect one.