


What Are Microgreens, Anyway?
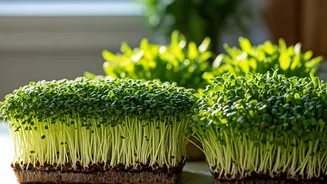
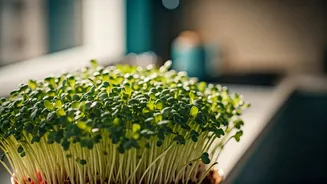
First, let’s clear up what we’re talking about. Microgreens are not sprouts, nor are they baby greens like spinach. They are young vegetable greens harvested just after the first true leaves have developed, typically within 7 to 21 days of germination.
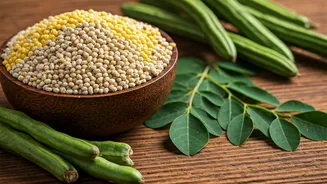
Think of them as the toddler stage of a plant. This is when they are often at their peak in terms of flavor concentration and nutrient density. Studies have shown that microgreens can contain significantly higher levels of vitamins and carotenoids than their mature counterparts. They offer intense, surprising flavors—radish microgreens have a spicy kick, while sunflower microgreens are nutty and sweet—making them a perfect garnish for salads, sandwiches, soups, and avocado toast.
The Urban Gardener’s Dilemma
For anyone living in a city apartment, the dream of a garden often crashes into a wall of reality. Where do you put the soil? What if you have a north-facing window with barely any light? Who has time for the constant watering, weeding, and pest control? Traditional gardening requires space, sunlight, time, and a tolerance for dirt—four things many urbanites are short on. This is precisely the problem that has fueled innovation in indoor gardening, moving beyond a single, sad basil plant on the kitchen counter to something more productive and foolproof.
How '5-Minute' Trays Actually Work
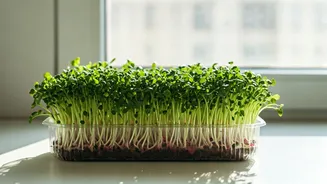
The headline promise of “5-Minute Microgreen Trays” might sound like an infomercial gimmick, but it refers to the remarkably low daily time commitment. These kits are self-contained ecosystems designed for simplicity. Most consist of a tray, a growing medium (often a soil-free pad made of coconut coir or hemp), and a cover. Some even have a self-watering reservoir. The process is incredibly simple: you hydrate the grow mat, sprinkle the seeds evenly, and place the tray in a spot with some light. Your daily 'work' involves a quick spritz of water or checking the reservoir, which genuinely takes only a minute or two. The '5-minute' part is the setup and the brief daily check-in, not the time from seed to harvest. There's no soil to haul, no mess, and no complex equipment. It’s gardening stripped down to its essential, most rewarding parts.
Your First Steps to Growing
Ready to turn your windowsill into a mini-farm? Getting started is refreshingly simple. First, choose your tray—many affordable starter kits are available online or at garden centers. Next, pick your seeds. Beginners should opt for fast-growing, 'cut-and-come-again' varieties. Once you have your kit, the steps are usually the same: 1. Soak the growing pad and place it in the tray. 2. Distribute your seeds evenly across the surface. Don't be shy; a dense planting is key for a lush harvest. 3. Mist the seeds with water and cover the tray for the first few days to encourage germination (this is known as the 'blackout' period). 4. Once sprouts appear, uncover the tray and move it to a location with indirect sunlight. 5. Water lightly each day. In about a week or two, you’ll be ready to harvest your first crop with a pair of clean scissors.
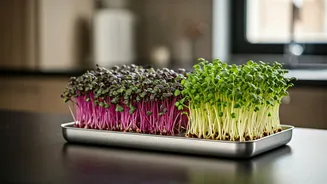
Easy Microgreens for Beginners
Not all microgreens are created equal when it comes to ease of growing. For your first attempt, stick with varieties that are known for being cooperative and quick. * **Broccoli:** One of the easiest and fastest, ready in about 7-10 days. The flavor is mild, like a less intense broccoli floret, and they are famously packed with sulforaphane, a powerful antioxidant. * **Radish:** If you love a spicy kick, radish microgreens are for you. They grow incredibly fast, often ready in under a week, and their vibrant pink stems look beautiful. * **Pea Shoots:** These are delightfully crunchy and taste exactly like fresh sweet peas. They are a bit slower, taking around 10-14 days, but their substantial texture makes them a satisfying addition to any dish. * **Mustard:** Another spicy option, mustard microgreens add a wasabi-like heat that can elevate a simple sandwich or salad. They also grow quickly and reliably.