


Translate 'Pre-Monsoon' for Your Backyard
In South Asia, 'pre-monsoon' planting means getting seeds in the ground just before the hot, rainy season kicks in, giving heat-loving plants the perfect launchpad. For U.S. gardeners, this concept isn't tied to a specific date but to local weather conditions.
Your personal “monsoon” season is summer. Therefore, your “pre-monsoon” planting window is late spring, when the threat of frost has passed and the soil has truly warmed up. Okra, the plant that gives us bhindi, is a tropical crop that thrives in heat. Planting too early in cool, damp soil will cause the seeds to rot or the seedlings to languish. The magic number is a consistent soil temperature of 65°F or warmer. A simple soil thermometer is a great investment, but a good rule of thumb is to plant your okra seeds about two to three weeks after your region's last average frost date. For gardeners in the South (USDA zones 7-9), this could be as early as April or May. For those in cooler Northern climates (zones 5-6), you might be waiting until late May or early June.
Find the Sunniest Spot
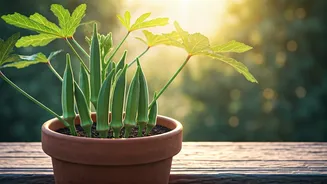
Okra is a sun worshipper. To get the kind of prolific production that keeps bhindi masala on the menu all summer long, you need to provide at least six to eight hours of direct, unfiltered sunlight per day. Anything less and you’ll get spindly plants with a disappointing yield. When scouting a location, look for the sunniest, warmest patch in your yard. This is often a south-facing spot that gets baked by the afternoon sun. Also, consider soil drainage. Okra hates “wet feet,” meaning its roots shouldn't sit in waterlogged soil. If you have heavy clay soil, consider planting in a raised bed or a large container (at least 5 gallons) where you can control the soil mixture and ensure excellent drainage. A mix of garden soil, compost, and perlite or coarse sand creates the perfect, loamy environment.
Planting Your Seeds for Success
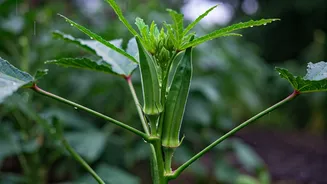
Okra seeds have a tough outer coating that can delay germination. To give them a head start, many experienced gardeners soak the seeds in warm water for 12 to 24 hours right before planting. This softens the seed coat and speeds up the sprouting process significantly. Plant the seeds about 1 inch deep. If you’re planting in rows in a garden bed, space the seeds 4 to 6 inches apart, with rows about 3 feet apart to give the mature plants plenty of air circulation. Once the seedlings are a few inches tall and have developed their first true leaves, thin them to their final spacing of 12 to 18 inches apart. Don't be afraid to snip the weaker seedlings at the soil line. Crowded plants compete for resources and are more susceptible to disease, ultimately producing fewer pods.
The Right Way to Water and Feed
While okra is famously drought-tolerant once established, it needs consistent moisture to produce tender, delicious pods. During the initial germination and seedling stage, keep the soil consistently moist but not soggy. Once the plants are established, they will need about an inch of water per week, either from rainfall or your hose. During particularly hot, dry spells, you may need to water more frequently. A good layer of mulch—like straw, shredded leaves, or wood chips—will help retain soil moisture and suppress weeds. Okra isn’t a particularly heavy feeder, but it appreciates a nutrient boost. Before planting, work a balanced, slow-release fertilizer or a generous amount of compost into the soil. You can give the plants a supplemental feeding with a liquid fertilizer low in nitrogen about a month after planting, and again when they start producing pods.
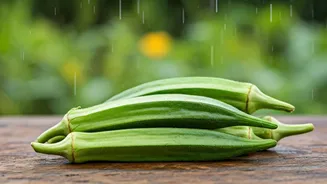
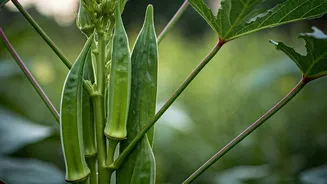
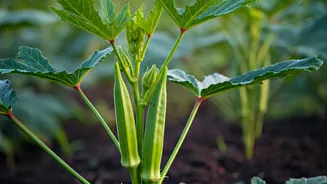
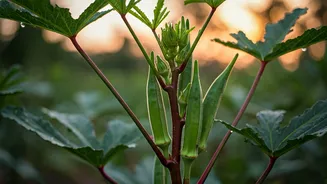
Harvesting for Tenderness
This is the moment you've been waiting for. Depending on the variety, you should start seeing the first pods about 50 to 65 days after planting. The key to delicious bhindi is harvesting the pods when they are young and tender. The ideal size is typically 3 to 4 inches long. If you let them grow much larger, they can become tough and woody. Check your plants every other day, as pods can grow from nothing to oversized overnight. Use a sharp knife or pruning shears to cut the stem just above the pod. Be careful—many okra varieties have small spines on the leaves and stems that can irritate the skin, so wearing gloves and long sleeves is a good idea. The more you harvest, the more the plant will produce. Regular picking signals the plant to keep flowering and setting new fruit, ensuring a steady supply for your kitchen all summer.