


Why This Project Works So Well
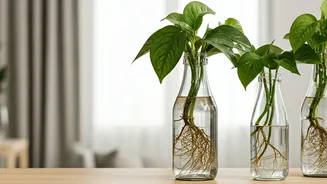
Before you begin, it’s worth understanding why this combination is so perfect. First, the money plant (Epipremnum aureum), also known as Pothos, is famously resilient and thrives in water. It’s one of the easiest plants to propagate, making it ideal for beginners.
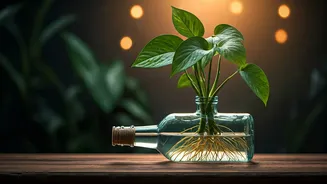
Second, glass bottles are everywhere. From wine and kombucha to fancy olive oil, you likely have a few beautiful candidates for repurposing already. This project saves them from the recycling bin and gives them a second, more stylish life. The clear glass allows you to watch the roots grow, adding a fascinating, living element to your decor. It’s a low-cost, low-effort, high-reward project that adds a touch of green elegance to any corner of your home.
Gather Your Simple Supplies
The beauty of this project is its minimalism. You don’t need a specialized kit or expensive tools. Raid your kitchen, recycling bin, and find a friend with a healthy plant. Here’s what you’ll need: * **A Glass Bottle:** Wine, beer, soda, or sauce bottles work well. Clear glass is great for watching roots, while amber or green glass can help slow algae growth and adds a different aesthetic. * **A Healthy Money Plant:** You’ll need a parent plant from which to take a cutting. If you don’t have one, they are inexpensive at any nursery, or a friend will likely be happy to share a clipping. * **Sharp Scissors or Pruners:** A clean cut is essential for the health of both the parent plant and the new cutting. * **Water:** Room-temperature tap water is usually fine. If your water is heavily treated, let it sit out for 24 hours to allow chlorine to evaporate.
Step 1: Prepare Your Bottle
A clean environment is crucial for preventing bacteria or algae from harming your new plant. First, remove any labels from your chosen bottle. A good soak in hot, soapy water will often do the trick. For stubborn adhesive, a mixture of baking soda and cooking oil applied as a paste can help break it down. Once the label is off, give the bottle a thorough cleaning inside and out. Use a bottle brush if you have one to scrub the interior walls. Rinse it completely to remove any soap residue. A sparkling clean bottle not only looks better but also gives your plant cutting the best possible start.
Step 2: Take the Perfect Cutting
This is the most important step for ensuring your new plant will root successfully. Look at your parent money plant and identify a healthy, mature vine. You want a piece that is at least 4-6 inches long and has several leaves. Follow the vine down from a leaf until you find a small, brown bump—this is a node. Nodes are where new roots will sprout. Using your sharp, clean scissors, make a cut about a half-inch below a node. You can take a cutting with several nodes and leaves. Once you have your cutting, remove the leaf or two closest to the cut end. This prevents leaves from sitting in the water and rotting, which can foul the water and kill the cutting.
Step 3: Assemble and Place
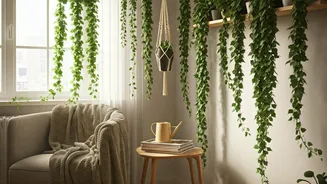
Now for the simple finale. Fill your clean bottle with room-temperature water, leaving about an inch of space at the top. Gently place your money plant cutting into the bottle, ensuring that at least one or two of the bare nodes are submerged in the water. The remaining leaves should be well above the waterline. That’s it! Your hydroponic station is complete. Find a home for it in a spot that receives bright, indirect sunlight. A north-facing window or a spot a few feet away from a sunnier window is perfect. Direct sunlight can scorch the leaves and encourage algae to grow in the water.
Long-Term Care and Flair
Your money plant can live happily in water for years with minimal care. The most important task is to change the water every 7-14 days to replenish oxygen and keep it fresh. When you do, give the bottle a quick rinse to remove any slickness that might be starting to form. In a few weeks, you should see delicate white roots begin to emerge from the submerged nodes. While Pothos doesn't require fertilizer to survive in water, you can add a single drop of a balanced liquid houseplant fertilizer to the water once a month during spring and summer to give it a nutrient boost. Group several bottles of different sizes and shapes together for a more dramatic and stylish display.