

The 5-Minute Shopping List
The 20-minute clock starts when you get home, not at the store. To make this work, you need to grab the right things. Don't get distracted. Your mission is to acquire items that are ready to go, minimizing prep work. Here’s your list: * **One Bag of Potting
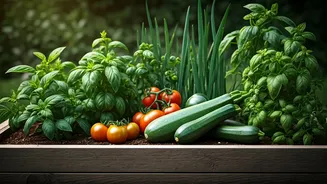
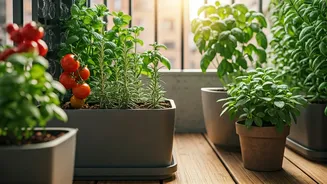
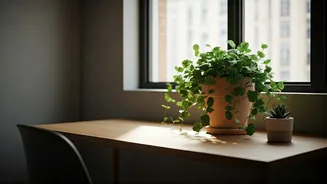
Mix:** Not garden soil or topsoil. Potting mix is specifically formulated for containers—it’s lightweight and provides good drainage and aeration. * **One or Two Containers:** Choose a pot, window box, or fabric grow bag that is at least 8-10 inches deep and wide, and crucially, has drainage holes at the bottom. Self-watering planters are a fantastic, low-maintenance option if available. * **Three Starter Plants:** Do NOT buy seeds. The key to speed and productivity is using “starts” or seedlings—young plants already growing in small pots. For a high-success balcony garden, grab a mix of cut-and-come-again plants: one leafy green (like loose-leaf lettuce), and two robust herbs (like basil and mint, or parsley and chives). These are forgiving and yield quickly.
Step 1: Prep Your Space (2 Minutes)
Before you open that bag of soil, take a moment to set up your station. If you’re worried about mess, lay down a few sheets of newspaper or a flattened cardboard box on your balcony floor. This makes cleanup a simple matter of rolling it all up at the end. Place your empty container in the middle of your prep area. If your container comes with a separate drainage tray, set it underneath now. Grab your bag of soil and a small trowel or a sturdy scoop (an old yogurt container works great). Have everything within arm's reach. This simple organization is the secret to moving quickly and cleanly.
Step 2: Fill Your Container (5 Minutes)
It’s time to get your hands dirty—or not, if you choose to wear gloves. Cut open your bag of potting mix. Scoop the soil into your container until it’s about two-thirds full. Don't pack it down; you want the soil to remain light and airy for the roots. Give the container a gentle shake to settle the soil naturally. Then, add more mix until the soil level is about one to two inches below the rim of the pot. This gap at the top is crucial; it prevents soil and water from spilling over the sides when you water your plants.
Step 3: Plant Your Starters (8 Minutes)
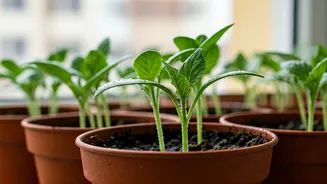
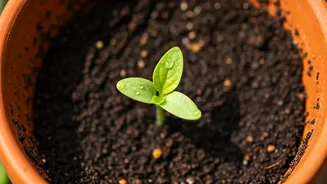
This is the main event. Use your trowel or hands to dig three small holes in the soil, spaced a few inches apart. Now, for the plants. To remove a starter from its plastic pot, don’t pull it by the stem. Instead, gently squeeze the sides of the plastic pot and turn it upside down, letting the entire plant and soil ball slide into your hand. If the roots are tightly wound in a circle at the bottom (a condition called “root-bound”), gently tease them apart with your fingers. This encourages them to grow outward into the new soil. Place one plant into each hole you dug, ensuring the top of its soil ball is level with the surrounding potting mix. Backfill the holes with soil, gently firming it around the base of each plant to eliminate air pockets.
Step 4: Water and Place (5 Minutes)
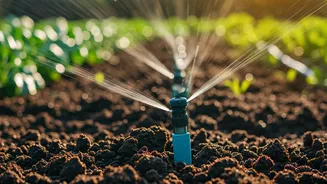
Your plants need a welcome drink. Water the container thoroughly until you see excess water running out of the drainage holes at the bottom. This first deep watering is essential for settling the soil and helping the roots make contact with their new environment. Let it drain for a minute or two. Now, move your newly planted garden to its final home. Most herbs and lettuces thrive with at least four to six hours of direct sunlight per day. Find the sunniest spot on your balcony—usually a south- or west-facing railing or corner. Clean up your newspaper, put your tools away, and you’re done. The clock stops here.
Beyond the First 20 Minutes
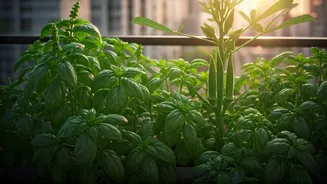
You’ve successfully built a garden primed for productivity. The "twenty minutes flat" was the setup—the race you've already won. The “productive” part is an ongoing partnership. Check the soil moisture every day or two; stick your finger an inch deep, and if it feels dry, it’s time to water again. Within a few weeks, your herbs will be ready for their first trim, and your lettuce can be harvested leaf by leaf. The more you snip from herbs like basil and mint (from the top down), the bushier and more productive they will become. Your 20-minute investment is now set to pay you back in fresh flavors all season long.