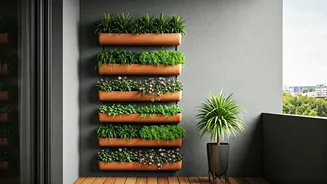


Why This Setup Works So Well
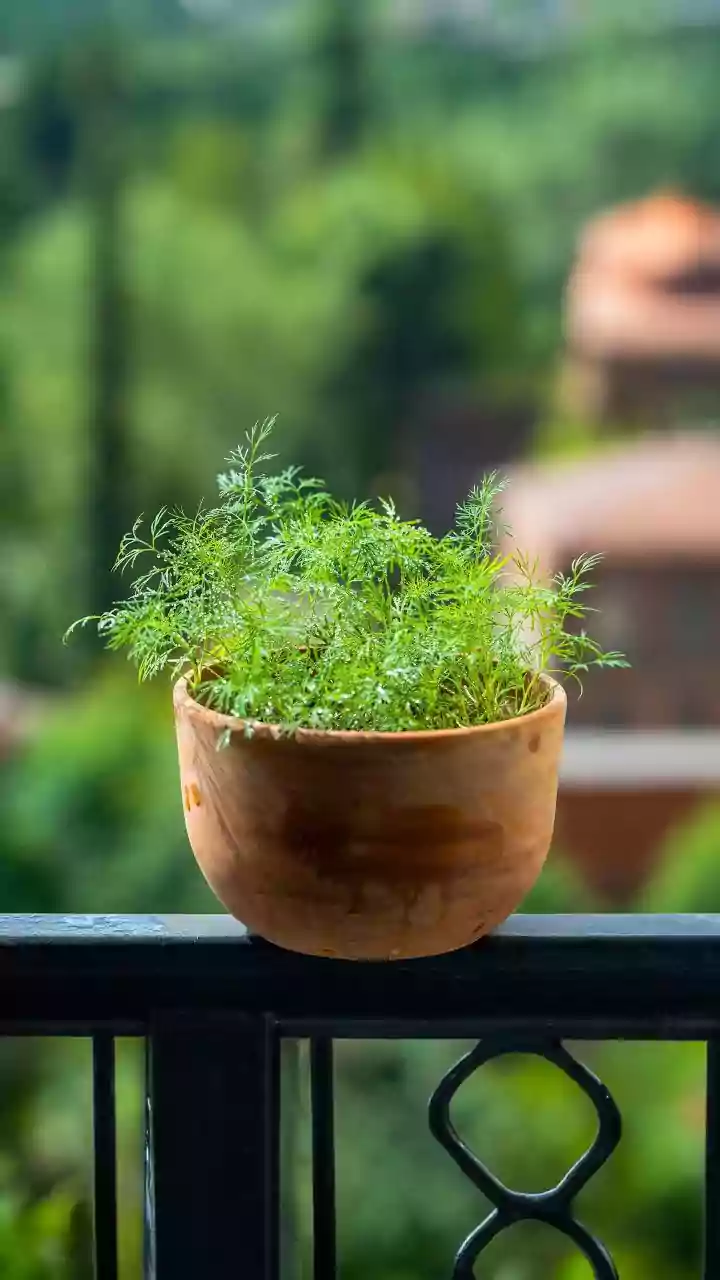
The secret to success in a damp environment lies in the clever combination of materials and design. Terracotta, an unglazed clay, is porous. Unlike plastic or glazed ceramic pots that trap moisture, terracotta breathes, allowing water to evaporate through
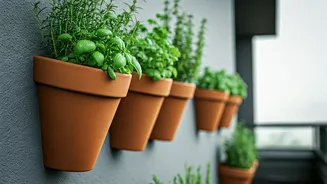
its walls. This helps the soil dry out more evenly between rainfalls, which is a lifesaver for herb roots that despise being waterlogged. The vertical, stacked design provides a second critical advantage: superior drainage and air circulation. As water flows through the top pot, gravity pulls the excess down through the layers below, preventing any single plant from sitting in a puddle. The offset stacking also exposes more surface area to the air, further speeding up the drying process and reducing the risk of fungal diseases and root rot.
Choose Herbs That Welcome the Rain
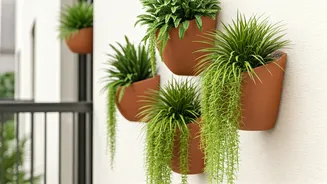
While this setup is forgiving, success starts with choosing the right plants. Not all herbs are created equal when it comes to water tolerance. For the best results in a consistently rainy area, focus on herbs that naturally thrive in moist soil. Moisture-Lovers: - Mint: Famously vigorous, mint varieties will flourish. Just be sure to give them their own pot in the stack to prevent them from taking over. - Parsley: Both curly and flat-leaf varieties appreciate consistent moisture. - Chives: This member of the onion family is robust and does well with regular water. - Cilantro/Coriander: It prefers moist, cool soil, making it a great candidate for a rainy garden (though it may bolt in summer heat). Tolerant with Good Drainage: - Basil: While it loves sun and heat, basil also needs consistent water. In this well-draining setup, it can thrive. - Oregano: A surprisingly tough herb that can handle moisture better than its Mediterranean cousins, provided the drainage is excellent. Avoid planting drought-loving herbs like rosemary, lavender, and thyme, which are native to arid Mediterranean climates and will likely struggle no matter how good your drainage is.
Gathering Your Supplies
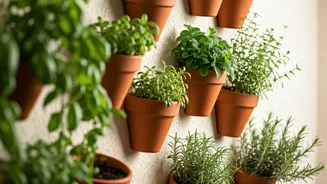
Building your tower is a simple weekend project. You’ll need just a few things, most of which are readily available at any garden center. - Terracotta Pots: You'll want a set of at least three to five pots in graduating sizes (e.g., 14", 12", 10", 8"). Ensure each pot has a drainage hole. - A Central Support (Optional but Recommended): A wooden dowel or a piece of rebar about the height of your finished tower adds crucial stability, especially in windy, stormy weather. - Gravel or Broken Pottery Shards: To cover the drainage holes and prevent soil from washing out. - A High-Quality Potting Mix: Don't just use garden soil, which is too dense and will compact.
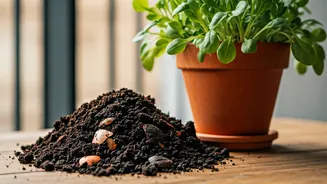
Create the Perfect Well-Draining Soil
The soil is your primary defense against overwatering. A custom mix will provide the perfect balance of moisture retention and drainage. For a basic, effective blend, combine: - Two parts high-quality potting soil: This provides the base and nutrients. - One part perlite or coarse sand: Perlite is a lightweight volcanic glass that looks like tiny white Styrofoam balls. It is essential for creating air pockets in the soil, which improves drainage and prevents compaction. Coarse sand works similarly. Mix these components thoroughly in a wheelbarrow or a large bucket before you start planting. The goal is a light, fluffy mixture that water can pass through easily.
Step-by-Step Assembly and Planting
1. **Prepare the Base:** Place your largest pot where the tower will live. If using a support rod, drive it into the ground through the pot's drainage hole for maximum stability. 2. **First Layer:** Place a few pieces of broken pottery over the drainage hole to prevent it from clogging. Add a layer of gravel, then fill the pot about three-quarters full with your custom soil mix. 3. **Stack the Next Pot:** Slide the next-smallest pot over the rod (if using) and rest it on the soil of the pot below, tilting it to one side. This creates the classic tiered look and provides planting pockets. 4. **Continue Stacking:** Repeat the process, adding soil to each pot as you go and tilting them in alternating directions for balance and aesthetic appeal. 5. **Plant Your Herbs:** Once your tower is built, gently place your herb seedlings into the pockets you've created. Tuck soil in around them and water everything thoroughly to help it settle. Plant your most water-tolerant herbs, like mint, in the lower tiers where moisture will collect most.