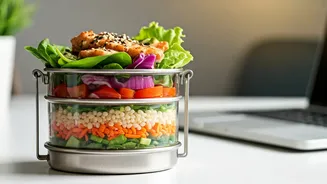


The Problem with the Desk Lunch
The midday meal for many American office workers is often a compromised one. It’s either a hastily assembled sandwich that loses its structural integrity by noon, a pricey salad from a nearby deli, or microwaved leftovers that perfume the entire office.
The core issues are time, freshness, and inspiration. We lack the time in the morning to create something exciting, and anything we do make often wilts into a disappointing, homogenous mush by the time we’re ready to eat. This daily ritual of uninspired eating doesn't just affect our taste buds; it can lead to a midday energy crash, making that 2 p.m. meeting feel like an eternity. The desire for a lunch that is convenient, healthy, affordable, and genuinely enjoyable has felt like an impossible dream—until now.
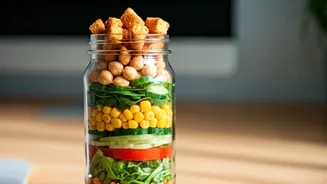
Enter the Genius of the Jar Salad
The viral trend you’ve seen across social media isn't just about putting a salad in a glass jar for aesthetics. It’s a strategic system designed to conquer sogginess and preserve texture. By layering ingredients in a specific order within a wide-mouth Mason jar, you create distinct zones that protect delicate components from wet ones. The dressing sits at the bottom, sealed off from everything else by a barrier of hard, non-absorbent vegetables. Lighter, more delicate ingredients like leafy greens and cheese sit safely at the top, far from any moisture. When it's time for lunch, you simply shake the jar vigorously. This action coats every ingredient evenly with dressing at the last possible moment, resulting in a salad that’s as fresh, crisp, and vibrant as if you had just made it. It’s a meal prep game-changer that turns five minutes of prep on Sunday night into a week of delicious lunches.
The Art of the Perfect Layer
Mastering the layered salad is all about understanding the 'why' behind the order. Getting this right is the secret to a perfect, non-soggy result every time.
Layer 1: The Dressing. Always start with your dressing at the very bottom of the jar. Use about two to four tablespoons. This liquid base is the enemy of crispness, so you want it quarantined.
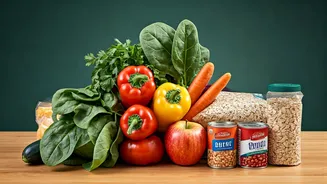
Layer 2: The Marinaters. Next, add your hard, non-absorbent vegetables. Think chopped carrots, bell peppers, red onions, celery, or cucumbers. These create a waterproof barrier over the dressing and can even benefit from marinating in it slightly.
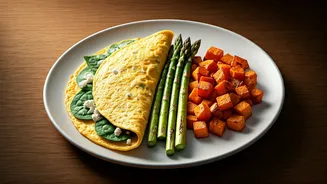
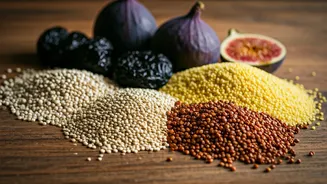
Layer 3: Grains, Beans, and Proteins. This is your hearty middle layer. Add cooked quinoa, chickpeas, black beans, farro, edamame, or diced grilled chicken. These ingredients are sturdy enough to sit near the hard veggies without turning to mush.
Layer 4: The Delicate Items. Now, add softer vegetables and fruits, plus cheese. Cherry tomatoes, corn, avocado (tossed in lemon juice to prevent browning), crumbled feta, or shredded cheddar go here. These items need to stay dry.
Layer 5: The Greens and Toppings. Finally, pack the jar to the very top with your leafy greens—spinach, arugula, romaine, or mixed greens. This top layer should be packed tightly to prevent the other ingredients from shifting around. Add any nuts, seeds, or croutons here as well to ensure they stay crunchy.
A Viral Recipe to Get You Started
Ready to try it? Here’s a take on the popular Southwestern-style jar salad that’s been making the rounds online.
Ingredients:
* Dressing: 3 tbsp lime vinaigrette (lime juice, olive oil, cilantro, pinch of cumin)
* Layer 2: 1/4 cup chopped red bell pepper, 1/4 cup chopped red onion
* Layer 3: 1/2 cup black beans (rinsed), 1/2 cup cooked quinoa, 1/2 cup grilled chicken (diced)
* Layer 4: 1/4 cup corn kernels, 1/4 cup crumbled cotija or feta cheese
* Layer 5: 2 cups chopped romaine lettuce, a sprinkle of pumpkin seeds (pepitas)
Instructions: Following the layering guide above, add each component to a 32-ounce wide-mouth Mason jar in the order listed. Seal tightly and refrigerate for up to four days. When ready to eat, shake well and pour into a bowl.