


1. Clear Away Winter Debris
Your first task is the simplest: a thorough spring cleaning. Winter leaves behind a mess of fallen leaves, twigs, and matted-down debris that can smother emerging plants and create a haven for pests and fungal diseases. Gently rake away this layer from
your garden beds, being careful not to disturb the delicate new shoots that might be peeking through. Remove any dead annuals you didn't get to last fall. For perennials, you can now trim back any dead stalks and foliage left for winter interest. This single step improves air circulation, allows sunlight to reach the soil and warm it up, and gives your plants a clean slate for the new season. It’s the gardening equivalent of opening the windows on the first nice day of the year.
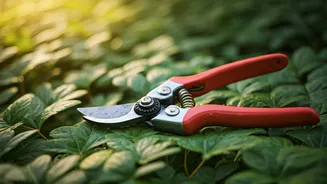
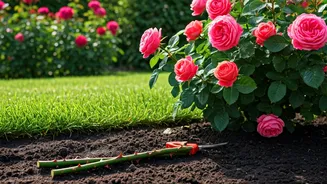
2. Prune With Purpose
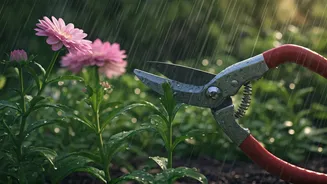
Pruning can be intimidating, but it’s one of the most impactful things you can do for the health and productivity of your flowering shrubs. The golden rule is to know *when* your plant blooms. Plants that bloom in early spring on last year's branches (known as “old wood”), like lilacs, forsythia, and some types of hydrangeas (e.g., Oakleaf, Bigleaf), should only be pruned right *after* they finish flowering. If you prune them now, you’ll cut off all the flower buds. Conversely, plants that bloom in the summer on the current season's growth (“new wood”), such as butterfly bush, panicle hydrangeas, and most roses, should be pruned in late winter or early spring. This encourages vigorous new growth that will be covered in flowers. A sharp, clean pair of bypass pruners is your best tool. Make your cuts just above an outward-facing bud to encourage growth away from the center of the plant.
3. Awaken and Amend the Soil
Healthy plants start with healthy soil. After a long winter, your soil can be compacted and depleted of nutrients. Before you even think about fertilizer, think about feeding the soil itself. The best way to do this is by adding organic matter. Gently top-dress your garden beds with a 1- to 2-inch layer of high-quality compost or well-rotted manure. There’s no need to aggressively dig it in, which can damage the delicate network of roots and beneficial soil organisms just below the surface. A gentle scratching-in with a hand cultivator is plenty. As you water and as earthworms do their work, these nutrients will slowly incorporate into the soil, improving its structure, water retention, and fertility for the entire growing season.
4. Apply a Smart First Feeding
With the soil amended, it’s time for a targeted nutritional boost. As new growth begins to emerge, your plants are hungry. This is the perfect time to apply a slow-release granular fertilizer formulated for flowering plants. These products are designed to break down over several weeks or months, providing a steady supply of nutrients rather than a single, overwhelming jolt that can burn roots. Look for a balanced formula (e.g., 10-10-10) or one slightly higher in phosphorus (the middle number), which promotes robust root development and flowering. Sprinkle the granules around the base of your plants, following the application rates on the package, and gently scratch them into the soil surface before watering.
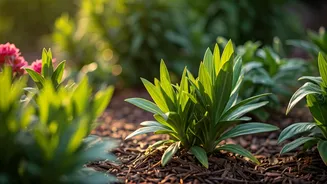
5. Divide and Conquer Overcrowded Perennials
If you noticed last year that some of your perennials—like hostas, daylilies, or bearded irises—had a sparse center or weren't flowering as profusely as they used to, they are likely overcrowded and ready to be divided. Early spring, just as new growth is emerging, is the ideal time for this task. Carefully dig up the entire clump and use a sharp spade, soil knife, or your hands to break it into smaller sections, ensuring each piece has a healthy portion of roots and shoots. Replant the most vigorous divisions and share the extras with friends. Dividing not only rejuvenates the parent plant, encouraging more vigorous growth and flowering, but it also gives you free plants to fill in other spots in your garden.
6. Edge and Mulch for a Finished Look
The final step is like putting a frame on a beautiful picture. Use a spade or a half-moon edger to create a clean, sharp edge between your garden beds and your lawn or pathways. This simple act creates a crisp, professional look and helps prevent grass from creeping into your flower beds. Once your edging is complete, apply a 2- to 3-inch layer of mulch, such as shredded hardwood, pine bark, or leaf mold, over the soil and around your plants. Be sure to leave a small gap right around the base of each plant to prevent rot. A fresh layer of mulch not only gives the garden a tidy, uniform appearance but also works hard all season to suppress weeds, retain precious soil moisture, and regulate soil temperature.