


What Exactly Are Microgreens?
Before you start, let's clear up what we’re growing. Microgreens are not the same as sprouts. Sprouts are germinated seeds, eaten root, seed, and shoot. Microgreens, on the other hand, are young vegetable greens harvested just after the first true leaves
have developed. They are essentially the seedling stage of edible plants like kale, radishes, and basil. This small distinction makes a big difference. You harvest microgreens by cutting them at the base, leaving the seed and root behind. This method reduces the risk of foodborne illness associated with sprouts and gives you a more flavorful, leafy green to enjoy.
Your Simple Soil-Free Toolkit
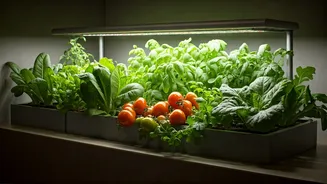
The beauty of this method is its simplicity. You don't need a garden, special lights, or complicated equipment. Here's your entire shopping list: 1. A Shallow Tray: A reusable plastic microgreen tray works best, but you can start with a simple takeout container or a pie plate (just poke a few drainage holes in it). 2. A Growing Medium: Instead of soil, you’ll use a hydroponic grow mat. These are often made of felt, jute, or coco coir. They hold the perfect amount of water without creating a mess. You can find them online or at garden centers. 3. Quality Seeds: Look for seeds specifically labeled for microgreens or sprouting, as they are typically untreated with fungicides. 4. A Spray Bottle: For gentle watering. 5. A Sunny Spot: A windowsill that gets a few hours of indirect sunlight is perfect.
Choosing Your First Crop
Walking into the world of microgreens can feel overwhelming with all the seed choices. For your first attempt, stick with the easy-to-please varieties. These seeds germinate quickly and are very forgiving. Excellent beginner choices include: * Radish: Peppery and incredibly fast-growing, often ready in 7-10 days. * Broccoli: Mild, slightly sweet flavor, and packed with nutrients. A reliable choice. * Pea Shoots: Sweet, crunchy, and taste just like fresh peas. They are a bit larger and very satisfying to grow. * Mustard: For those who like a spicy kick. They grow quickly and add a big flavor punch. Start with just one or two types to get a feel for the process before you turn your kitchen into a full-blown micro-farm.
Step-by-Step: From Seed to Green
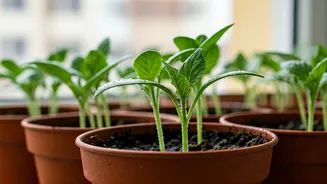
Ready to get growing? The process takes about 15 minutes of setup time. First, cut your grow mat to fit the bottom of your tray. Submerge the mat in water for a few minutes until it’s fully saturated, then place it in the tray. Sprinkle your seeds evenly across the surface of the mat—aim for dense coverage but try not to let the seeds pile on top of each other. Once they're spread out, give them a gentle misting with your spray bottle. Don't drench them; just make sure the seeds are moist.
The Blackout Period and First Light
This next step feels counterintuitive but is critical for success. For the first 2-4 days, your seeds need to be in total darkness. This “blackout period” encourages the seeds to germinate and develop strong roots as they search for light. You can achieve this by placing an identical tray on top or simply putting your tray in a dark cabinet. Check on them daily and give them a light misting to keep the mat moist. Once you see tiny, yellowish shoots appearing across the tray, it’s time to introduce them to light. Move the tray to your chosen sunny spot. Within a day, those yellow shoots will turn a vibrant green as they begin to photosynthesize.
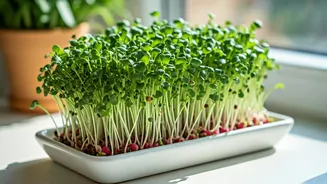
Harvesting Your Tiny Bounty
This is the best part. In about 7 to 14 days, depending on the variety, your microgreens will be 1-3 inches tall and will have developed their first set of true leaves. They are ready to harvest! To do so, simply grab a sharp pair of scissors or a knife and cut the greens just above the surface of the grow mat. It’s like giving your tiny lawn a haircut. Don’t try to pull them out, as you want to leave the roots and seed hulls behind. You can rinse them gently in cool water and they are ready to eat immediately. Add them to sandwiches, soups, eggs, or salads for a fresh, nutrient-dense, and flavorful boost.