


Dishwasher Odor Solutions
A persistently unpleasant odor emanating from your dishwasher can be a puzzling problem, but the root causes are often identifiable and rectifiable. One
common culprit is food debris trapped in the filter or spray arms, which, when left to decompose, generates foul smells. Regular cleaning of these components, typically a simple process of rinsing or wiping, can eliminate this source of odor. Another frequent offender is a buildup of grease and soap scum within the dishwasher tub and on its rubber seals. This organic matter can harbor bacteria and mold, leading to a distinct musty or sour scent. Running an empty cycle with a dishwasher cleaner or a cup of white vinegar can effectively break down and flush away these residues. Furthermore, the drainage system itself can become a breeding ground for bacteria if not properly maintained. Ensuring the drain hose is clear and running a descaling solution periodically can prevent odor accumulation. Lastly, sometimes the issue is simply a matter of water hardness affecting cleaning performance, leading to residual food particles. Adjusting your detergent usage or employing a rinse aid can improve cleaning efficiency and minimize lingering smells.
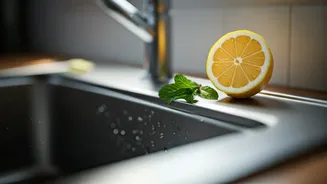
Sparkling Stainless Steel
Achieving a gleaming, fingerprint-free stainless steel sink doesn't require extensive effort or specialized products. A swift, deep clean can be accomplished in under 20 minutes by leveraging the power of common household ingredients. Begin by clearing the sink of all dishes and debris. A mixture of baking soda and water creates a gentle abrasive paste that effectively tackles food stains and minor scuffs without scratching the surface. Apply this paste with a soft cloth or sponge and scrub in the direction of the steel's grain. For tougher spots or to impart an extra shine, a splash of white vinegar can be used after rinsing off the baking soda. Vinegar's acidity helps to dissolve mineral deposits and soap scum, leaving the stainless steel looking remarkably bright. Rinse thoroughly with water and then dry completely with a clean, microfiber cloth to prevent water spots and streaks. This method not only cleans but also polishes, restoring the original luster to your sink with minimal fuss.
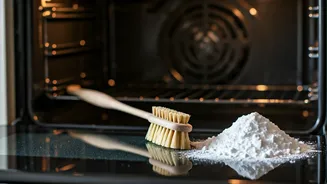
Oven Rack Grime Removal
Tackling baked-on grease and grime on oven racks can seem like a daunting task, but a surprisingly effective and straightforward method involves using baking soda. This common pantry staple, known for its mild abrasive and deodorizing properties, can work wonders on stubborn residues. The process typically involves removing the oven racks and placing them in a bathtub or large sink. Sprinkle a generous amount of baking soda over the entire surface of each rack, ensuring all greasy areas are covered. Then, lightly dampen the baking soda with water to form a thick paste. Let this paste sit and work its magic for several hours, or even overnight, allowing it to loosen the hardened grease. Once the dwell time is complete, use a scrub brush or an old toothbrush to dislodge the softened grime. For particularly tough spots, you might need to reapply the paste or use a plastic scraper. Rinse the racks thoroughly and dry them completely before returning them to the oven. This natural approach avoids harsh chemicals, making the cleaning process safer and more environmentally friendly.
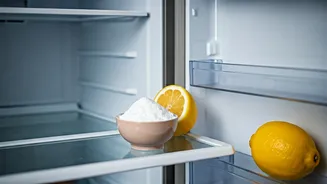
Hidden Kitchen Germ Hotspots
Beyond the obvious areas, several often-overlooked spots in your kitchen can harbor a surprising amount of grime and bacteria, potentially making guests uncomfortable. One such area is the grout between your tiles, which can absorb spills and become a breeding ground for mold and mildew if not regularly cleaned. Another frequently neglected zone is the top of your refrigerator, where dust and grease can accumulate significantly. The inside of your microwave, especially if splatters are left uncleaned, can become quite unsanitary. Don't forget the dishwasher filter; if it's not cleaned, it can redistribute food particles and odors. The handles and buttons of appliances, being high-touch surfaces, are also prime areas for germ transfer. Lastly, the area around your trash can, both inside and out, can attract pests and harbor bacteria if not regularly disinfected. Addressing these forgotten spots ensures a more hygienic and welcoming kitchen environment.
Appliance Grease Solutions
Greasy kitchen appliances, often a challenge to clean effectively, can be restored to their former glory with simple, professional-recommended techniques. For greasy stovetops, a paste made from baking soda and water can work wonders. Apply it to the greasy areas, let it sit for a bit, and then gently scrub with a non-abrasive sponge. A degreasing spray or a solution of dish soap and warm water can also be effective, followed by a thorough wipe-down. For range hoods and other exterior surfaces, a surprising yet effective solution is WD-40. Spray a small amount onto a cloth (not directly onto the appliance) and wipe away the grease. This not only cuts through tough residue but can also leave a protective shine. When cleaning, always remember to work in the direction of the appliance's grain if applicable, and use soft cloths to avoid scratching. Regular, lighter cleaning sessions are far more effective than infrequent, intensive scrubbing when dealing with persistent grease buildup.
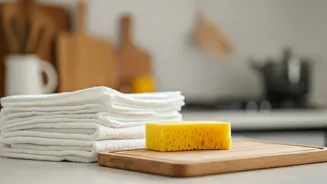
Efficient Dishwashing Tactics
A common, yet easily overlooked, mistake when washing dishes by hand can prevent them from ever truly getting clean. Many people simply rinse dishes briefly before washing or fail to use enough hot water, which is crucial for cutting through grease and sanitizing. To ensure your dishes are spotless, always scrape off excess food particles thoroughly before the wash. Use the hottest water your hands can comfortably tolerate; this significantly aids in breaking down oils and food residues. Employ a good quality dish soap, and create plenty of suds. Agitate the water vigorously to ensure the soap is distributed evenly. When washing, start with the least greasy items, such as glasses and cups, and move to the dirtiest, like pots and pans. Ensure you're scrubbing all surfaces, including the undersides and rims, where food particles can easily cling. Proper rinsing under hot running water is also key to removing all soap residue and lingering grime. Finally, allowing dishes to air dry on a rack rather than towel-drying can further prevent the spread of germs.
Reviving Cast Iron Cookware
Restoring a cast iron pan that has developed rust and accumulated grime can seem like a significant undertaking, but it's a rewarding process that brings this durable cookware back to life. Begin by scrubbing away loose rust and debris using steel wool or a stiff brush. For more stubborn rust, a paste of baking soda and water can be applied and allowed to sit before scrubbing. Once the rust is mostly removed, thoroughly wash the pan with hot, soapy water and dry it completely. The crucial next step is re-seasoning. Apply a thin, even layer of cooking oil (like vegetable or flaxseed oil) all over the pan, inside and out, then wipe off any excess. Place the oiled pan upside down in a preheated oven (around 400-450°F or 200-230°C) and bake for about an hour. Allow the pan to cool completely in the oven. Repeat this seasoning process several times to build up a robust, non-stick layer. Regular use and proper care, including immediate drying after washing and light oiling, will maintain its restored condition.
Countertop Ice Maker Care
Maintaining a clean countertop ice maker is essential for producing fresh-tasting ice and ensuring the longevity of the appliance. The process can be broken down into five straightforward steps. First, unplug the unit and empty any remaining water and ice. Second, wipe down the interior and exterior surfaces with a damp cloth and a mild soap solution. For tougher mineral deposits or potential mold, a vinegar and water solution can be used for cleaning. Third, clean the water reservoir and any removable parts according to the manufacturer's instructions, ensuring all crevices are reached. Fourth, rinse all cleaned components thoroughly to remove any soap or vinegar residue. Finally, allow all parts to air dry completely before reassembling and plugging the unit back in. Performing this cleaning routine regularly, ideally every few weeks, will prevent the buildup of bacteria and mineral scale, ensuring your ice remains pure and the machine operates efficiently.