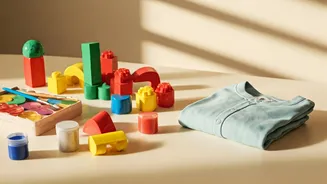


Start With Simple Supplies
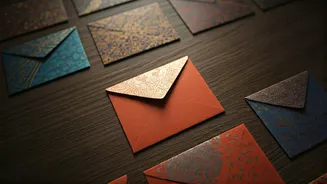
Embrace the spirit of handmade Eid by gathering readily available materials to craft your Eidi envelopes. You don't need expensive or specialized items;
ordinary household supplies will suffice. Think about any paper you have on hand – perhaps leftover decorative paper, pages from an old notebook, or even repurposed wedding invitation cards. Essential tools include basic stationery like scissors and glue. Adding a touch of colour can be done with sketch pens or crayons, allowing for personal flair. The beauty of homemade items lies in their imperfections; they shouldn't strive for factory precision. These small, unique characteristics are what make them endearing and special for the recipient, turning a simple gift into a cherished keepsake.
Forming the Envelope Base
Begin the creation process by laying your chosen paper flat. The initial step involves folding the lower portion of the paper upwards, ensuring there's a clear margin left at the top. This folded section will serve as the pocket to hold your Eidi. Subsequently, gently fold in the side edges of the paper, mirroring the action of closing a small, neat pocket. Don't be concerned if the initial folds appear a bit uneven; this is perfectly normal for handmade crafts. Take a moment to adjust the paper with your fingers, carefully pressing down the creases to establish firm folds. As you refine these folds, the distinct shape of an envelope will begin to emerge, signaling the progression of your creative endeavor and building anticipation for the next steps.
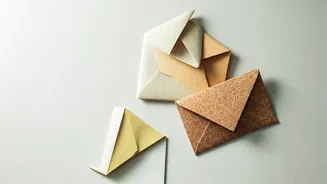
Securing the Envelope
With the basic structure of your envelope taking shape, it's time to secure its form. Apply a thin layer of glue along the inner edges of the folded sides to firmly adhere them. Be mindful not to apply too much glue, as an excess can cause the paper to wrinkle, detracting from the neatness of your creation. Once the glue is applied, gently press the glued sections together and allow them a few moments to set. This simple action transforms the folded paper into a functional envelope, ready to be embellished. While the current state of the envelope is plain, it now holds immense potential for personalization and artistic expression, serving as a blank canvas for your Eid-themed creativity.
Adding Festive Eid Decorations
This stage is where the true Eid spirit comes alive, and children often dive in with enthusiastic creativity. There's no definitive rule for decorating; the goal is to make it visually celebratory. Consider drawing classic Eid motifs like a crescent moon and stars, or perhaps intricate lantern designs. Alternatively, a bold 'Eid Mubarak' inscription, filled with vibrant colours, can make a striking statement. Many find joy in creating decorative patterns, from simple dots and lines to flowing swirls, which add a festive feel without needing specific meaning. Don't hesitate to incorporate any extra decorative elements you have, such as glitter, stickers, or even small scraps of old gift wrap. Layering these materials and mixing colours can result in a wonderfully unique and festive design.
Infusing Personal Touches
To elevate your Eidi envelope from merely decorative to deeply personal, dedicate time to adding unique touches. Begin by writing the recipient's name clearly on the envelope, making it immediately identifiable. You might also consider including a brief, heartfelt message inside, perhaps a lighthearted note like 'For your Eid treats' or a playful 'Don't spend it all at once.' If the Eidi is for a younger family member, drawing something they particularly adore, such as a favourite toy, animal, or even a funny doodle, shows thoughtful consideration. These personal embellishments demonstrate that you've put genuine thought into the gift, transcending the monetary value and making the gesture truly memorable.
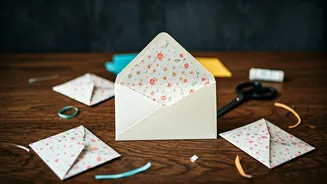
Designing the Closing Flap
The final structural element of your Eidi envelope is the closing flap, which you'll fold down to secure the contents. This flap offers another opportunity for creative expression. You can leave it in its basic rectangular form, or for a more distinctive look, consider cutting it into an interesting shape, such as a gentle curve or a pointed tip. A small decorative element, like a star sticker, can also serve as a charming way to keep the flap closed. For an added touch of elegance, some choose to tie a small ribbon or a piece of thread around the envelope. While purely decorative, these additions can enhance the overall aesthetic appeal and make the envelope feel even more special.
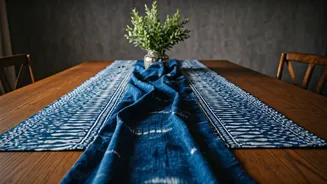
The Meaningful Difference
The act of presenting Eidi in a handmade envelope imbues the exchange with a distinct warmth and intimacy. It subtly shifts the interaction from a mere transaction to a more personal gesture, transforming 'Here's the money' into 'I crafted this specifically for you.' This distinction is often noticed and appreciated by both children and adults. Furthermore, the creative process itself is often contagious; making one envelope can lead to the spontaneous creation of several others, each with its unique colour palette and design. This iterative crafting process becomes an integral part of the Eid celebration, extending beyond the act of giving Eidi and fostering a sense of joyful participation and shared festivity.
Embrace Imperfect Creation
Remember that the essence of a handmade gift lies in its unique charm, not its flawless execution. There's no need to adhere strictly to every step or strive for perfect symmetry. Your envelope might turn out larger or smaller than anticipated, perhaps the glue marks are visible, or maybe your drawn crescent moon bears a whimsical resemblance to a banana. None of these deviations diminish the value or sentiment behind your creation. The ultimate goal is to create something that, upon opening, brings a smile to the recipient's face before they even count the Eidi. This joy and connection are the true heart of the handmade Eidi envelope tradition.