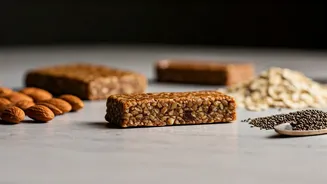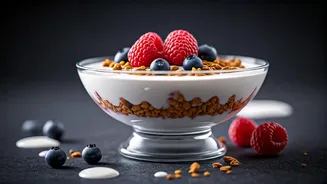


Homemade Protein Bar Benefits
Store-bought protein bars often contain a cocktail of preservatives, artificial additives, and excessive sugars, which can lead to bloating and unsatisfied
hunger. Embracing a homemade approach offers a superior alternative. You gain complete control over the ingredients, ensuring a cleaner, more wholesome product. This not only contributes to better health by avoiding unnecessary chemicals but also proves to be a more economical choice compared to frequently purchasing pre-packaged bars. Furthermore, crafting your own protein bars allows for customization to suit your specific dietary needs and taste preferences, ensuring a truly personalized and nourishing snack that fits seamlessly into a busy lifestyle.
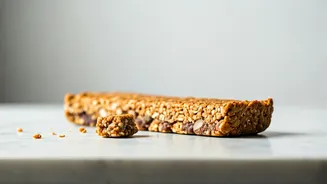
Natalie's Speedy Recipe
Holistic nutritionist Natalie Brady introduces a remarkably simple protein bar recipe that takes a mere 10 minutes to assemble, yielding an impressive 17 grams of protein per serving. She advocates for ditching commercial bars laden with fillers, gums, and added sugars, which can cause digestive discomfort and leave you feeling unfulfilled. Her solution is a readily achievable homemade alternative designed to be both satisfying and beneficial. The recipe emphasizes wholesome ingredients, making it a practical and intelligent choice for anyone seeking to boost their protein intake without compromising on health or taste. This quick preparation time makes it an ideal option for busy individuals or those needing a fast, nutritious boost.
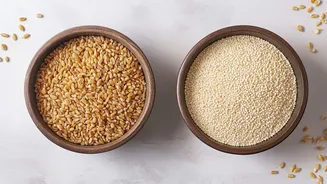
Essential Ingredients Listed
To create these high-protein, quick-prep bars, you'll need a few key components. Start with 1½ cups of almond meal, which provides a good base and healthy fats; oat flour can be substituted, though it will slightly reduce the overall protein content. A ¼ cup of vanilla protein powder is crucial for hitting the high protein target. Add a pinch of sea salt to enhance flavors. For richness and binding, incorporate ¾ cup of your favorite nut butter. Sweetness comes from ¼ cup of maple syrup, complemented by 1 tsp of vanilla extract for aroma. Finally, a ¼ cup of dark chocolate chips adds a delightful textural contrast and flavor boost, making these bars a truly satisfying treat.
Simple Preparation Steps
The preparation process is designed for maximum efficiency. First, line a loaf tin or a small container with baking paper, ensuring the paper extends up the sides for easy bar removal. In a mixing bowl, combine the dry ingredients: almond meal, vanilla protein powder, and sea salt, stirring thoroughly to ensure even distribution. Next, add the wet ingredients—nut butter, maple syrup, and vanilla extract—to the bowl. Mix everything until it forms a thick, cohesive dough. Gently fold in the dark chocolate chips, distributing them evenly throughout the mixture. Press this mixture firmly into the prepared tin, smoothing the top to create an even surface. Refrigerate the tin for at least four hours, or preferably overnight, allowing the bars to set completely.
Setting and Serving
Once the protein mixture has chilled and solidified, the bars are ready to be enjoyed. Remove the firm block from the tin by lifting it using the overhanging baking paper. Slice the block into eight equal portions, creating convenient, individual protein bars. For optimal freshness and to maintain their firm texture, store these homemade bars in the refrigerator. They can also be frozen for longer-term storage, offering a readily available, nutritious snack option whenever you need it. This method ensures that you always have a healthy, protein-rich snack at your fingertips, perfect for pre- or post-workout fuel or a mid-day energy boost.