


Gathering Your Materials
To embark on this delightful craft, you don't need a plethora of specialized supplies. The beauty of this project lies in its simplicity and accessibility.
Begin with a readily available sheet of paper; this could be plain white paper, colorful craft paper, or even repurposed materials like old wedding invitations or notebook pages. The core tools required are basic: scissors for cutting and glue for assembly. To add flair and personality, gather sketch pens, crayons, glitter, stickers, or remnants of decorative paper. The essence of handmade items is their inherent imperfections; they are meant to look distinctly unlike mass-produced goods, so don't fret about having the 'perfect' materials. Embrace what you have and let your creativity guide you.
Folding the Base
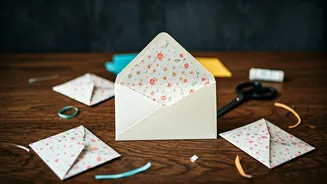
The initial step in crafting your Eidi envelope involves shaping your chosen paper into a basic form. Start by laying the paper flat. Then, take the bottom edge and fold it upwards, ensuring you leave a small margin at the top. This folded section will serve as the foundation to hold your Eidi. Next, gently fold the side edges inward, akin to closing the sides of a small pouch. At this stage, the shape might appear a bit uneven, which is entirely normal. Use your fingers to adjust the folds, pressing them down firmly to create clean lines. As you refine these folds, you'll begin to see the distinct outline of an envelope emerge, signaling the start of the fun and creative part of the process.
Securing the Structure
Once the basic folds are in place, it's time to secure the envelope's form. Apply a thin layer of glue along the edges of the side folds you made. It's crucial to be mindful not to use excessive glue, as this can cause the paper to wrinkle and detract from the envelope's neat appearance. Press down gently on the glued seams to ensure they adhere properly. Allow the glue a few moments to set. This action solidifies the envelope's structure, transforming it from a mere folded piece of paper into a tangible vessel ready to receive your thoughtful Eidi. With the sides sealed, you now possess a plain, yet promising, envelope awaiting further embellishment.
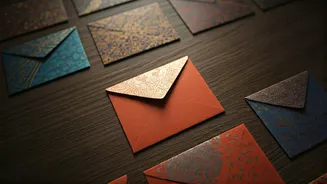
Designing for Eid
This is where the true festive spirit comes alive, especially for younger crafters who often dive in with unbridled enthusiasm. There's no single 'correct' method for decoration; the aim is pure joy and visual appeal. Consider drawing classic Eid motifs like a crescent moon and stars on the envelope's front, or perhaps some charming lanterns. Alternatively, boldly write 'Eid Mubarak' and fill the letters with vibrant colors. Intricate patterns, simple dots, flowing lines, or abstract swirls can all contribute to a festive look, even if they don't represent specific objects. Don't hesitate to incorporate any decorative elements you have on hand, such as glitter, stickers, or scraps of old gift wrap. Tearing and pasting these elements together allows for a wonderfully unique and even delightfully messy creation.
Adding Personal Touches
The true magic of a handmade Eidi envelope lies in the personal details you add. This step is about infusing the gift with warmth and individuality. Begin by writing the name of the recipient clearly on the envelope. You can also include a short, sweet message inside. Options range from a simple 'For your Eid treats' to a humorous note like 'Don’t spend it all at once.' For younger recipients, drawing their favorite things—a football, a cuddly cat, or even a funny face—demonstrates that you've put thought into their gift beyond just the monetary value. These small gestures transform a simple envelope into a treasured keepsake, reflecting care and affection.
The Final Closure
With the envelope decorated and personalized, the final step is to create the closing flap. Fold the top portion of the paper down over the envelope's opening. You can opt for a straightforward fold, or you can enhance its appearance by shaping the flap. For instance, cut the top edge into a gentle curve instead of a straight line. Another creative touch is to affix a small embellishment, like a star sticker, to act as a decorative clasp. Some individuals also prefer to tie a delicate ribbon or thread around the envelope for a refined finish. While not strictly necessary, these additions contribute to the overall aesthetic appeal and the sense of occasion.
Embracing Imperfection
It's important to remember that the charm of handmade items lies precisely in their deviations from perfection. Don't be discouraged if your envelope doesn't turn out exactly as planned. Perhaps it's a little larger or smaller than anticipated, or maybe a trace of glue is visible. The moon you drew might resemble a banana, and that's perfectly fine. The ultimate goal is not flawless execution, but the sentiment behind it. The joy is in the act of creation and the smile it brings to the recipient's face when they see the effort and love invested, making the Eidi exchange a genuinely special moment.
The Meaningful Exchange
There's a distinct feeling that accompanies presenting Eidi in a lovingly crafted envelope. It elevates the act of giving, shifting it from a simple transaction to a more intimate gesture. The phrase 'I made this for you' carries a weight that a store-bought envelope simply cannot match. Children, in particular, often recognize and appreciate this added layer of care. Beyond the individual gift, the process of making these envelopes can become a joyful part of the Eid celebration itself. Often, one leads to another, encouraging experimentation with different colors and designs, and fostering a sense of shared fun and accomplishment.