


Understanding Root Rot
Many plant enthusiasts mistakenly believe root rot is solely a consequence of overwatering. However, the root cause is often found in the soil's condition.
When soil remains saturated for extended periods, it deprives the plant's roots of essential oxygen, leading to a phenomenon known as 'suffocation before rot.' Research indicates that waterlogged environments significantly reduce oxygen availability in the root zone, initiating a cascade of detrimental physiological responses within the plant. This lack of oxygen is the primary trigger, creating an environment where fungal pathogens, such as Pythium, Phytophthora, and Rhizoctonia, can rapidly proliferate. Studies consistently show a direct correlation between soil moisture levels and the severity of root rot, meaning wetter soil conditions lead to a higher incidence of the disease. Ironically, a plant suffering from severe root rot might exhibit symptoms of thirst, with withered and dry leaves, even though the soil remains excessively damp. This occurs because the damaged roots are incapable of absorbing water, perpetuating the cycle of distress.
Root Inspection and Pruning
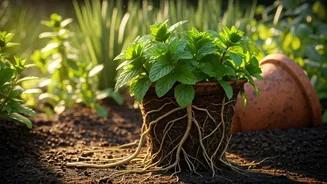
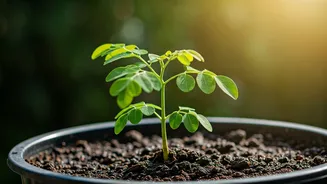
The most effective immediate action to save a waterlogged plant is to physically remove it from its pot and assess the root system. Gently support the plant's base and ease it out of the container, tilting the pot if necessary to avoid abrupt movements. Once exposed, carefully examine the roots. Healthy roots are typically pale and firm, often appearing white or light tan. In contrast, roots affected by rot usually turn brown or black, becoming soft and mushy to the touch, and may emit an unpleasant odor. The key assessment is the ratio of healthy to damaged roots. A substantial proportion of firm, viable roots indicates a good prognosis for recovery. If the majority of roots are compromised, recovery is still possible but becomes more challenging. Regardless of the extent of damage, the next step remains consistent: pruning away the affected parts. Using clean scissors or pruning shears, meticulously cut away all soft, discolored, or mushy roots. Thoroughness is crucial, as any remaining diseased tissue can fuel further fungal spread, jeopardizing the plant's survival. This process leaves you with the remaining healthy root structure.
Repotting and Soil Choice
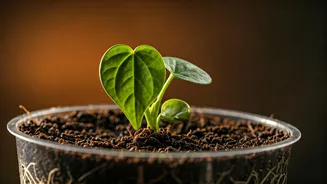
Following the pruning of damaged roots, the critical next step is to repot the plant into a completely new environment, discarding the old, contaminated soil. This old soil harbors the conditions that led to the root rot and will only perpetuate the problem if reused. Select a clean container, ensuring it has adequate drainage holes. A common mistake is opting for a pot that is too large for the plant; a small plant in an oversized pot will have more soil than its roots can effectively manage, leading to prolonged moisture retention. Therefore, choose a pot that offers just enough space for the plant to grow, with minimal excess room. It's also important to dispel the myth that a layer of gravel at the bottom of the pot aids drainage. In reality, this practice creates a 'perched water table,' where water collects just above the gravel, leaving the roots still sitting in standing moisture. The true solution for improved drainage lies in selecting the right pot and using an appropriate, well-draining potting mix. This foundational step is essential for preventing future issues and promoting healthy root development.
Post-Repotting Care
After repotting, resist the urge to water the plant immediately. The new potting mix is usually slightly damp, and the stressed roots need time to recover before being subjected to more moisture. Delay watering for a few days, and then check the soil moisture with your finger. Continue to wait if the soil still feels damp. Your focus shifts from a rigid watering schedule to actively observing the soil's condition. Once the plant shows signs of recovery, such as new growth, place it in a location that receives stable, indirect light. During this recovery phase, it is vital to refrain from fertilizing. The sole objective is to allow the roots to establish themselves without any additional demands. Some plants may rebound quickly, while others might take several weeks to produce new leaves. In cases of severe root damage, unfortunately, survival is not guaranteed. However, by taking prompt action the day you notice the problem, you significantly enhance your plant's chances of recovery. This entire rescue process, from removal to repotting, typically takes less than an hour and can be the crucial factor in saving your plant.