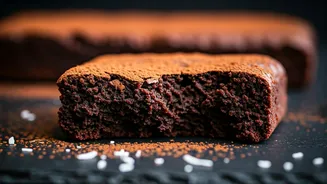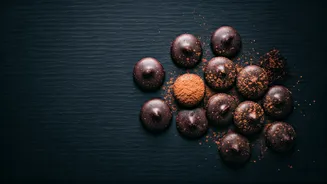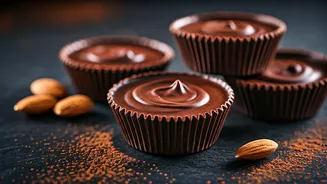


Crafting the Cups
Embark on the delightful journey of creating your own dark chocolate almond butter cups, a fantastic alternative to store-bought candies. The process begins
by preparing your workspace, typically a mini-muffin tin lined with paper cups. A crucial first step involves melting a portion of dark chocolate chips using a double boiler to achieve a smooth, luscious consistency. This melted chocolate is then carefully brushed onto the bottoms and sides of the paper liners, ensuring they are coated at least halfway up. This initial chocolate layer acts as a protective barrier, preventing the almond butter filling from seeping out and causing a mess during consumption. Once coated, the prepared liners are placed in the refrigerator to allow the chocolate to set firm, creating a solid base for the next stage of this sweet creation. Precision and a steady hand are key to achieving a clean, professional-looking finish for your homemade treats.
The Almond Butter Filling
The heart of these delightful cups lies in their rich almond butter filling. To prepare this essential component, you'll combine a few key ingredients in a bowl: creamy almond butter, a pinch of salt to enhance the flavors, arrowroot powder for thickening and binding, and a touch of vanilla extract for its aromatic sweetness. These ingredients are thoroughly mixed until they form a cohesive, smooth mixture. Once the chocolate-lined cups have firmed up in the refrigerator, this almond butter mixture is then divided equally among each of the prepared cups. Ensuring an even distribution guarantees that each bite delivers the perfect ratio of chocolate to almond butter, creating a balanced and satisfying taste experience. The consistency of the filling is important; it should be firm enough to hold its shape but still soft enough to melt in your mouth.
Sealing the Treat
The final layer of indulgence involves covering the almond butter filling with more melted dark chocolate. The remaining dark chocolate chips are melted using the same double boiler method employed earlier, ensuring a seamless transition in the process. Once melted and smooth, this luscious chocolate is carefully spooned over the almond butter mixture in each mini-muffin cup. It's vital to spread this top layer of chocolate evenly, ensuring it completely covers the almond butter filling. This creates a beautiful, sealed finish for your cups, much like the classic candy bars they are inspired by. After the chocolate has been spread, the entire mini-muffin pan is returned to the refrigerator. This chilling period is essential for the chocolate to harden completely, solidifying the structure of your homemade cups and making them ready to be enjoyed.
Tips for Perfection
Achieving consistently delicious results with these dark chocolate almond butter cups involves a few key considerations. The recipe yields approximately 16-18 cups, but this number can vary based on personal preference for cup size. Making them smaller, for instance, results in 20 cups, offering a more delicate treat, while larger cups (around 12) result in a richer, more decadent experience. It's important to note that the type of dark chocolate used can influence the outcome; some homemade dark chocolate chips may not re-melt as smoothly as store-bought varieties, potentially impacting the texture. When selecting chocolate, consider options with lower sugar content to align with a healthier treat philosophy. Proper storage is also key: keep these homemade delights refrigerated in an airtight container to maintain their freshness and texture.