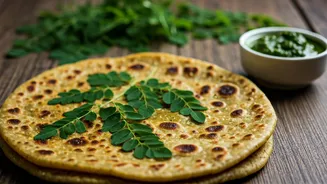

Gather Your Ingredients
Preparing the perfect Moringa Paratha begins with gathering the necessary ingredients. This includes wheat flour, which forms the base of the paratha.
You will also need moringa powder, the star ingredient, providing the unique flavor and health benefits. Other essential ingredients are salt, water for kneading, and ghee or oil for cooking. Some variations may also include spices like turmeric or cumin powder to enhance the taste. Ensure you have fresh moringa powder for the best flavor and nutritional value. The quality of your ingredients directly impacts the final taste and texture of your paratha. Having all ingredients readily available streamlines the cooking process, ensuring a smooth and enjoyable experience. Measuring ingredients accurately is vital, so consider using measuring cups and spoons for precise amounts. If you are experimenting with adding spices, start with small quantities, then adjust to your personal preference. Remember to choose fresh, high-quality ingredients for the best results, as this will significantly enhance the overall appeal of your homemade Moringa Paratha.
Kneading the Dough
The process of kneading the dough is key to a soft and pliable paratha. Combine the wheat flour, moringa powder, salt, and any additional spices in a mixing bowl. Mix the dry ingredients well to ensure even distribution of the moringa powder and spices. Gradually add water, a little at a time, while mixing the ingredients with your hands or a spoon. The water temperature should be lukewarm, ensuring better dough consistency. Continue to add water and mix until a dough starts to form. Once the dough has formed, begin kneading it. Knead the dough vigorously for about 5-7 minutes until it becomes smooth and elastic. The kneading process develops the gluten in the flour, which gives the paratha its characteristic texture. The dough should be soft but not sticky. If the dough feels too dry, add a few more drops of water. If it feels too wet, add a little more flour. Once the dough has reached the desired consistency, cover it with a damp cloth or plastic wrap to prevent it from drying out. Let the dough rest for about 20-30 minutes. This resting period allows the gluten to relax, which makes the parathas easier to roll and cook.
Rolling the Paratha
Rolling the paratha requires a smooth surface and a light touch. Divide the rested dough into equal-sized portions. The number of portions will determine how many parathas you will make. Take one portion of dough and roll it into a ball, then flatten it slightly. Lightly dust your rolling surface (a clean kitchen counter or a rolling board) with some dry flour. This prevents the dough from sticking. Use a rolling pin to roll out the dough into a thin, circular shape. The thickness of the paratha is a matter of personal preference, but generally, a thin paratha cooks evenly and has a better texture. Aim for about 6-8 inches in diameter. If the dough sticks to the rolling pin or surface, lightly dust the dough with more flour. If the paratha shape is not perfectly round, don't worry, as it adds to the homemade charm. Once you have rolled out the paratha, it's ready for the next step: cooking. Handle the rolled-out paratha gently to avoid tearing. Practice makes perfect, so don't be discouraged if your first few parathas aren't perfectly shaped. The key is consistent effort, and you will soon master the art of rolling.
Cooking the Paratha
Cooking the Moringa Paratha is the final step to creating this delightful dish. Heat a flat griddle or tava over medium heat. Once the griddle is hot, lightly grease it with ghee or oil. Place the rolled-out paratha onto the hot griddle. Cook the paratha for about 1-2 minutes on each side, or until golden brown spots begin to appear. Gently flip the paratha with a spatula. Drizzle a little more ghee or oil around the edges and on top of the paratha. Press down gently on the paratha with a spatula as it cooks to ensure even cooking and encourage it to puff up. Cook for another minute or two, flipping the paratha a few times, until both sides are golden brown and cooked through. The paratha should be crispy on the outside and soft inside. Remove the cooked paratha from the griddle and place it on a plate. Repeat the process with the remaining dough portions. Serve the Moringa Paratha hot, and it can be enjoyed with yogurt, chutney, or your favorite side dishes. Cooking time may vary slightly depending on your griddle and heat source, so adjust as needed.