
Selecting the Right Flour
The foundation of a great chapati lies in the flour. Opt for whole wheat flour, often labeled as 'atta' in Indian stores. This type of flour is key to yielding
the best results. Ensure the flour is fresh; check the expiry date. Fresh flour contains more gluten, a protein crucial for the chapati's elasticity and ability to trap steam, which contributes to its fluffiness. Also, consider the brand of the flour, as different brands may produce different textures. A good starting point is to consult recommendations from experienced chapati makers or explore reviews to find the best atta for your needs. While whole wheat flour is primary, adding a small amount of other flours like rice flour can influence the texture, but whole wheat should always be the base. This ensures that the resulting chapatis have the desired flavor, texture and will remain soft for a longer duration.
Kneading the Dough
Kneading the dough properly is one of the most important steps. Begin by gradually adding water to the flour. Start with lukewarm water, as it helps activate the gluten in the flour. Add the water slowly, mixing with your fingers until the flour absorbs the water and forms a shaggy mass. Once the flour has absorbed most of the water, begin kneading. The goal is to develop the gluten and create a smooth, pliable dough. Knead the dough for about 10-15 minutes, until it becomes soft and elastic. The dough should not be too sticky or too dry; adjust the water if needed. A well-kneaded dough is the secret to soft chapatis. Proper kneading allows for the creation of air pockets which will later inflate the chapati, making it soft and fluffy. After kneading, let the dough rest for at least 30 minutes, covered with a damp cloth or plastic wrap. This allows the gluten to relax, further improving the texture.
Resting the Dough
The resting period is often overlooked, but it's vital for soft chapatis. After kneading, place the dough in a bowl, cover it with a damp cloth or plastic wrap, and let it rest at room temperature for at least 30 minutes, though longer is better. The resting period allows the gluten in the flour to relax, which prevents the chapatis from shrinking or becoming tough during cooking. As the gluten relaxes, the dough becomes more pliable, which means the chapatis will be easier to roll out evenly. The moisture from the damp cloth prevents the dough from drying out, keeping it supple. If you plan to make chapatis later in the day or the next day, you can refrigerate the dough. Ensure it is well-covered to prevent a dry surface. Remove it from the refrigerator at least an hour before rolling and cooking, to allow it to come to room temperature. This ensures the dough rolls out evenly and the resulting chapatis are soft.
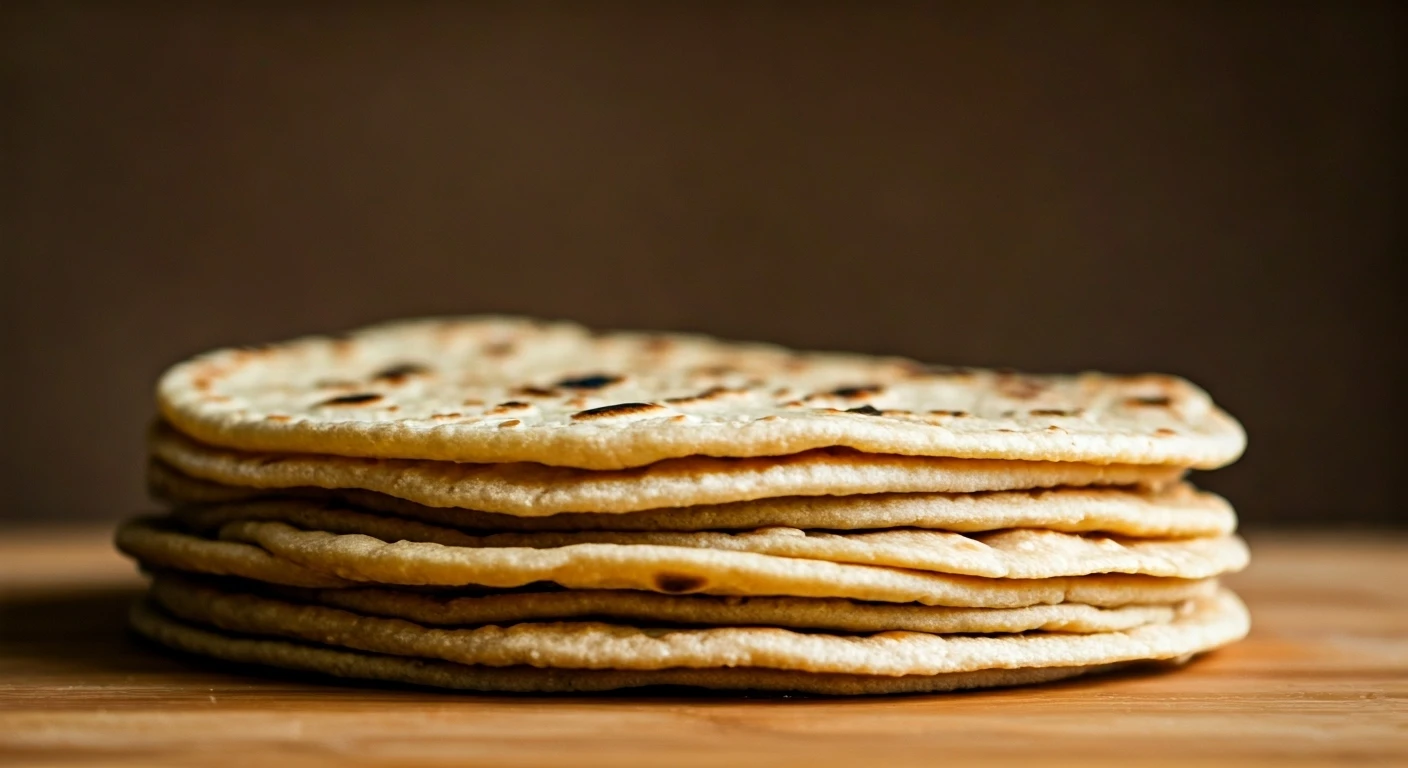
Rolling Out the Chapatis
Rolling the chapatis to the right thickness and shape is crucial. Start by dividing the dough into equal-sized balls. The size of the balls will determine the size of your chapatis; aim for a golf ball size for a standard chapati. Dust each ball with dry flour and flatten it slightly with your fingers. Then, using a rolling pin, begin rolling each ball into a circle. Aim for a consistent thickness throughout, about 1-2 mm. This consistency ensures even cooking. Rotate the dough as you roll to achieve a circular shape. Avoid rolling too thin, as this may lead to chapatis that become hard. If the dough sticks to the rolling pin or surface, dust with a little more dry flour. Be gentle, applying even pressure to ensure the chapatis maintain a soft texture during cooking. A well-rolled chapati will puff up during cooking, indicating it’s soft and ready.
Cooking on the Tawa
The cooking process significantly influences the final texture. Heat a flat griddle or tawa over medium-high heat. Once the tawa is hot, place a rolled-out chapati on it. Cook the chapati for about 30-60 seconds on the first side, or until you see small bubbles begin to form. Flip the chapati and cook the other side for about the same amount of time, or until light brown spots appear. This initial cooking partially cooks the chapati. Now, the magic happens: using tongs, place the partially cooked chapati directly over an open flame, if you have a gas stove. The heat will cause the chapati to puff up like a balloon, a sign of a perfectly cooked and soft chapati. If using an electric stove, you can use a small wire mesh over the burner to achieve a similar effect. Hold the chapati over the flame, rotating it until it puffs up on both sides. If it doesn't puff, it might be too thick or the dough needs more gluten development. Make sure the flame is not too high, so it doesn't burn the chapati.
Keeping Chapatis Soft
Proper storage is key to maintaining chapati softness. After cooking, immediately remove the chapati from the flame and brush it lightly with ghee or butter. This step adds flavor and helps keep the chapatis soft. Place the cooked chapatis in a clean, insulated container or a casserole lined with a clean kitchen towel. Make sure to stack the chapatis on top of each other to retain moisture. This helps to trap the steam and prevent them from drying out. Cover the container with a lid or wrap the chapatis in the towel to trap moisture and maintain warmth. Avoid stacking chapatis while they are still hot; this might lead to condensation and make them soggy. For longer storage, you can wrap the cooked chapatis in aluminum foil before placing them in the insulated container. This helps preserve moisture and softness for a more extended period. You can reheat them later, if needed, either on the tawa or in a microwave for a few seconds.