
The Walkout
The walkout is the initial action, the beginning of the barbell row journey. First, position yourself directly under the loaded barbell in a power rack.
The bar should be set at a height where it rests comfortably on your upper back. Once the bar is in place, center your feet beneath it, shoulder-width apart. This stance ensures stability. Next, firmly grasp the bar. Your grip will be determined by your preferred width. Maintaining a tight core and straight back, lift the bar off the rack. Take a few steps backward to clear the rack. Your stance will be adjusted depending on your goals, with a wider stance potentially better for a more explosive pull. Before you start the row, make sure your balance is steady. Then, prepare for the next step.
Base Establishment
Establishing a solid base is crucial for a safe and effective barbell row. Begin by positioning your feet shoulder-width apart. Ensure your toes are pointed slightly outward, providing a stable foundation. Next, hinge at your hips, pushing them back while keeping your back straight. Bend your knees slightly as you lower your torso towards the bar. The exact angle will depend on your body type and preference, but you will want your torso at approximately a 45-degree angle to the floor. This angle promotes a neutral spine and allows for optimal pulling. Keep your core engaged throughout the movement to maintain stability. Maintain a flat back and head up, looking slightly forward to help keep your back straight. Your chest should be up, and your shoulders should be back.
Grip and Position
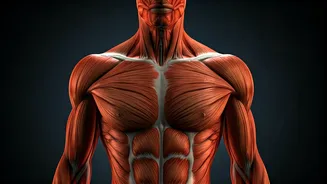
The right grip and hand position are key to maximizing effectiveness and preventing injury. The most common grip is the overhand grip, where your palms face down. Choose a grip width slightly wider than your shoulders to maximize back muscle engagement. For a wider grip, start with your hands a little further out and adjust as needed. Once your grip is secure, make sure your wrists are in a neutral position. This means your wrists should be neither bent forward nor backward. The bar should sit directly across your palm and contact with your fingers. Keep your forearms tight and your arms extended to feel the tension in your lats. This grip ensures that your back muscles bear the brunt of the load, not your arms. Proper grip and positioning are essential for protecting your shoulders and preventing strains.
Elbow and Wrist
Correct positioning of your elbows and wrists are important elements for maximizing muscle engagement and protecting your joints. Your elbows should be slightly bent when you grab the bar. As you pull the bar towards your chest, the elbows should move back, driving the movement. Avoid letting your elbows flare out. This can reduce the range of motion and put unnecessary strain on the shoulders. Keep the elbows close to your body throughout the exercise for optimal muscle activation and shoulder joint safety. Your wrists should remain in a neutral position throughout the entire movement. If your wrists bend forward or backward, it can lead to discomfort or potential injury. The right elbow and wrist positioning helps prevent injuries and allows a proper contraction of the back muscles.
Breathing and Brace
Breathing and bracing are crucial for maintaining core stability and generating the necessary force during the lift. Before you pull the bar towards your chest, take a deep breath into your belly. The air should fill your abdomen, not just your chest. Once your belly is full of air, brace your core. Engage your abdominal muscles as if you are preparing for a punch. This creates intra-abdominal pressure, which stabilizes your spine and protects your lower back. Think of your core as a rigid cylinder supporting your back. Exhale as you lower the weight back to the starting position. The proper breathing technique helps you lift heavier weights safely and efficiently. It enhances your overall performance and safeguards against injuries.
Green Light Check
This green light checklist is your final step before beginning the lift. First, check your stance: feet shoulder-width apart, toes slightly outward, stable base. Second, verify your grip: overhand, slightly wider than shoulder-width, wrists neutral. Third, evaluate your back position: straight back, chest up, head neutral. Fourth, ensure your elbows are in the right position: close to the body during the movement. Fifth, make sure you have taken a deep breath, and your core is braced. Make these checks before each lift. Your safety is the priority. Ensuring that each element is correct will boost your performance and reduce the risk of injury. Performing the green light check every time helps reinforce good habits and helps you stay focused on your form during the entire exercise.