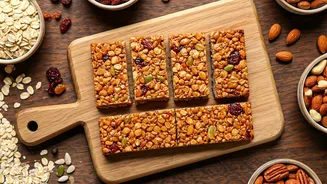

Gather Your Essentials
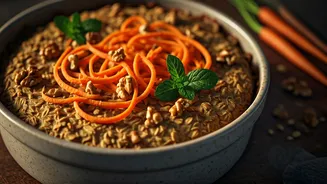
To embark on this culinary adventure, you will need a handful of essential components. Start with the foundation: rolled oats, the heart of any good granola
bar. Next, incorporate a medley of nuts and seeds, such as almonds, peanuts, or pumpkin seeds, for added texture and nutritional value. For a touch of natural sweetness and chewiness, gather some dried fruits like raisins or dates. A natural sweetener, either honey or maple syrup, will bind everything together, along with some nut butter for that necessary stickiness, and a pinch of salt to balance the flavors. If desired, you can add dark chocolate chips, cinnamon, or vanilla for a more customized taste experience.
Toast for Flavor
To elevate the flavor and texture of your homemade granola bars, the initial step involves lightly toasting the rolled oats and nuts. In a dry pan over medium heat, or in the oven, spread out the oats and nuts and let them roast. This gentle roasting process enhances the flavors and creates a delightful crunch. Keep a close eye on them, stirring frequently to prevent burning, until they turn aromatic and slightly golden. This initial preparation is important in preventing the bars from becoming soft or soggy after they are set. Roasting also brings out the natural oils in the nuts, adding depth and a more complex flavor profile to the finished product.
Make Sticky Batter
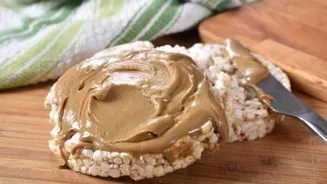
The secret to a perfect granola bar lies in the preparation of a sticky binder. In a pan over low heat, gently warm the nut butter with honey or maple syrup. Adding a pinch of salt and a dash of vanilla extract will help to enhance the flavors. Stir the mixture slowly until it becomes smooth and glossy. This warm, sticky blend serves as the glue, holding all the other ingredients together to create the perfect bar. The consistency is key: it should coat all the dry ingredients evenly, ensuring that the bars hold their shape and stay together during slicing and consumption.
Mix Everything Together
Once the oats, nuts, and dried fruits are toasted and the binder is prepared, it is time to bring everything together. In a large mixing bowl, combine the toasted oats, nuts, and dried fruits. Pour the warm, sticky binder over these dry ingredients. Mix everything thoroughly to ensure every piece is evenly coated. A thorough mix is essential, as it guarantees that all components are bound together, preventing the bars from crumbling. It is equally important to make sure the flavor profile is balanced; every bite should contain a blend of sweet, crunchy, and chewy elements.
Press Firmly
After the ingredients are combined, the mixture needs to be carefully transferred to a tray lined with parchment paper. This step is crucial for shaping your bars. Press the mixture firmly into the tray using a spoon or the back of a bowl. The goal is to compress the ingredients together tightly, thus, preventing them from falling apart once the bars are cut. Make sure there are no gaps. A tightly packed mixture results in a perfectly textured granola bar that holds its shape. Proper pressing ensures that each bar maintains its form and offers a satisfying bite without crumbling.
Set, Slice, Store
The final stage involves setting, slicing, and storing your granola bars. Refrigerate the tray for 2 to 3 hours to achieve a chewy texture. Alternatively, if you like a crunchier bar, bake the mixture in a preheated oven at 170°C for 15 to 18 minutes. Once the bars are set and cooled, carefully slice them into desired sizes. The use of a sharp knife ensures clean cuts, and the size can be adjusted according to personal preference. To maintain freshness and quality, store the sliced granola bars in an airtight container at room temperature for up to a week. The airtight seal keeps them from drying out, preserving their delicious flavor and texture for as long as possible.