


A Healthier Rosogolla Twist
Rosogolla, a quintessential Bengali confection, has undergone a delicious transformation into a baked variant that aligns perfectly with contemporary health
consciousness. Traditionally, this spongy delight is prepared by boiling chenna (curdled milk solids) in a sugar-rich syrup, resulting in a syrupy and sweet treat. However, this innovative approach shifts the focus towards a baked preparation, utilizing a significantly reduced amount of syrup and incorporating a protein-fortified base. This method not only modifies the texture, lending it a slightly firmer exterior while maintaining a soft core, but also significantly cuts down on sugar content. The result is a dessert that feels lighter and more balanced, making it an ideal choice for those seeking healthier dessert options without compromising on flavour or the comforting essence of this cherished sweet. It's a testament to how traditional recipes can be adapted to suit evolving dietary preferences and wellness goals.
Crafting the Chenna Base
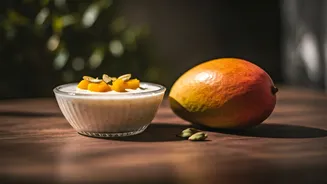
The foundation of these healthier baked rosogollas lies in meticulously prepared chenna, a protein powerhouse derived from milk. To begin, a litre of full-fat milk is heated until it reaches a boil, after which the heat is reduced. A gentle addition of 2-3 tablespoons of lemon juice or vinegar prompts the milk to curdle, separating into solid curds and liquid whey. This chenna is then carefully strained through a fine-mesh sieve lined with muslin cloth, ensuring all excess water is expertly squeezed out. This forms the primary ingredient for our dough. To this, we introduce 1/4 cup of crumbled paneer, which enhances the richness and texture. For an added protein punch, 2 tablespoons of almond flour and an optional 1 tablespoon of whey protein powder are incorporated. A quarter teaspoon of cardamom powder lends its aromatic charm, and a natural sweetener of choice, such as stevia or erythritol, is added to taste. The key is to knead this mixture gently for about 5-7 minutes until it achieves a smooth, soft, and cohesive dough. Over-kneading must be avoided to maintain the delicate texture of the final product. Small, equal portions of this dough are then rolled into perfectly smooth, crack-free balls.
Preparing Light Syrup
While the traditional rosogolla is steeped in a heavily sweetened syrup, this baked version opts for a lighter, more delicate sweetness. The syrup for our baked rosogollas is prepared by combining 2 cups of water in a deep pan with a sweetener of your choice, such as stevia or erythritol, adjusted to your preferred level of sweetness. This mixture is brought to a boil and then allowed to simmer gently for approximately 5 minutes, allowing the flavours to meld. For an optional touch of visual appeal and subtle aroma, a few strands of saffron can be added during this simmering process. This light syrup serves a dual purpose: it provides the necessary moisture to prevent the rosogollas from drying out during baking and imparts a subtle, pleasant sweetness that complements the creamy chenna without overwhelming it. The reduced volume and sugar content make this syrup a healthier alternative to the traditional syrupy bath, contributing to the overall lighter profile of the dessert.
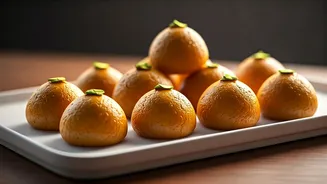
Baking to Perfection
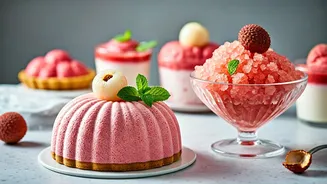
The transformation into baked rosogollas culminates in a gentle baking process that imparts a unique texture. Once the chenna balls are formed and the light syrup is prepared, the next step involves carefully placing the dough balls into a baking dish. The pre-prepared, lightly sweetened syrup is then poured over these balls, ensuring they are coated but not submerged. The dish is then placed into a preheated oven set at 180°C (350°F). The rosogollas are baked for approximately 25-30 minutes, or until they develop a slightly golden hue on their surface. It's crucial not to overbake them, as this can lead to a dry texture. The goal is a light caramelisation on the exterior while preserving the soft, spongy interior. A gentle press on the baked rosogollas can indicate their readiness, revealing a tender core. The baking time might vary slightly depending on the oven, so keeping a watchful eye is recommended to achieve the desired consistency. This method results in a rosogolla that is both visually appealing with its subtle golden top and delightfully textured.
Cooling and Serving
The final stage in creating these delicious no-sugar baked rosogollas involves a crucial cooling period that allows the flavours to fully develop and the texture to set. After removing the baking dish from the oven, the rosogollas are best left to cool within the residual warmth of the syrup for at least 30 minutes. This allows them to absorb any remaining moisture and ensures the centre remains wonderfully soft and moist. For an even more refreshing experience, particularly suited for warmer climates or as a light summer dessert, refrigerating the rosogollas after this initial cooling phase is highly recommended. When ready to serve, these baked rosogollas offer a delightful contrast to their traditionally boiled counterparts; they possess a slightly firmer outer layer that has a hint of caramelisation, giving way to a soft, yielding centre. Their mildly sweet, creamy flavour profile, enhanced by the subtle notes of cardamom and natural sweetener, makes them a perfect guilt-free indulgence. They are best enjoyed chilled, providing a light yet satisfying conclusion to any meal.