


Milk to Curd Transformation
The journey to homemade paneer begins with selecting the right ingredients and setting the stage for curdling. You'll need one liter of full-fat milk,
which is crucial for achieving the best texture and yield. Additionally, gather your acid, typically two to three tablespoons of either fresh lemon juice or white vinegar. The process starts by heating the milk in a sturdy, heavy-bottomed pot over medium heat. It's important to stir occasionally to prevent the milk from sticking to the bottom and scorching, which could impart an undesirable flavor. Bring the milk to a vigorous, rolling boil. Once it reaches this stage, immediately reduce the heat to low. Now comes the magic: slowly introduce your chosen acid, adding it a tablespoon at a time while stirring gently. As you stir, you'll observe the milk beginning to separate into distinct solid white masses (the curds) and a yellowish-greenish liquid (the whey). Continue this gentle stirring until the separation is complete, and the whey appears relatively clear, signaling that all possible curd has formed. At this point, turn off the heat.
Separating and Pressing
With the milk successfully curdled, the next critical steps involve efficiently separating the cheese curds from the whey and then pressing them into a firm block. Prepare your straining station by lining a fine-mesh sieve or a colander with a layer of cheesecloth or muslin cloth. Position this sieve over a bowl to conveniently collect the draining whey. Carefully ladle or pour the curdled milk mixture into the cloth-lined sieve. The whey will naturally filter through, leaving the soft paneer curds behind, neatly contained within the cloth. An optional but recommended step, particularly if you used lemon juice, is to rinse the curds under cold running water while they are still in the cheesecloth. This helps to wash away any lingering sourness. After rinsing (or skipping this step), gather the corners of the cheesecloth, twist them to form a compact bundle of curds, and give it a gentle squeeze to remove some of the excess liquid. Place this bundle on a flat, stable surface. To achieve the desired firmness and shape, place a heavy object, such as a plate weighed down with more plates or cans, or a heavy book, directly on top of the paneer bundle. Allow it to press for a minimum of 30 minutes, and up to an hour, depending on how dense and solid you prefer your paneer to be. The longer it presses, the firmer it will become.
Finishing Touches
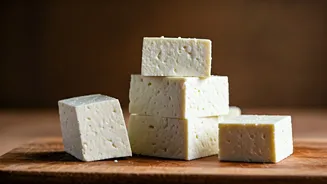
Once your paneer has achieved the perfect consistency through pressing, it's time for the final preparation and storage to enjoy its freshness. Carefully unwrap the paneer from the cheesecloth. It should now be a cohesive, firm block that readily holds its shape, a testament to the successful curdling and pressing process. Using a sharp knife, cut the paneer into your preferred shapes – cubes are common for curries, while slices can be used for sandwiches or frying. For optimal flavor and texture, it's best to use your homemade paneer within two to three days. Store any leftovers in an airtight container in the refrigerator. A crucial tip for consistent success is to always use full-fat milk; lower-fat alternatives may not curdle as reliably, impacting the final outcome. Additionally, avoid excessive stirring after adding the acid, as this can lead to a tougher paneer. Lastly, don't discard the whey – it's a nutritious liquid that can be incorporated into other recipes, such as baking bread or enriching soups, adding another layer of value to your homemade cheese-making endeavor.