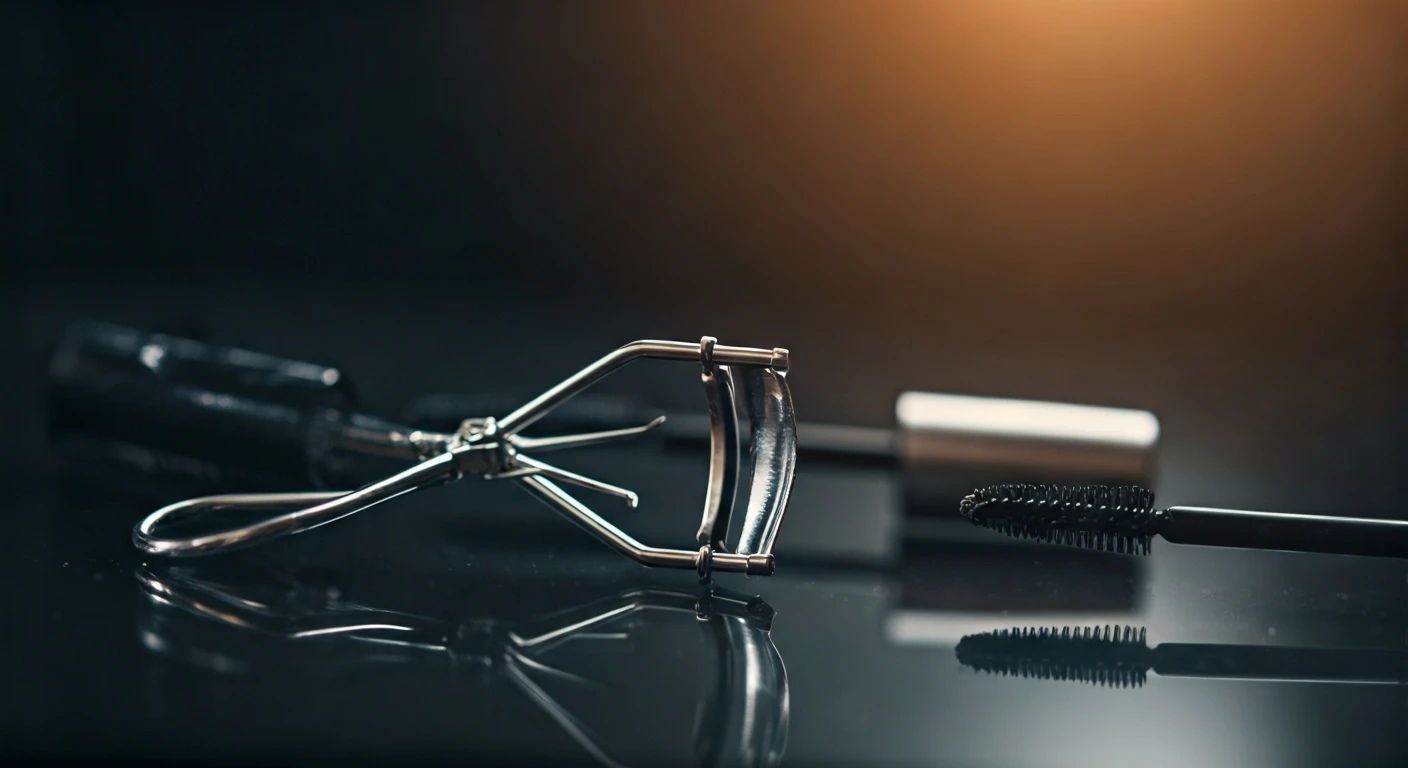


Clean, Ready Lashes
Start with a blank canvas: clean, dry lashes are key. Before anything else, ensure your lashes are free from any makeup residue, oils, or creams. This
allows the curling process to work effectively. Washing your face with a gentle cleanser and drying the area thoroughly is a crucial first step. Removing any impurities prevents your lashes from clumping or losing their curl prematurely. Clean lashes provide the best foundation for a long-lasting, defined curl, setting the stage for the rest of the process. The absence of any substances enables the curler to grip each lash properly, resulting in a more dramatic effect and enhanced longevity.
Warm Up the Curler
Adding a little heat can dramatically improve your curling experience. Gently warm up your eyelash curler before using it. You can use a hairdryer on a low setting, holding it over the curler for a few seconds. Be very careful not to overheat the curler, as this could burn your eyelids. A warmed curler helps to shape the lashes more easily, just like using a heated hair tool. The heat aids in setting the curl, providing extra hold and making the lashes appear more lifted and voluminous. This simple step provides a significant advantage for achieving the perfect curl that stays put for longer, so remember to let it cool down before contact with your eyelid.
Choose Quality Curler
The type of curler you use significantly impacts the outcome. Invest in a high-quality eyelash curler. This tool should fit comfortably and grip your lashes firmly. Look for curlers with a sturdy construction and a soft, replaceable rubber pad. A poor-quality curler can pinch or break your lashes, while a good one will provide a smooth, efficient curl. Testing the curler before use is a good idea – place your lashes inside and gently squeeze. Consider different shapes and sizes until you find a curler that suits your eye shape for the best result. Your eyes will thank you for selecting a tool that is gentle and effective.
Curl in Sections
For maximum impact and a naturally beautiful curl, consider curling your lashes in sections. This method is very effective for achieving the desired look. Start at the base of your lashes, near the eyelid, and squeeze the curler gently for a few seconds. Then, move the curler up the lash and repeat this process, curling in small increments. This technique provides a more defined and lifted effect, creating a dramatic result, without damaging your lashes. The incremental curling distributes the curl evenly. This approach makes a difference in the outcome, helping you achieve a professional-looking curl. Do not skip this important step, the result is worth it.
Hold for 10 Seconds
Patience is key when curling your lashes. The longer you hold the curler, the better the curl will be. After placing the curler, hold it in position for about 10 seconds. Ensure the curler is held securely. The heat from a heated curler helps mold the lash into shape, giving it the desired lift and definition. This simple step contributes significantly to the longevity of your curl, helping them maintain their shape throughout the day. Take care to avoid pulling on the lashes, which could damage or break them, and always be gentle.
Waterproof Mascara First
For a curl that truly lasts, waterproof mascara is your best friend. Apply a coat of waterproof mascara before curling your lashes. This helps the curl 'set' and ensures that your lashes remain lifted throughout the day. The waterproof formula adds hold, preventing the curl from drooping. Applying mascara beforehand creates a base for your curl, allowing it to set properly. However, be very careful: the curler should be applied carefully to avoid any damage. This technique delivers superior results, creating a more enhanced and lasting curl. This will assist in your overall look. Remember to let the mascara dry before the next step.
Lash Primer Boost
Before applying mascara, use an eyelash primer for enhanced results. Lash primers work like a base coat for your lashes, helping to create volume, length, and hold. Applying primer before mascara increases the hold of your curl and preps your lashes. Primer also adds extra definition and ensures your lashes will look fuller. It also provides a smooth surface for the mascara to adhere to, preventing clumping. Using a lash primer will help you achieve a more dramatic curl, increasing the longevity of the look. Primer ensures that your lashes look enhanced and stay curled for longer, so be sure to incorporate this step.
Avoid Heavy Mascara
The type of mascara you use can influence the duration of your curl. Avoid using heavy or volumizing mascaras, as they can weigh down your lashes, causing the curl to droop. If using a volumizing mascara, apply it in thin layers. Use a mascara formula that provides definition and lift without adding too much weight. Opt for a mascara that emphasizes lengthening and separating the lashes. This approach helps maintain the shape of your curl throughout the day. By choosing a lightweight mascara, you can ensure your lashes remain curled and lifted longer, delivering a more impactful look.
Comb Through Lashes
After applying mascara, take the time to comb through your lashes. Use a lash comb to separate each lash, removing any clumps. Combing separates your lashes, ensuring a more defined curl and preventing them from sticking together. This step also helps to distribute the mascara evenly, creating a polished and natural look. A well-groomed appearance also helps to extend the longevity of the curl. By using a lash comb, you can achieve a more defined look. Combing also helps to prevent any build-up of mascara. A simple technique will maximize your lash's potential.
Set with Clear Gel
To truly lock in your curl, finish with a clear brow or lash gel. A clear gel acts as a sealant, holding the curl in place and preventing it from drooping. Apply a coat of clear gel over your mascaraed lashes to set the curl and keep it intact. This provides an extra layer of hold. The clear gel provides a waterproof barrier, shielding your lashes from humidity and environmental factors that can affect their shape. Finishing with a clear gel extends the life of your curl, guaranteeing your lashes maintain their shape all day. Incorporate this step into your daily routine to maintain the results.