


Essential Equipment Unveiled
Before you begin the magical process of nurturing a sourdough starter, gathering the right tools is paramount. You'll need a clean glass jar or container,
ideally with a lid that allows for some air circulation, such as cheesecloth secured with a rubber band or a loose-fitting lid. A kitchen scale is highly recommended for precise measurements of flour and water, ensuring consistency in your starter's development. A non-metal spatula or spoon is preferable for mixing, as metal can sometimes react with the wild yeast and bacteria. Additionally, having a dedicated place to store your starter, where the temperature is relatively stable, will be beneficial throughout its growth. Don't forget a supply of unbleached all-purpose flour or bread flour, and filtered or non-chlorinated water, as these are the foundational elements of your burgeoning starter.
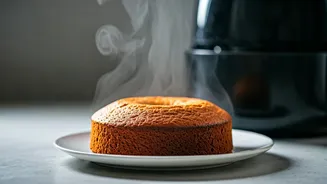
Day 1: The Genesis
The journey of your sourdough starter begins on Day 1 with a simple, yet crucial, mixture. In your clean jar, combine equal weights of flour and water – a common starting point is 50 grams of flour and 50 grams of water. Mix these ingredients thoroughly until no dry flour remains, achieving a thick, paste-like consistency. It's essential to use unbleached flour, as the bleaching process can harm the wild yeasts and bacteria necessary for fermentation. Cover the jar loosely to allow for airflow and place it in a warm spot, ideally around 24-28 degrees Celsius (75-82 degrees Fahrenheit). This environment encourages the initial activity of the microorganisms present in the flour. You might not see significant activity on the first day, and that's perfectly normal. The goal is simply to establish the base for your starter to thrive.
Day 2: Gentle Stirring
On Day 2, your starter might begin to show subtle signs of life, or it might still appear dormant. The primary action for this day is a gentle stirring. Remove the cover and stir the mixture thoroughly. This process helps to aerate the starter and distribute the developing microbial population. Discarding a portion of the starter before stirring is often recommended from this point onward to manage the volume and the food-to-microorganism ratio, though some beginners wait until Day 3. If you choose to discard, remove about half of the starter and then stir the remaining portion. Even if you don't observe bubbling or rising yet, the microorganisms are beginning to awaken and consume the available food source. The warm environment remains key to fostering this early development. Patience is a virtue during these initial stages.
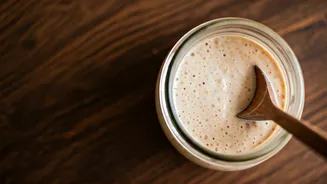
Days 3-14: The Feeding Ritual
From Day 3 onwards, your starter will enter a more active phase, requiring consistent feeding to build its strength and flavor. The daily routine involves discarding a significant portion of the starter (typically leaving about 25-50 grams) and then replenishing it with fresh flour and water. A common feeding ratio is 1:1:1, meaning you add equal weights of starter, flour, and water. For instance, if you have 50 grams of starter remaining, you'd add 50 grams of flour and 50 grams of water. Mix well until a smooth batter forms. You should start observing distinct activity: bubbles forming throughout the mixture, a pleasant, slightly tangy aroma, and noticeable rising within a few hours after feeding. This period is crucial for developing the robust community of wild yeast and lactic acid bacteria that give sourdough its characteristic flavor and leavening power. Continue this daily feeding ritual, observing changes in aroma, texture, and activity.
Readiness Assessment
Knowing when your sourdough starter is ready to bake with is a significant milestone. The most reliable indicator is consistent doubling in size within 4-8 hours after feeding. When your starter reaches its peak after a feed, it should be bubbly, airy, and have a pleasant, slightly sour aroma – not unpleasant or alcoholic. A simple float test can also provide a clue: drop a small spoonful of starter into a glass of water. If it floats, it's generally considered ready, signifying it's full of active gases produced by the yeast. However, visual cues and doubling are often more important than the float test alone. Your starter should also exhibit predictable behavior, rising and falling consistently after each feeding. This sustained activity indicates a healthy, well-established culture capable of leavening your bread effectively.
Troubleshooting Common Hiccups
During the starter cultivation process, encountering a few issues is common. If your starter seems sluggish and isn't showing much activity, ensure it's in a consistently warm environment. Sometimes, a prolonged period of low activity might mean the initial flour or water wasn't optimal, or the balance of microbes hasn't quite settled. Discarding more and feeding more frequently can sometimes revive a weak starter. A thin, watery layer on top, known as 'hooch,' is a sign that your starter is hungry; simply pour it off and feed as usual. If you notice an unpleasant, acetone-like smell, it might indicate an imbalance of bacteria, but often resolves with consistent feeding. Mold is a clear sign that the starter is contaminated and should be discarded entirely. Remember, patience and consistent feeding are key to overcoming most challenges.
Maintenance & Storage
Once your sourdough starter is mature and reliably active, you can transition to a maintenance routine. If you bake frequently, keeping it on the counter and feeding it daily or twice daily (depending on temperature) is ideal. For less frequent bakers, storing the starter in the refrigerator significantly slows down its activity and reduces the need for daily feeding. When stored in the fridge, feeding it once a week is generally sufficient. Before baking, you'll need to take it out of the refrigerator, let it come to room temperature, and give it a few feedings to reawaken its full vigor. If you plan to be away for an extended period, you can dry your starter or dehydrate it for long-term storage, reconstituting it when you return. Properly maintained, a sourdough starter can last for decades, becoming a cherished culinary companion.